My Life-changing Leftovers Tip + Sweet Corn Pizza with Chorizo

July-2017-Bham-Mag-Corn-031

It’s July, and I KNOW you have some leftover produce hanging around in your fridge that you don’t know what to do with.

Maybe it’s not even the whole vegetables! Maybe it’s the garlic skins you rubbed off while you were prepping that stir fry on Monday, or the onion skins that were peeled away for that summer tomato pie on Thursday. What do you do with those leftovers?

You BRING THE **FUN** BACK TO THOSE VEGGIES, that’s what!  If it’s good enough for Justin Timberlake, then I think it’s great for us. This week I will share with you, my amazing readers, the #1 use-up-your-leftovers tip I EVER learned. As in, your life may not ever be the same and you will most likely feel about as accomplished as Alice Waters from here on out.

The broth bag!! I know, genius right? I first heard about this technique while listening to (hearts) Lynn Rosetto Casper on the Splendid Table, interviewing a brilliant 90-year old woman whose claim to life-long health revolved around bone broth. And her key to great bone broth was not letting all of your leftover veggie scraps go to waste, but instead stockpiling them in a freezer bag.

Food people are the BEST people.

July-2017-Bham-Mag-Corn-045

But I also know that you have more than your leftover veggie scraps lying around- you probably also have TWO more things I normally cram into my refrigerator:

Hummus– Hummus is not only an amazing snack, but there are some super cool things you can do with it outside of pita chip dipping’! Hummus chicken, pasta sauce, VEGAN QUESO *all the hearts**

Leftover pickle juice– There are a myriad of things you can do with leftover pickle juice. From adding it to potato salad and marinating meats to simply throwing your leftover veggies straight into the brine to make your own version of pickles, get creative! This list of the 15 Ways To Use Leftover Pickles by Bon Appetit is super-inspiring.

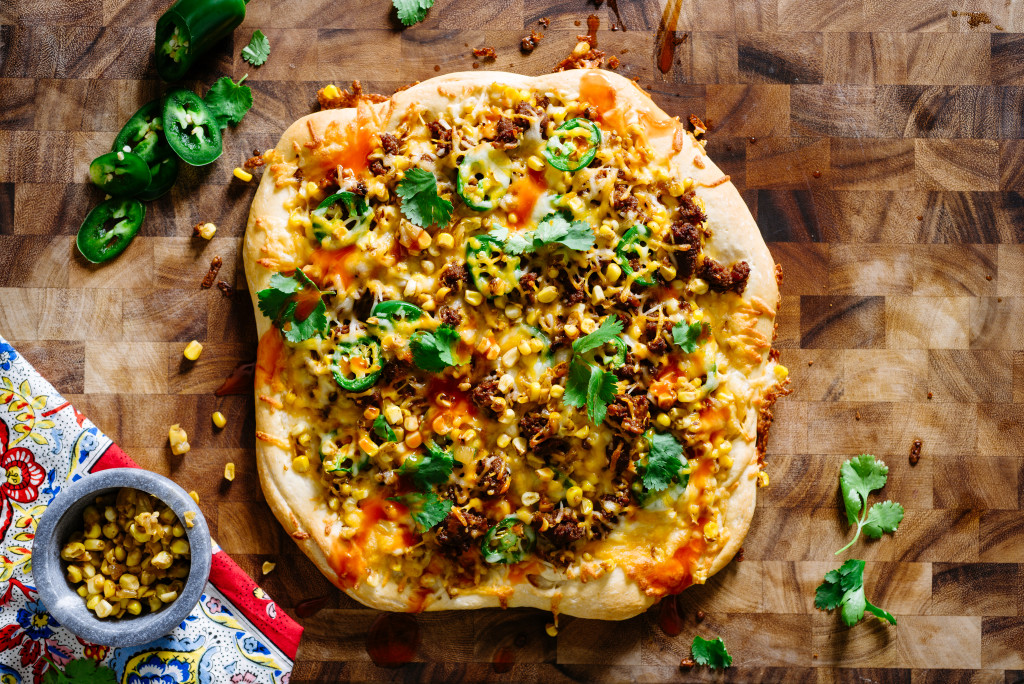
And of course, since this month’s focus is corn, so I’m pumped to share this awesome spicy corn and chorizo pizza we shot for Birmingham magazine. Pizza is a PERFECT vehicle for leftover summer produce!

So this weekend, let’s relax, make an easy bowl of hummus pasta, and throw whatever leftover veggies you have in pickle juice or the broth bag. Like 90-year-old Louise Hay says in her book Loving Yourself to Great Health, “Your body will love you for continuing to nourish it in this manner!”

July-2017-Bham-Mag-Corn-043

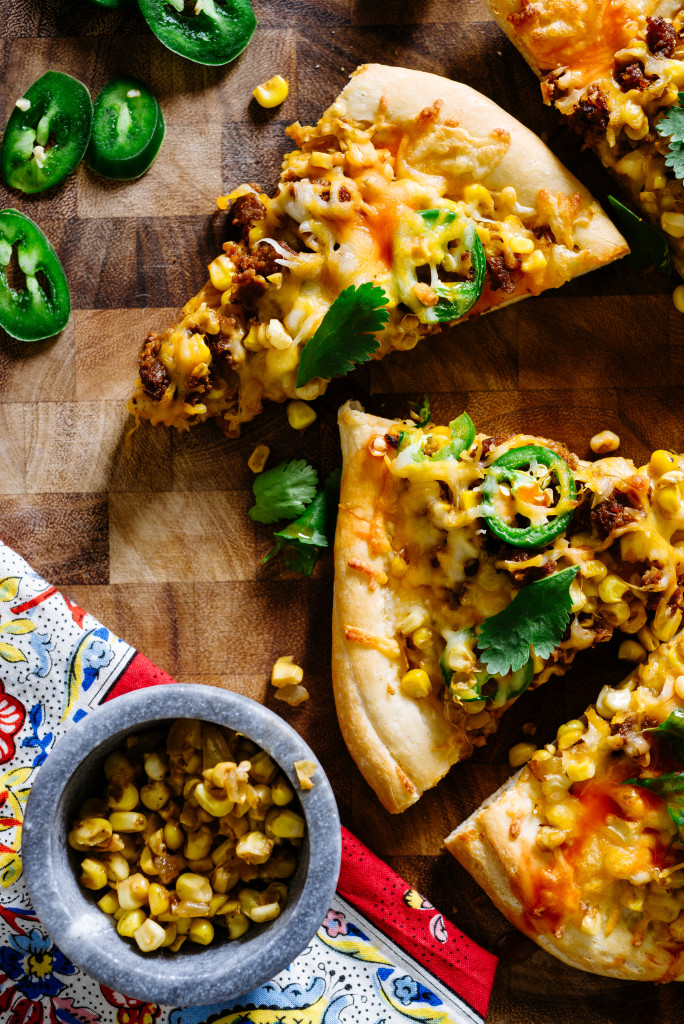
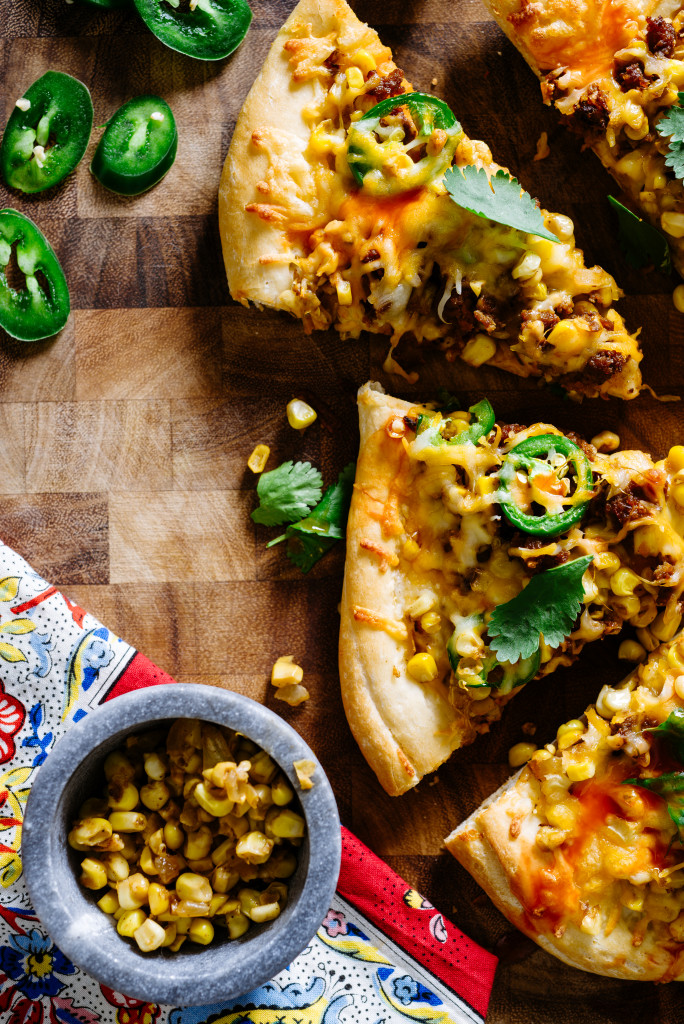
Sweet Corn Pizza with Monterey Jack and Chorizo

This corn pizza is perfect- and easy enough- for summertime!  Just grab some fresh summer corn, spicy chorizo, and melty cheese and you are ready to create a hearty appetizer or fun main course. Try substituting the chorizo for ground beef or turkey with taco seasoning if good quality chorizo is hard to come by. 

What You Will Need:

Yield: 1 pizza

  • 1 pound ground chorizo
  • 4 fresh ears sweet corn, shucked and kernels removed for cooking
  • 1/2 cup diced Vidalia onion
  • 1 teaspoon ground cumin
  • 1/2 teaspoon taco seasoning
  • 1 (13.9-ounce) can pizza crust
  • 1 jalapeno, sliced
  • 4 ounces Mexican blend shredded cheese
  • Fresh cilantro leaves, for serving
  • Hot sauce, for serving

What You Will Do

  1. Preheat oven to 400 degrees.
  2. In a medium saute pan, cook chorizo over medium heat, breaking up large pieces with a spoon. Once cooked through, remove to plate.
  3. Add corn kernels, onion, cumin, and taco seasoning to pan. Continue cooking and stirring occasionally until onion softens and corn is crisp tender, about five minutes.
  4. Remove corn mixture from heat.
  5. Cover a large surface with parchment paper. On it, roll out pizza dough into a large circle.
  6. Move dough to parchment-lined baking sheet and bake for 8 minutes.
  7. Remove crust from oven, then top with cooked chorizo, corn/onion mixture, cheese, and sliced jalapenos.
  8. Return to oven and bake until cheese is melted and crust is crispy, about 10 minutes more.
  9. Top with cilantro leaves and serve immediately with hot sauce.

How to use leftover PRODUCE + Summer Corn Succotash!

July-2017-Bham-Mag-Corn-069

Hey WOW it’s July and WOH there is some heat happening in Tennessee!

I liken going outside to feeling like your tonsils are being strangled by a hot sauna while someone sets a steamy, hot cast iron skillet above your face.

It’s weird; but growing up in the South, oddly familiar.

July-2017-Bham-Mag-Corn-084

And of course, I am doing all I can to stay inside near an air conditioner for the better three fourths of the day. I find that a run with our dog Bigsby in the morning also fulfills about 200% of my outdoor quotient for the week.

And because of my avoidance of anything outdoorsy until September, this also means that a lot of the recipes I’m cooking these days revolve around the things I have scrounged around from food shoots or indoor trips to the grocery store.

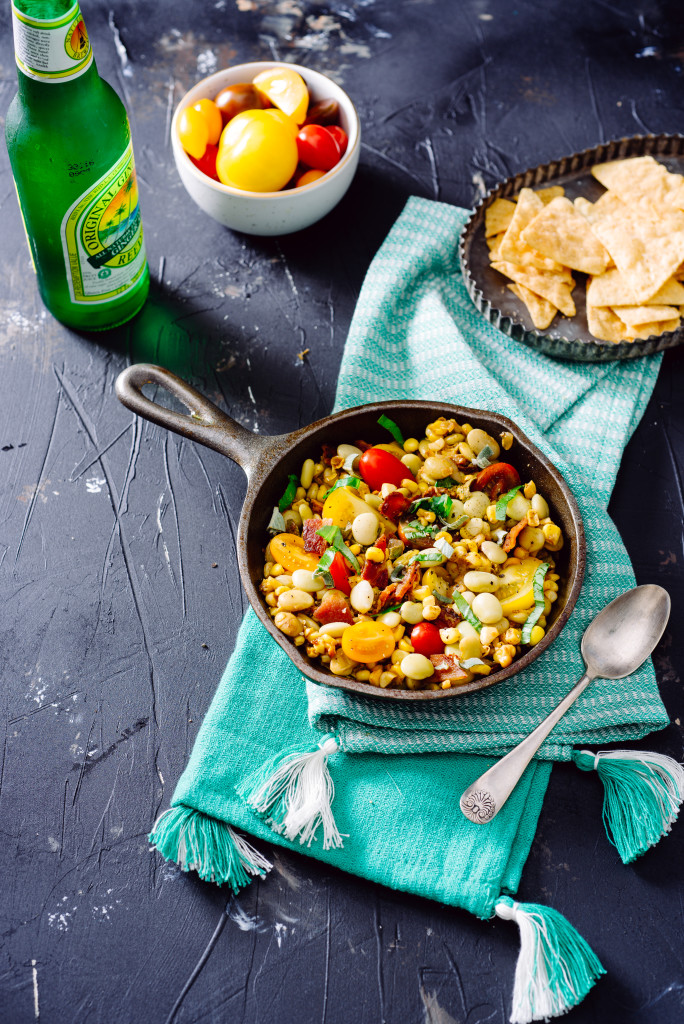
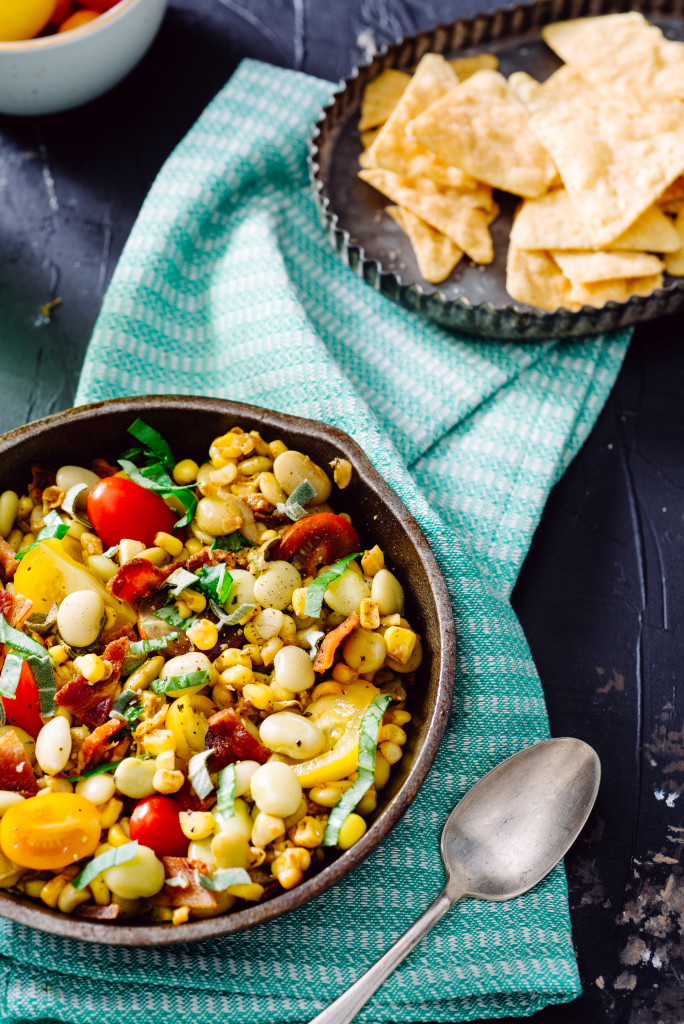
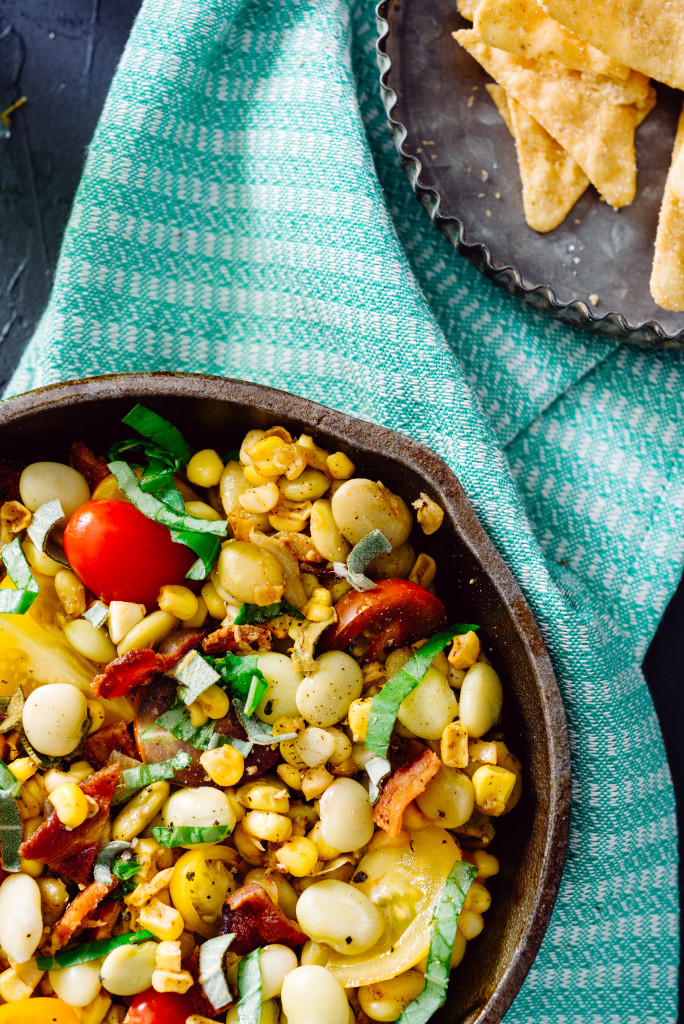
Like this delicious succotash Jake and I shot for Birmingham magazine this month. I am a complete sucker for corn and bacon, and this sweet corn version with bacon and sage is soooo good. As in, my mouth is watering thinking about it. Plus, you don’t even have to go outside to cook it! No grills! Just an indoor heat source and cast iron skillet to fry bacon is all you need.

And speaking of leftovers, this week’s video is ALL about what to do with leftover produce. As in, avocados, brown bananas, and sweet potatoes! PRAISE for getting creative and bringing FUN back to your leftoverzzzz (with a Z of course).


And as promised, the links I mentioned above for some creative leftover inspiration:

Frozen avocados: Just blend the avocado fruit with a bit of lemon in a food processor. Pour into ice cube trays and freeze! Can be thawed to use in salad dressing, guacamole, and smoothies! Just don’t eat by itself- it will be watery and not taste the same!

Banana recipes:

Cookies: Banana Chocolate Chip

Pancakes: Healthy Banana Pancakes

Muffins: Whole Wheat Banana Muffins

Banana/Quick breads: Coffee Cake Banana Bread and Strawberry Banana Bread 

Banana “Fro yo”: Peanut Butter Frozen Yogurt

Sweet Potatoes: Stuff them! Bake them whole, doused in olive oil with a bit of sea salt and wrapped in aluminum foil, in a 450 oven for about 45 minutes to an hour, depending on the size of your tater. Let cool for 15 minutes; slice open, and fill with: turkey pepperoni, cheese, marinara sauce, basil; or black beans, ground turkey, cheddar cheese, and salsa. Combos are endless! Put back in oven on baking sheet to melt cheese if desired.

Sweet potato baked goods: Cinful Sweet Potato Cookies and Healthy Sweet Potato Breakfast Brownies

And this week’s corn recipe! Which you can also find here!

July-2017-Bham-Mag-Corn-085

Fresh Corn, Bacon and Sage Succotash

This easy breezy summer side is perfect for a hot day because you don’t have to go outside to cook ANYTHING and it’s just as tasty indoors with a glass of cold, cold iced tea. Serve with tortilla chips if you like:) 

What You Will Need

  • 3 slices center-cut bacon
  • 1 tsp olive oil
  • 1/2 cup sweet Vidalia onion, diced
  • 2 cloves garlic, sliced
  • 1 tsp chili powder
  • 1/2 tsp plus ¼ tsp salt
  • 1/4 tsp pepper
  • 4 ears fresh corn, shucked and kernels removed for cooking
  • 1 15.25 ounce can lima beans, rinsed and drained
  • 1 tablespoon chopped fresh sage
  • 1 tablespoon chopped fresh basil
  • 1 pint organic heirloom cherry tomatoes, halved

What You Will Do

  1. Cook three pieces bacon in a cast iron skillet on medium low heat until done and crispy; remove and drain on paper towels. Drain all but 1 tablespoon grease.
  2. Add olive oil, sweet onion, garlic, chili powder, ½ teaspoon salt and ¼ teaspoon pepper; heat until onion is softened, three minutes.
  3. Add corn and lima beans and cook 6 to 11 minutes on medium low heat, depending on how crunchy you like your corn. It should be crisp-tender and cooked through.
  4. Allow corn mixture to cool. Chop bacon.
  5. Stir in chopped bacon, sage, basil, ¼ tsp salt, and cherry tomatoes to corn mixture. Taste; season with more salt and pepper if desired.
  6. Serve succotash immediately or store in the refrigerator.


Fourth of July Fried Avocado Tacos with Red Jalapeno Slaw

Avocado Taco Resize

Fourth of July: one of the best food holidays of the year. A time where we get to celebrate not only the beauty of our country, but the beauty of the food it produces (#california). I consider it one of the best times of the year to celebrate our beloved avocado in all it’s forms.

Like, serving your friends guacamole with pimento and queso fresco to dip salty tortilla chips into. Or chocolate avocado cupcakes with chocolate peanut avocado “buttercream” for dessert. But this week’s recipe is, to me, the ultimate way to enjoy a fresh avocado: fried.

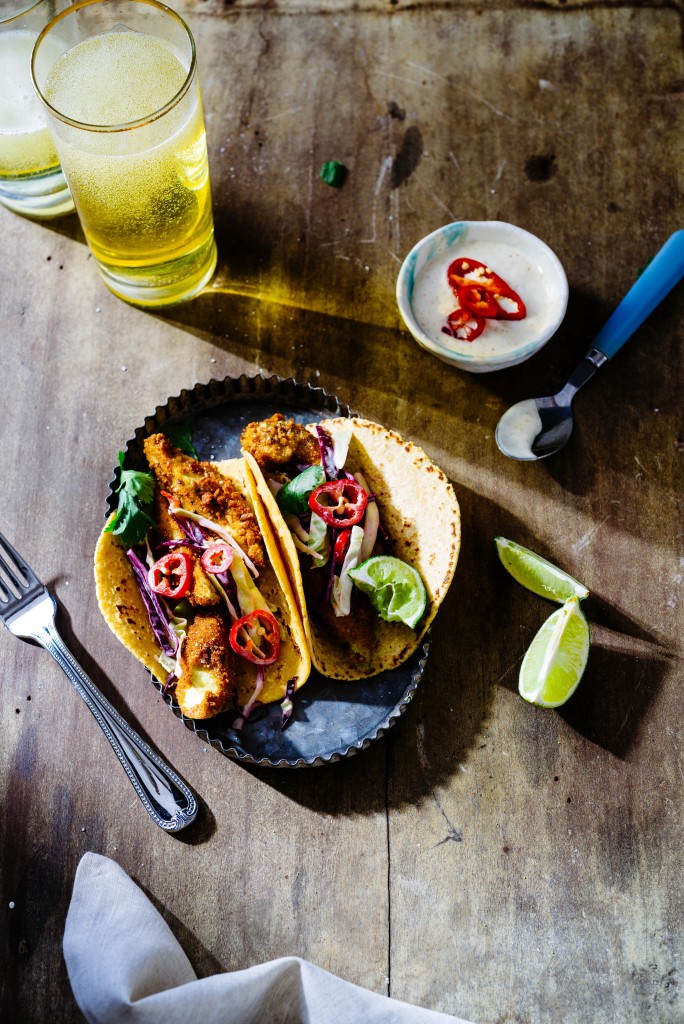
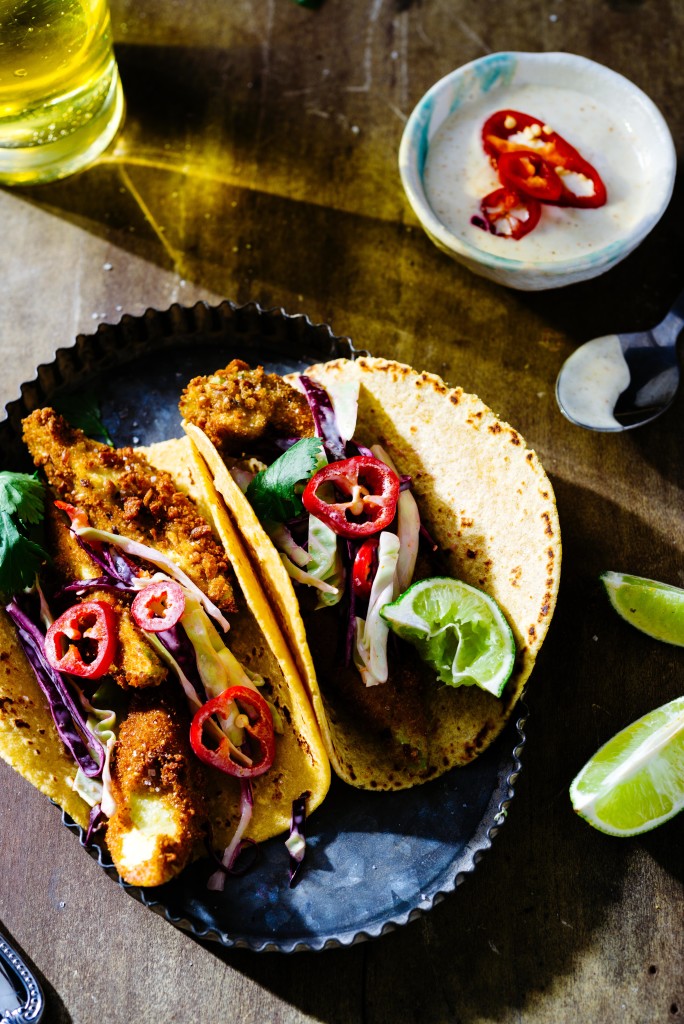
Overhead of fried avocado tacos with red cabbage slaw and sliced red jalapenos in metal tray with lime wedges, creamy sauce and beer on wooden surface.

And, I must give credit where credit is due- to our very own Mas Tacos in Nashville, who serves as the original inspiration for this recipe with their fried avocado tacos. Biting into the crispy, salty breading as your teeth sink into the soft, creamy avocado center is the height of deliciousness (well, next to their fried tilapia or chicken skillet tacos), as is really everything on the Mas Tacos menu.

But back to you, and me, and frying avocados. The primary method in cooking these avocado pieces well involves organization, moving quickly, and taking care to use ripe avocados.  Too soft, and your avocados will fall apart a bit as they fry. Too firm, and you don’t want to eat them. How do you ensure their ripeness? Use your thumb and forefinger to gently squeeze the top and bottom of the avocado at the stem. If it gives in to gentle pressure, it should be good to go. Squeezing the outer flesh of the fruit isn’t a good indicator- sometimes the inside is bruised and may give a false sense of ripeness.

AND for more tips on keeping your sliced avocado fruit fresh, check out this video!

In review of these video and blog post tips:

To keep your slices fresh:

  1. Dunk whole avocado halves in lemon water (a few tablespoons lemon juice stirred into a bowl of water).
  2. Use Fruit Fresh (a fruit preservative you can find in the canning section of grocery stores).
  3. Use a vacuum sealer!! I don’t personally own one of these but I think they are super awesome.

To fry these tacos with ease:

  1. Be organized. Assemble all of your ingredients ahead of time, and make sure your breading bowls are ready to go once the oil is heated.
  2. Move quickly. Watch the avocado slices as they fry; too long, and they will turn an unappealing dark, dark brown. Once they look golden and crisp, flip those slices!
  3. Choose ripe avocados. Take some extra time to make sure your avocados are just right to fry (See tips above)!

Alright my loves!! Here’s to a Fourth of July weekend full of yummy food, fabulous friends, and feeding the ones you love.

Overhead of fried avocado tacos with red cabbage slaw and sliced red jalapenos in metal tray with lime wedges and beer on wooden surface.

Fried Avocado Tacos with Red Jalapeno Slaw (You can also check out the full post for Birmingham magazine here)

These easy summer tacos are a perfect way to highlight avocado’s creamy richness. You can even fry the avocado pieces ahead of time and gently warm in the oven at about 250 degrees before serving guests. 

What You Will Need

  • 3 ripe avocados, sliced
  • 1 egg
  • ¼ cup unsweetened almond milk
  • ½ cup whole wheat flour
  • 1 teaspoon cumin
  • ½ teaspoon chili powder
  • ½ teaspoon paprika
  • ½ teaspoon coarse kosher salt
  • 1 cup whole grain, seeded bread crumbs, coarsely ground
  • 4 cups canola oil
  • 8 corn or flour tortillas, warmed
  • Red jalapeno slaw, for topping
  • Cilantro leaves, for topping

What You Will Do

  1. Pour oil into large Dutch oven. Line a large plate with paper towels. Heat oil on medium until oil temperature reaches 350 degrees.
  2. While the oil is heating, whisk egg and almond milk together and place in a shallow bowl.
  3. Whisk flour, cumin, chili powder, paprika and coarse kosher salt and place in shallow bowl.
  4. Pour breadcrumbs into another bowl.
  5. Dip avocado slices, working in batches of two to three slices at a time, first in the flour mixture, then egg/milk mixture, then bread crumbs.
  6. Carefully lower breaded slices into hot oil, and fry for about one minute, or until sides are nice and golden brown.
  7. Set to drain on paper towel lined plate and top with additional salt to taste. Serve in warmed corn tortillas topped with red jalapeno slaw.

Red Jalapeno Slaw

This slaw is as simple as slicing up some cabbage then whipping together a quick dressing. Save half of the dressing as dip for the tacos!

What You Will Need

  • ¼ cup olive oil mayonnaise
  • 1 teaspoon lime juice
  • 1 teaspoon cumin together
  • ¼ teaspoon agave
  • 1 cup green cabbage, shredded
  • 1 cup purple cabbage, shredded
  • 2 red jalapenos, sliced

What You Will Do

  1. Combine mayonnaise, lime juice, cumin, and agave.
  2. Toss half of dressing with cabbage and sliced jalapenos; use other half as a dip for tacos.


Luv Cooks Fourth of July FAVES!

Hi lovely Luv Cooks foodies!

In honor of this very special holiday weekend, where we get to celebrate the beauty and freedom of America, and American cuisine, I wanted to give you guys a special round-up of all of the recipes that are SURE to bring a smile to the ones you love this Fourth of July.

This post is all about my favorite summertime recipes that not only taste delicious, but are a great way to bring some fun and love to those outdoor BBQ’s.

Without further ado…

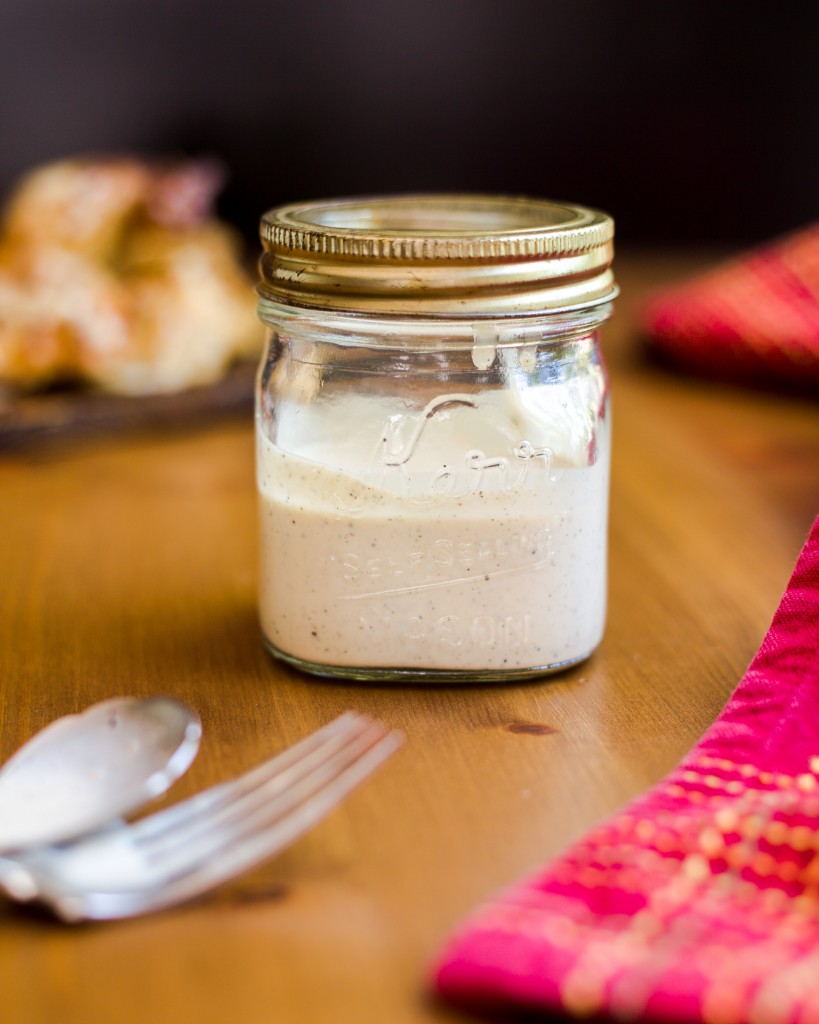
White BBQ Sauce

White BBQ Sauce This recipe, adapted from Southern Living’s version, is a huge crowd pleaser! Use it to top smoked chicken, burgers, even stir it into coleslaw!

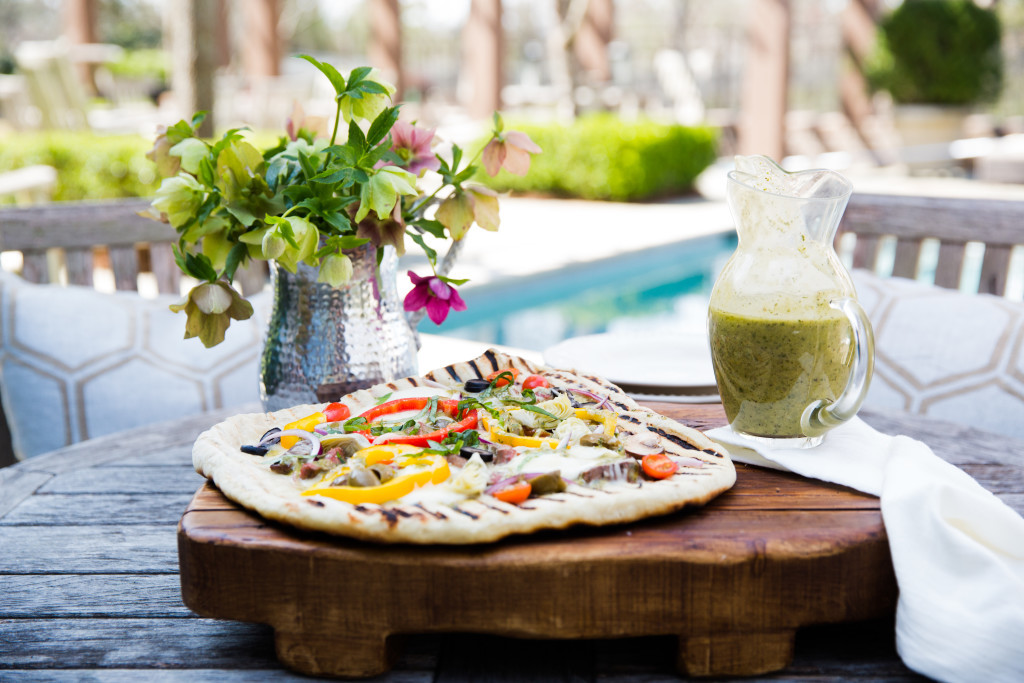
Steak Pizza!

Grilled Greek Pizza with Steak Two words: GREEK DRESSING! This post features my favorite homemade Greek dressing of all time and the fabulous The Style Gathering– plus steak tips!

Grilled Tomato Salsa

Grilled Tomato Salsa: I adore salsa, and grilling the tomatoes in this recipe gives even more depth of flavor to already fantastic Southern tomatoes.

Strawberry Lemonade

Strawberry Honey Lemonade This lemonade is one of my favorites I’ve ever made, plus it uses honey and only a bit of sugar for sweetness. And, it involves summertime strawberries- deal!

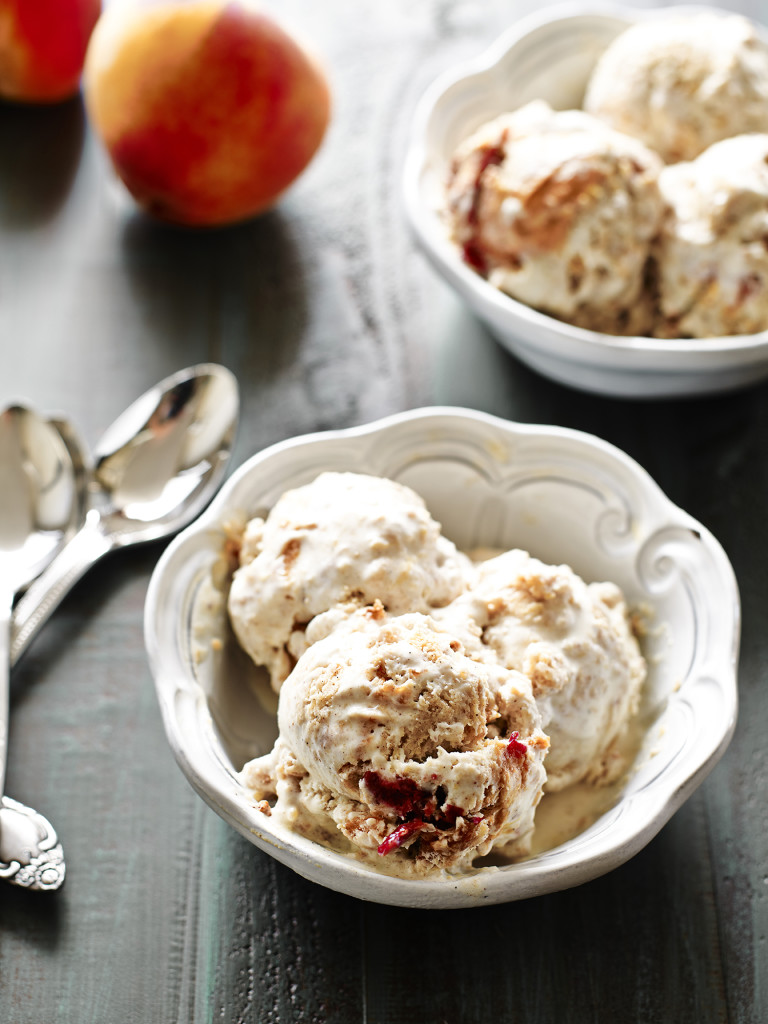
Gluten Free Peach Cobbler Ice Cream

Gluten Free Peach Cobbler Ice Cream

This recipe is soooo tasty and even uses gluten-free pie crust in the ice cream. YES!

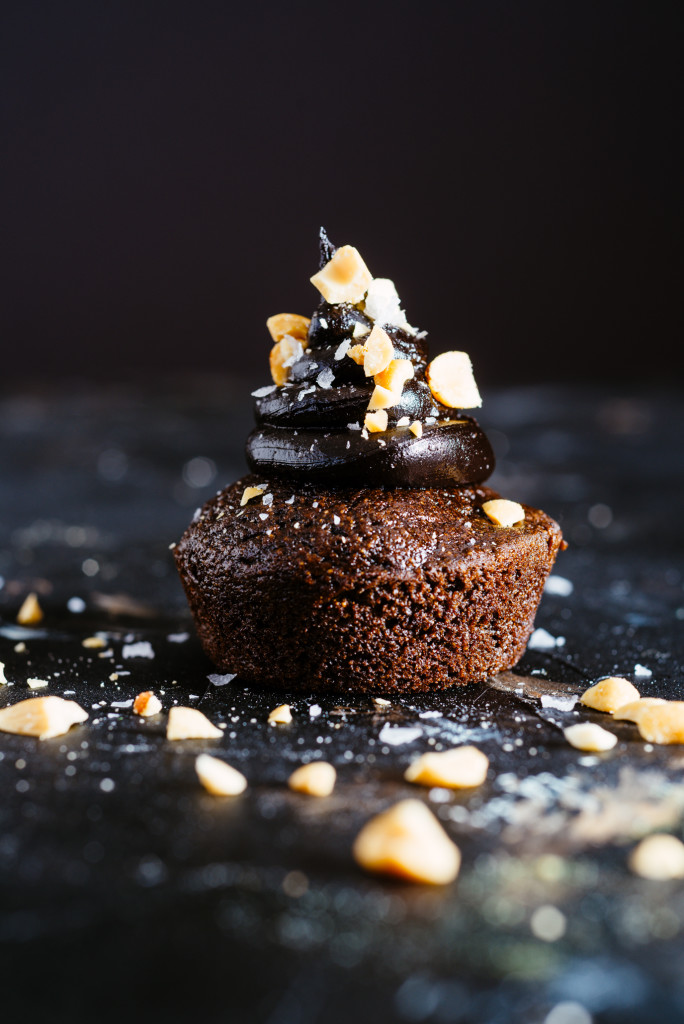
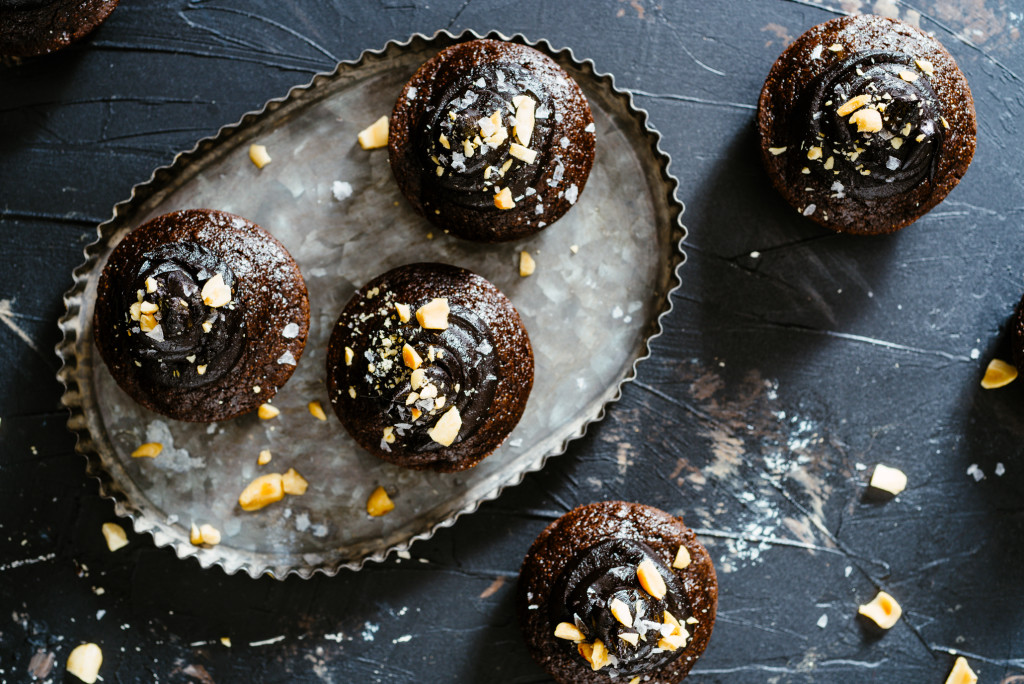
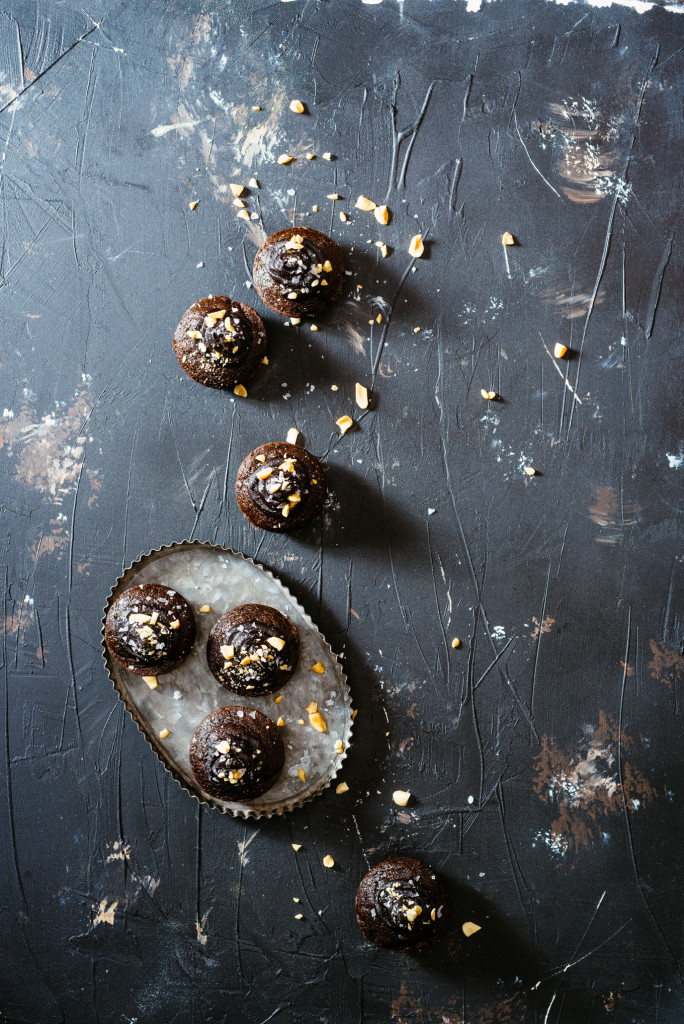
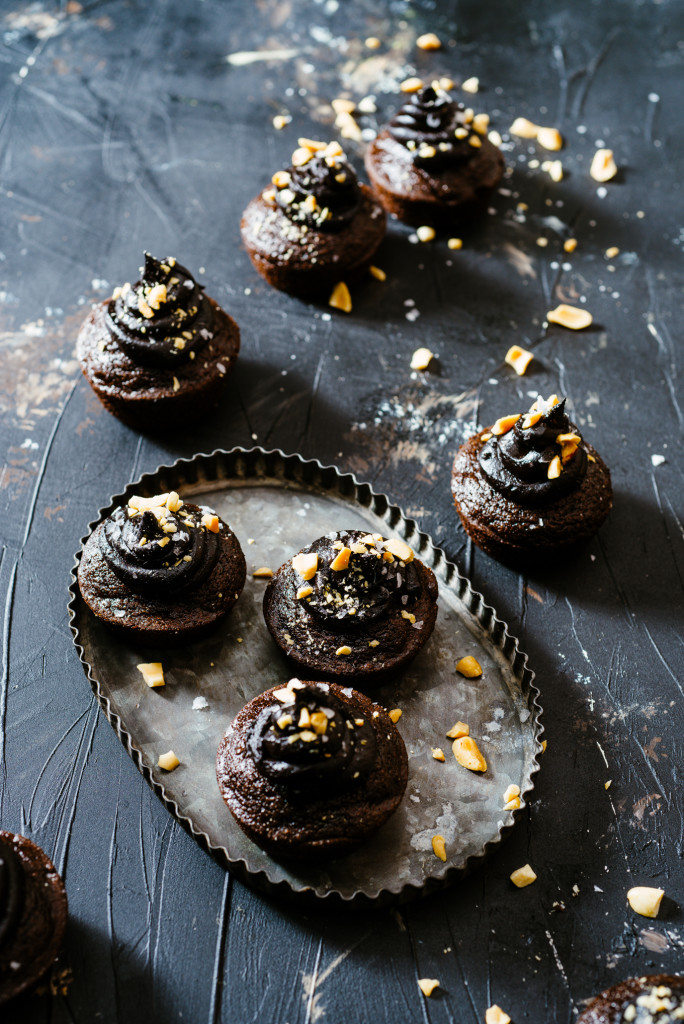
Chocolate Avocado Cupcakes with Chocolate Peanut “Buttercream”

Chocolate-Avocado-Cupcakes-with-Peanuts-023 Glory hallelujah!! It’s summertime, and all I can think about is avocados. I want avocados on my tacos, in (last week’s) guacamole, in the tacos *spoiler alert* that will appear next week.

But I never thought I would want avocados in cupcakes. That is, until I came across Laura Lea Balanced and clicked on her “Desserts” tab. OH MY GEEZZ the creativity, beauty, and ingenuity of her healthy recipes are phenomenal! Strawberry shortcakes with coconut cashew cream, blueberry lime popsicles, Samoas macaroons, and… avocado cupcakes with chocolate orange buttercream. Brilliant.

I absolutely love Laura’s creativity and how she replaces the typical white sugar and butter found in most cupcakes (and most buttercream recipes) and utilizes avocado. These cupcakes have a fudge-chocolatey texture, but lack the saccharine sweetness of a typical chocolate cake. Plus they are full of nutrients, use spelt flour, and the non-dairy buttercream is so wildly addictive that I wanted to eat it on it’s own.

Chocolate-Avocado-Cupcakes-with-Peanuts-037 This week’s recipe is my own small twist on what Laura already developed; putting dark chocolate cocoa powder in the cupcake batter, substituting honey in the buttercream instead of maple syrup (since Jake and I never seem to have that on hand) and adding PBFit powdered peanut butter, plus chopped peanuts, to the top. So, ya’ll, these cupcakes are a MUST HAVE food adventure- especially if you love avocados.

Chocolate-Avocado-Cupcakes-with-Peanuts-028 AND more avocado food styling tips!

Chocolate-Avocado-Cupcakes-with-Peanuts-038 Chocolate Avocado Cupcakes with Chocolate Peanut “Buttercream” (Recipe adapted from Laura Lea Balanced Avocado Cupcakes with Chocolate Orange Buttercream)

This recipe requires a few specific ingredients (like fresh orange juice) but it’s worth the effort! I suggest making the icing ahead of time since it needs to sit for about two hours in the fridge. Plus, if you like orange zest, make sure and check out Laura’s original recipe! 

What You Will Need:

  • cups spelt flour
  • 2 tablespoons dark chocolate cocoa powder
  • ¾ cup coconut sugar
  • ¾ teaspoon baking soda
  • 1/4 teaspoon salt
  • 1 egg, beaten
  • 1 ripe banana, roughly chopped
  • ½ large ripe avocado, mashed
  • ¼ cup coconut oil, melted
  • ¼ cup freshly-squeezed orange juice
  • ¼ cup unsweetened vanilla almond milk 
  • 1 teaspoon vanilla extract
  • Chocolate Peanut Avocado “Buttercream”
  • Salted roasted peanuts, chopped, for topping
  • Flaked sea salt, for topping

What You Will Do:

  1. Preheat your oven to 350 degrees F, and spray a muffin tin with olive oil cooking spray.
  2. In a large mixing bowl, combine flour, cocoa powder, coconut sugar, baking soda and salt.
  3. In a blender, combine egg, banana, avocado, coconut oil, orange juice, almond milk, and vanilla extract. Blend until smooth and no chunks of avocado remain (a minute or two).
  4. Add liquid ingredients to the bowl of dry ingredients and fold (or gently stir) to incorporate.
  5. Scoop about ¼ cup batter into each muffin hole and bake for about 15 minutes, or until a sharp knife inserted into them comes out with no crumbs attached.
  6. Let muffins cool completely in the pan, or after cooling for about 10 minutes, transfer them to a wire rack to cool. Once cool, ice with buttercream and top with chopped salted peanuts and flaked sea salt. Enjoy!

Chocolate Peanut Avocado “Buttercream”

What You Will Need:

  • 1 ½ ripe avocados, lightly mashed
  • 5 tablespoons honey
  • 5 tablespoons dark chocolate cocoa powder
  • 1 tablespoon PBFit (powdered peanut butter)

What You Will Do:

  1. In the bowl of a small food processor, blend avocado, honey, cocoa powder and PB fit until smooth.
  2. Spoon icing out and place into a bowl. Cover and refrigerate for at least two hours. Attempt to resist temptation to eat this once it’s cold!


Avocado Food Styling Tips + Pimento and Queso Fresco Guacamole

May-2017-Avacados-118

Guacamole, inspired by pimento cheese! Food styling tips! Let’s do this!

Summer is a perfect time for guacamole. As I dip my salty, crispy tortilla chip into the creamy fabulousness that is fresh guac, I am transported to sunny beaches, tropical beverages, and (hopefully) a summer vacation.

This week’s recipe is also inspired by pimento cheese. That’s right, as a woman who grew up in the South, there was also NO WAY you could bypass the summer season without being offered either a pimento cheese sandwich with the crusts cut off at a baby and/or wedding shower; offered pimento cheese and Premium brand saltine crackers at the beach; or eaten right out of the jar with fresh tomatoes.

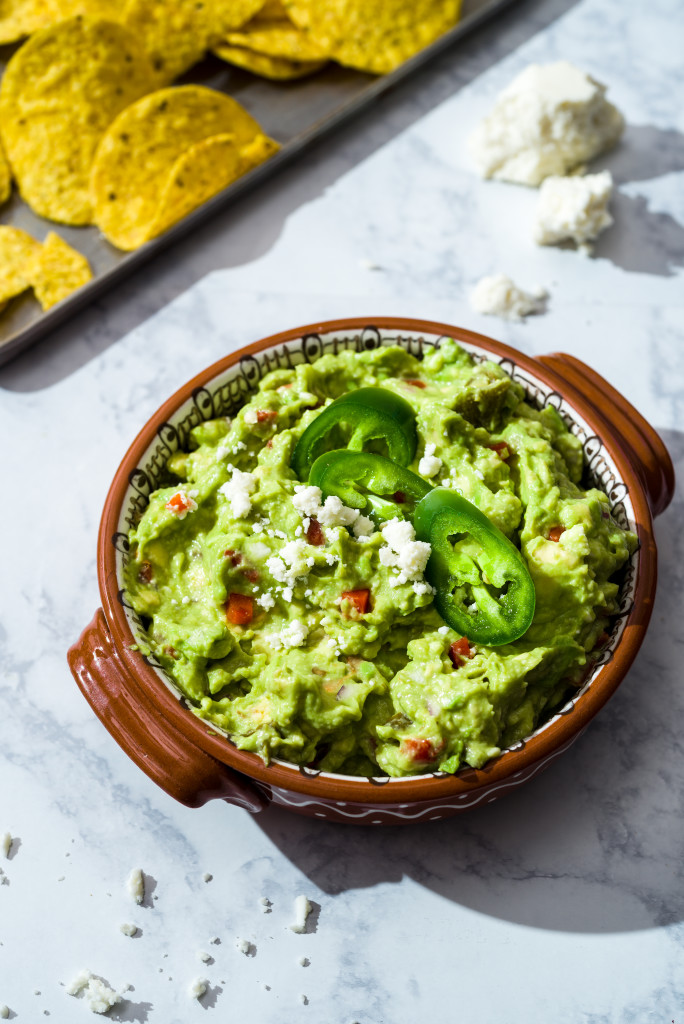
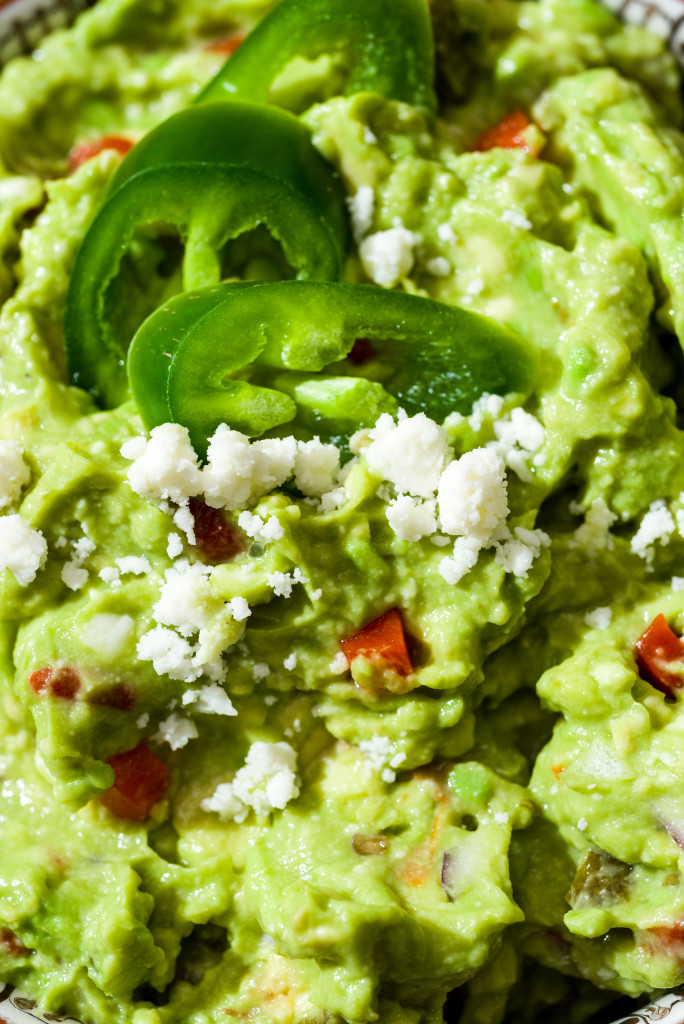
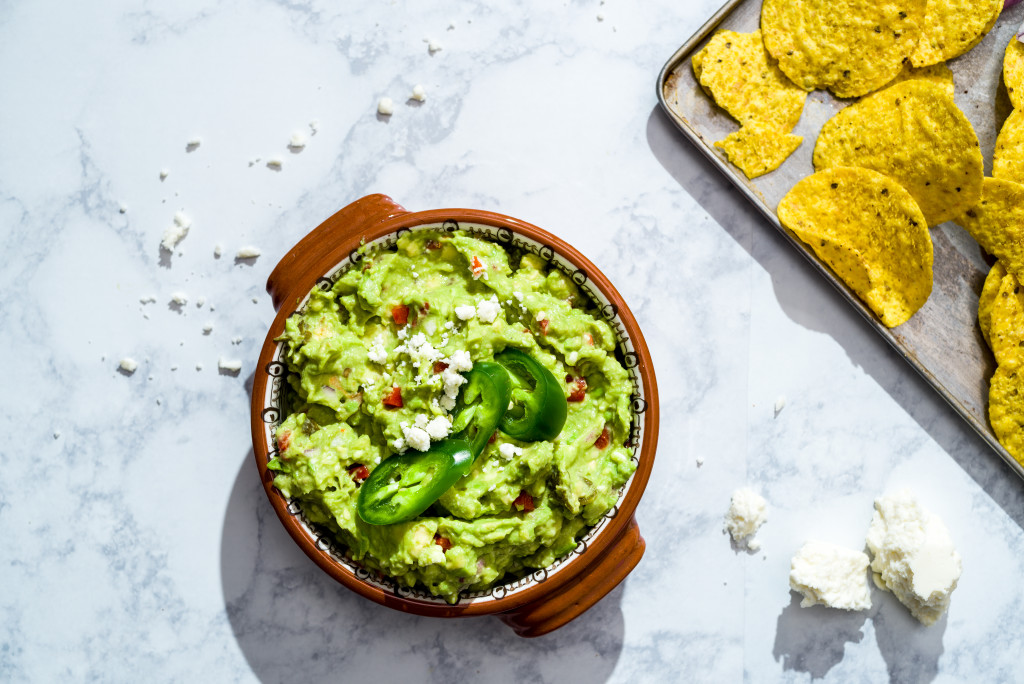
Jake and I shot this pimento and queso fresco guacamole for the May issue of Birmingham magazine, who we love. I was also super pumped to experiment with adding a Southern spin to a traditionally Mexican side dish. Plus, I’ll share with you food styling tips I’ve learned along the way, #praise!

Brown ceramic bowl of chunky guacamole with pimentos, queso fresco and sliced jalapenos on white marble surface with metal tray of tortilla chips in the background.

How to style (and use) beautiful avocados:

Avocados have a tendency to brown super easily. Whether you are styling your avocado for Instagram (or your family picnic), try rubbing the surface of the fruit (that’s right, FRUIT!) with fresh lime juice. You can also use a product called Fruit Fresh

To pick out a great avocado, don’t look at color alone. My favorite tip for finding a ripe, perfect avocado is NOT to squeeze the fruit in your hand. Simply press the top and bottom of the guacamole in between in your forefinger and thumb. If the fruit has a slight give to it, and no visible bruises or soft spots on the exterior, it’s ready to go!

Buy more than you need. Whether you are making guacamole at home or photographing avocados, it’s almost impossible to pick them perfectly every time. I usually buy double the amount of what I need, and if you don’t end up using the extra avocado that day, just dice it up and pop it in a plastic bag in the freezer! Frozen avocado is brilliant in puddings, smoothies, etc.

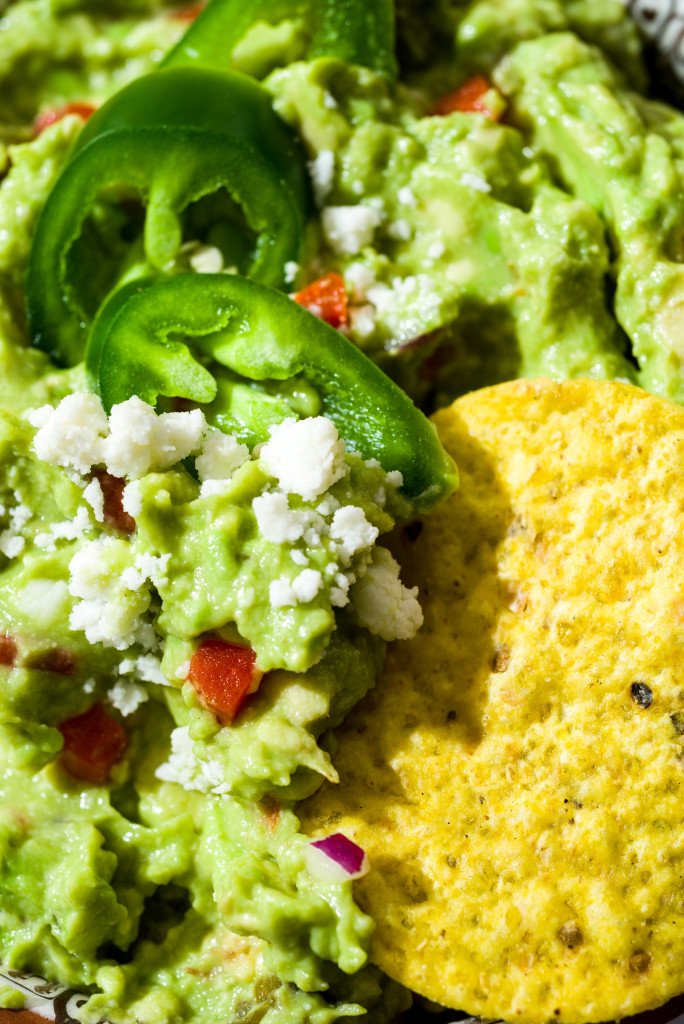
  1. Close-up of sliced jalepenos with queso freso in pimento guacamole with round yellow corn tortilla chip.Don’t slice your hand open! The best way to slice avocados involves two knives and these steps: A. Slice avocado in half using a very sharp chef’s knife. B. Gently twist avocado open. C. Strike pit with the blade of your chef’s knife (DONT USE A CERAMIC KNIFE HERE OR IT WILL SHATTER!) and, with the blade in the pit of the avocado, twist. Use a dry dish towel to remove the pit from the half. D. Use a paring knife to create even, clean slices in your pit-free halves. E. Use a large metal spoon to gently remove the avocado half from the fruit, scooping as close to the avocado flesh as possible. E. Place fruit on cutting board and fan those slices to your heart’s content! Drizzle with lime juice or Fruit Fresh to make it last and prevent browning.

And without further ado (and your newly acquired avocado SKILLZ) this week’s avocado recipe! Suggestions for serving: A refreshing tropical beverage and bright pink sunglasses in tow.

Overhead of brown ceramic bowl of chunky guacamole with pimentos, queso fresco and sliced jalapenos on white marble surface with metal tray of tortilla chips in the background.

Pimento and Queso Fresco Guacamole

This recipe is perfect for a chill summer day, and comes together easily and quickly if you have ripe avocados! The hit of roasted green chilis adds extra depth. To store your guacamole to prevent browning, simply press plastic wrap into the surface of the guacamole. Ole!

Serves 6

  • 3 ripe avocados, mashed
  • 1 tablespoon roasted green hatch chiles
  • 1/4 to 1/2 teaspoon salt
  • 1/2 lime, juiced
  • 1/4 cup red onion, minced
  • 2 tablespoons pimento, drained
  • 3 tablespoons crumbled queso fresco, plus additional for topping
  • Sliced jalapenos, for topping
  • Corn tortilla chips, for serving
  1. Stir avocado, chiles, salt, lime juice, red onion, pimento, and queso fresco together. Serve with tortilla chips and sprinkle with sliced jalapenos and crumbled queso fresco.

ALSO check out more fun avocado facts at this article I wrote for B’ham mag here!


FAB Memorial Day Breakfast Ideas + Gratitude

Raspberry Cream Cheese Sweet Rolls
The Food Charlatan’s dreamy raspberry sweet rolls with coconut cream cheese frosting.

Praise praise hallelujah for America!

With all that is taking place in our 2017 world (largely of which I don’t know about because I purposely avoid watching the news), I’ve grown increasingly more grateful for the opportunity and privilege I have to live, and be, an American. Now that my husband and I own a home and seem to be thinking more and more about the  generations after us- it’s become much more important to show gratitude to the ones we love.

It especially inspires a gratitude for the military names I don’t know. The ones who served in our military, put their own needs aside, and gave their lives- so people like me could live in freedom.

So this week, in honor of our wonderful country, and our wonderful military members and their families, let’s take this weekend to love people with some of the most tasty, patriotic Memorial Day recipes out there. Drum roll pleeeasee…

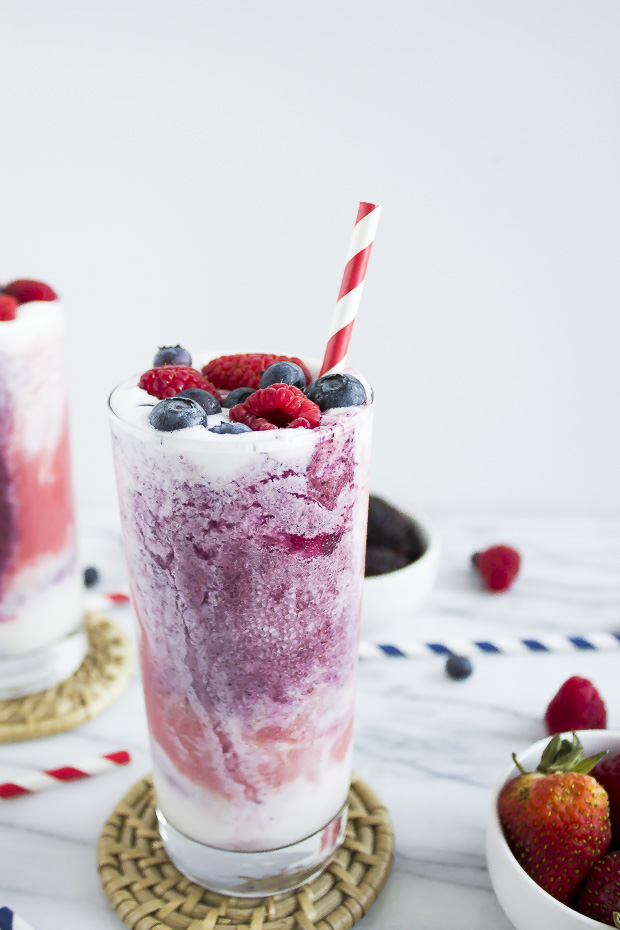
healthy-berries-cream-fruit-smoothie-02

Berries and Cream Tye Dye Fruit Smoothie– This is one of the most beautiful layered smoothie recipes I’ve ever seen. Hot Beauty Health is a fab lifestyle blog and this smoothie does not disappoint! Layers of raspberry pureed with banana, yogurt + milk, and cranberry juice +blue berries + black berries pile high in a cold glass. I wish this was in my hand now. Except I couldn’t type. But I think I could manage with one hand if I got to drink this.


Blueberry-Oatmeal-Marla-Meridith-Photography.1

Blueberry-Coconut-Oatmeal-Marla-Meridith-Photography-IMG_9912

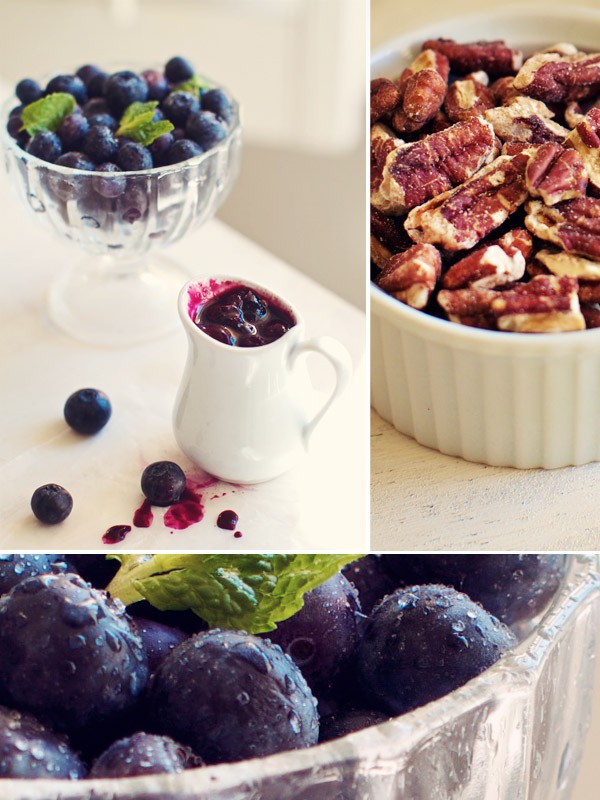
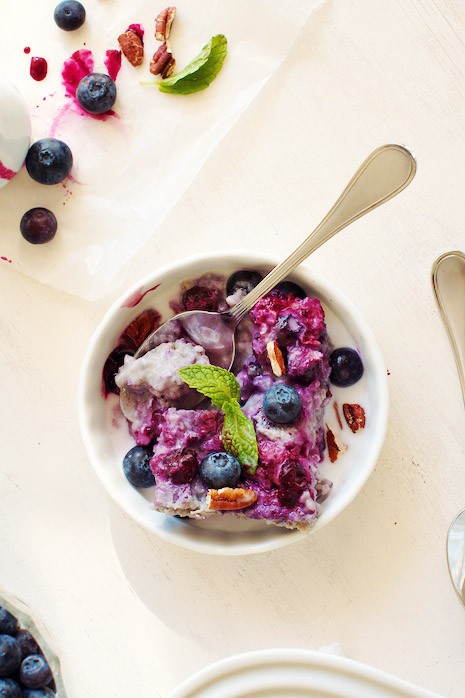
Blueberry-Coconut Baked Steel Cut Oatmeal– Helllooooo oatmeal! I am a huge steel cut oats fan, and this recipe is perfect for a long Memorial Day weekend. MarlaMeridith cooks the oatmeal in the oven ahead of time so the texture becomes even more fantastic as it sits in the fridge overnight. Plus, it’s covered with toasted pecans and extra blueberry sauce. You had me at blueberry sauce.
Sweet Rolls Take 2

Raspberry Sweet Rolls with Coconut Cream Cheese Frosting There truly are no words for The Food Charlatan’s take on a classic sweet roll. She stuffs these beautiful, homemade dough babies with a little bit of sugar and raspberries, then whips up a homemade coconut cream cheese frosting to slather on them once they are hot out of the oven. I can’t imagine a sweeter Memorial Day treat to wake up to.

Ok and of course, a few Luv Cooks favorites:

Gluten Free Mixed Berry Cobbler-196

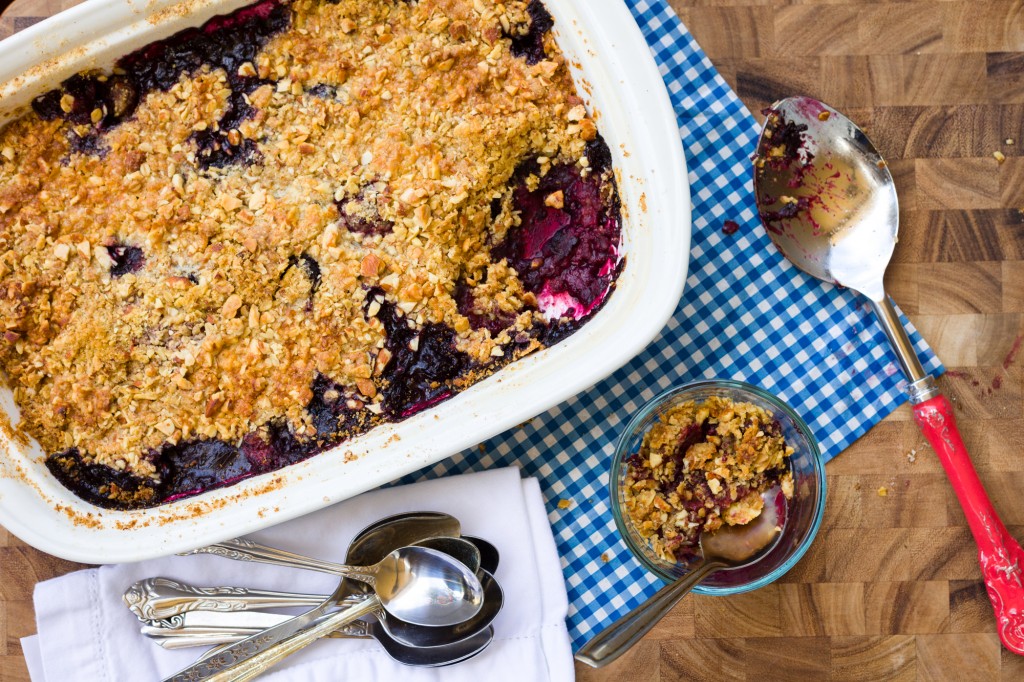
Gluten Free Mixed Berry CrumbleThis gluten-free take on a classic berry crumble would be PERFECT for a Memorial Day breakfast- or picnic! Top it with cold Greek yogurt and you have yourself a breakfast of champions.

The beautiful necklace in the center of the Chai is Jyori's- to see more like it, just visit the Sound of Hope online store.
Coconut Chai Latte Do your friends love chai tea? Then you have to try to make it homemade. This coconut chai tea latte is a fantastic way to drink chai- and continues to remind me of how much I love coconut milk.
Strawberry Frozen Yogurt

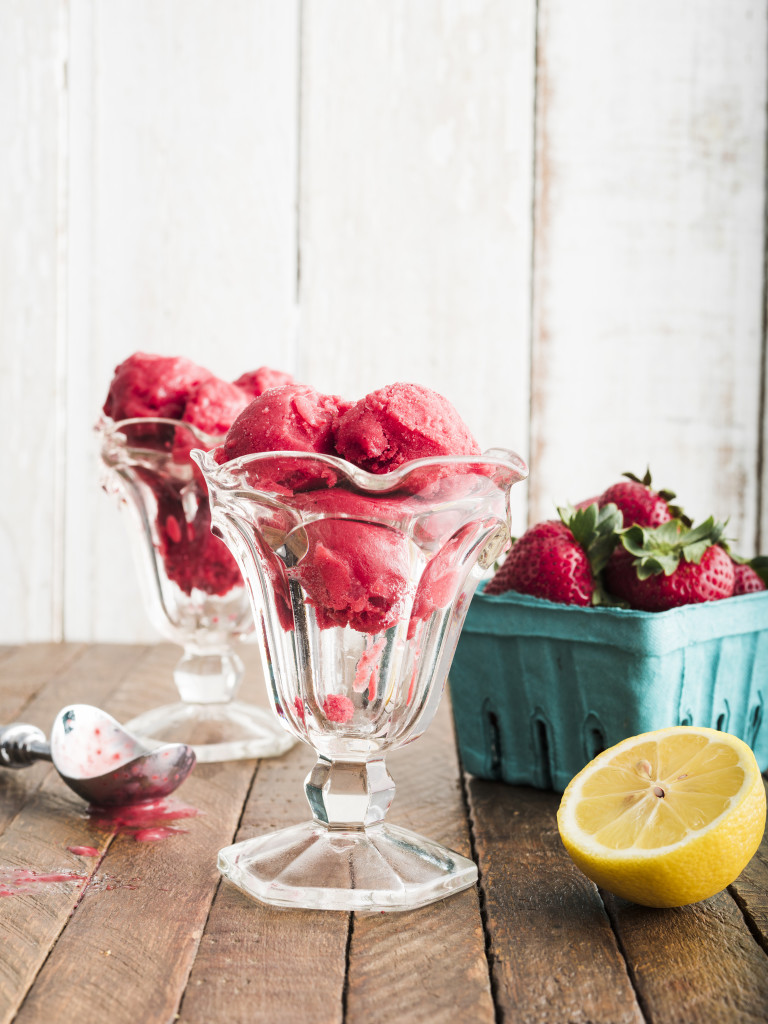
Strawberry Frozen Yogurt I am 100% for eating fro-yo for breakfast, and this incredibly easy recipe has only four ingredients. Count ’em- FOUR!

Plus, not to leave you hanging, the original instructional video!!

So grab your sparklers, tell someone you love ’em, and cook up a sweet breakfast this weekend. From my patriotic heart to yours- Luv Cooks!

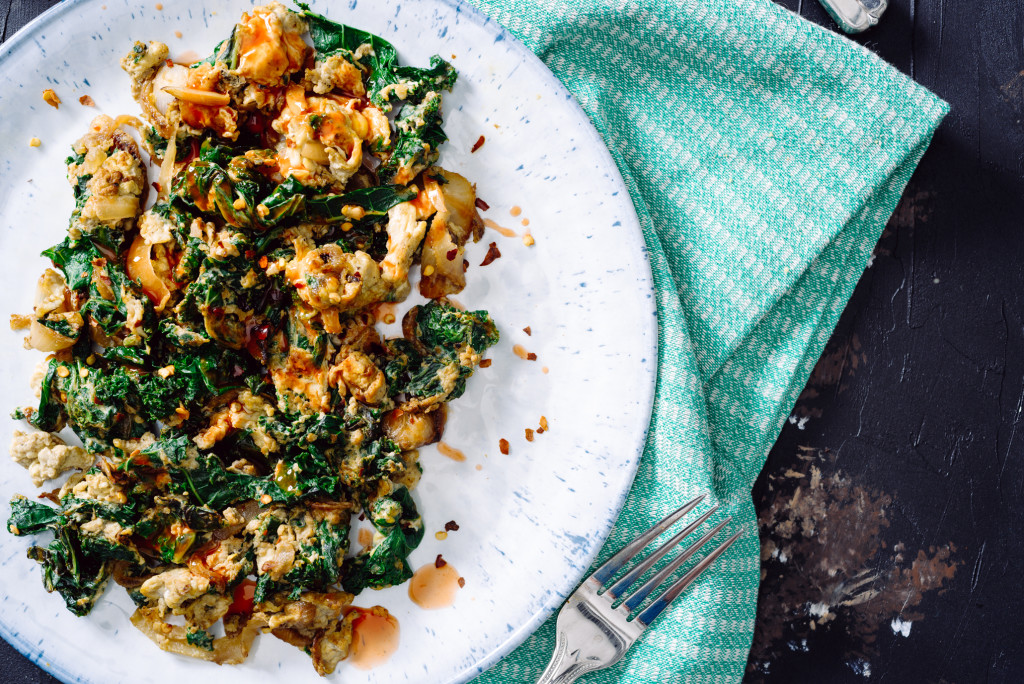
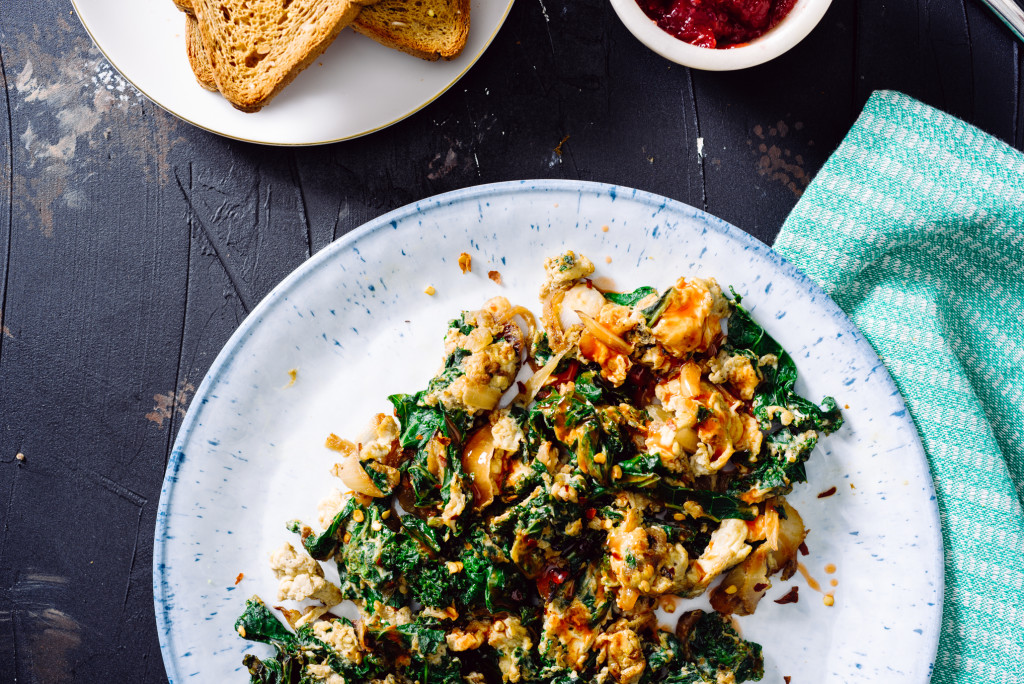
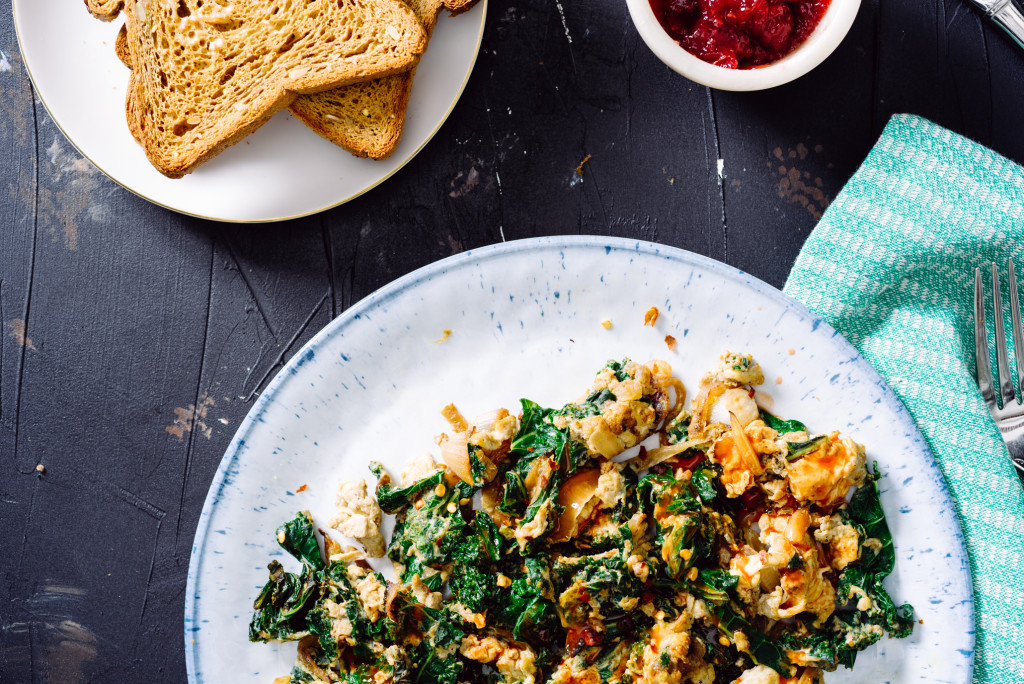
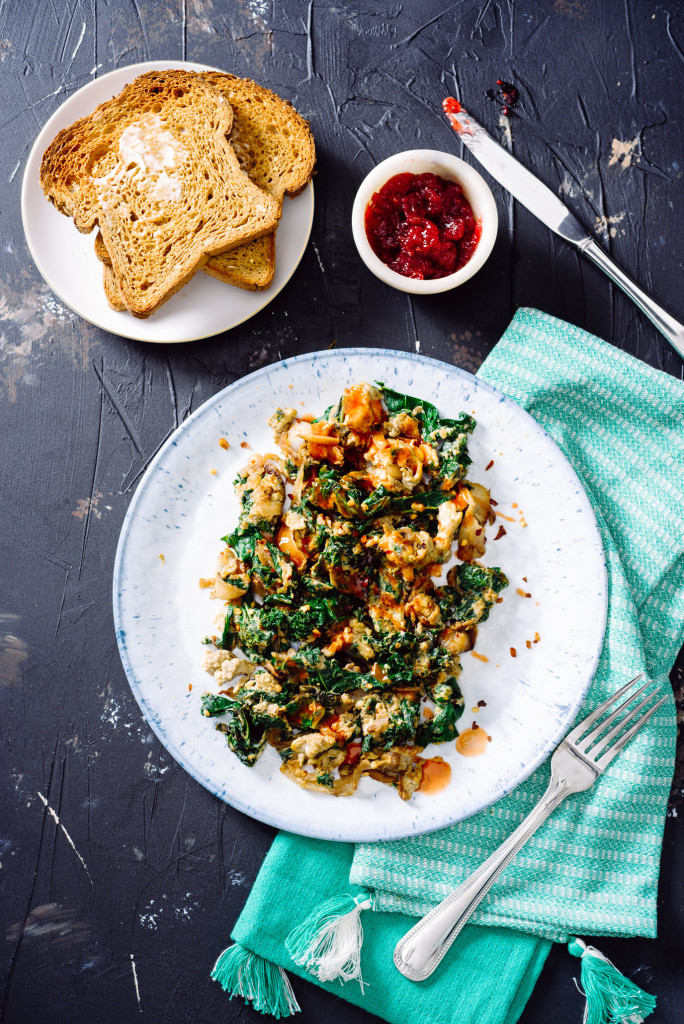
Caramelized Onion Kale Scramble

Kale-Caramelized-Onion-Egg-Scramble-007

Caramelizing onions.

File this under one of the most delicious things to do to an onion. Granted- diced onions in fresh salsa? Zesty and awesome. Sliced fresh and put on a burger? Perfect ratio of bite. But caramelized? So, so good.

This week’s recipe has rocked my world a bit because 1- I don’t like kale. Shocker, I know. I will never be that person that wears the “Kale, YEAH!” shirt, or eats kale from the salad bar at Whole Foods, or drinks a kale smoothie and LOVES IT.  Not. Gonna. Happen.

Kale-Caramelized-Onion-Egg-Scramble-013

BUT Food and Wine!! As you guys know, discovering their recipes is rocking my world, and the same thing happened recently with their sautéed kale with garlic and olive oil. This recipe is brilliantly simple- just toast garlic in olive oil, toss in chili flakes, coat kale in the oil, and cook it until it wilts. Finish it off with salt and pepper.

Something magical takes place in this recipe when the kale hits the oil- and I later learned that the reason why is because FAT UNLOCKS THE NUTRIENTS IN KALE. That’s right- some of the vitamins in kale can be hard to digest, so fat helps. This article by Time-written in the hey day of kale’s popularity in 2015- shed lots of bright light for me on why I should actually eat it. Also- one ounce of kale has MORE iron than beef. What?!

So, taking Mallory’s advice from the beginning of this month, I decided to combine the sautéed kale with caramelized onions in my own nutrient-dense powerhouse breakfast scramble.

Kale-Caramelized-Onion-Egg-Scramble-005

That’s also super delicious and I want to eat it every day.

So, roll up your sleeves, chop up some greens and get amped as you conquer this beast of a breakfast recipe AND get all your Vitamin K.

KALE, YEAH!

Kale-Caramelized-Onion-Egg-Scramble-008

Caramelized Onion Kale Scramble 

This spicy scramble is my new favorite! It combines the richness of caramelized onion with the bright bite of kale. Assemble your ingredients ahead of time to make the breakfast cooking process easy, drizzle with hot sauce, and serve with whole grain toast and jam to round out the meal. 

What You Will Need:

  • 1 tablespoon salted organic butter
  • 1 tablespoon olive oil
  • 1 bunch organic kale, rinsed, stemmed and chopped into bite size pieces
  • 1 Vidalia or sweet onion, sliced into rings, about 2 cups
  • 6 eggs, whisked
  • 1/2 tsp salt plus more for seasoning
  • 1/4 tsp pepper
  • 1/4 tsp red chili flake
  • 3 cloves garlic, sliced thinly

What You Will Do

  1. Heat butter on medium heat; add sliced onions and a pinch of salt. Stir occasionally for about 8 minutes, until onions begin to brown/caramelize.
  2. Add olive oil, garlic, salt, pepper, and red chili; stir for one-two minutes, or until garlic starts to brown.
  3. Add kale in batches, coating each batch in oil, and slowly incorporating more as the kale wilts. You should smell the red pepper at this phase!
  4. Continue to stir onions, garlic and kale; cover and cook 3 minutes more (stir about halfway through to make sure the garlic doesn’t get too brown).
  5. Add egg and stir continually until cooked through. Season with additional salt and pepper, if desired.
  6. Garnish with hot sauce or crushed red pepper; serve with toast or bagels and jam!!

PB Fit Crazy Granola + Mother’s Day Breakfast

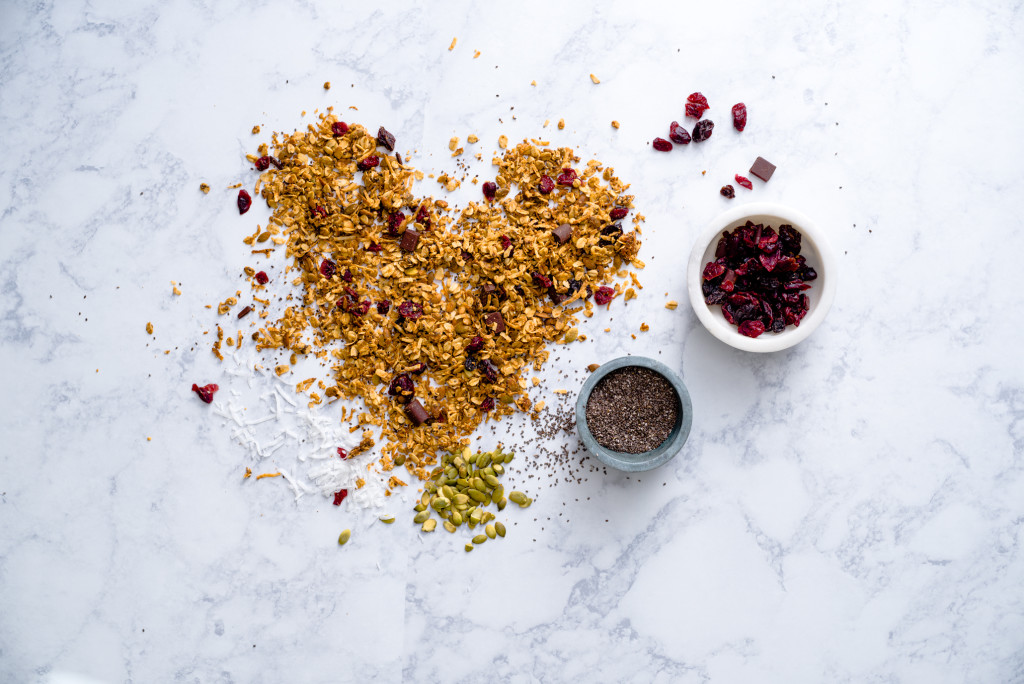
Crazy-Granola-009

Happy Mother’s Day week!

First of all- umm, how awesome are moms?

Crazy-Granola-020

I’ve been in the sweetest season this year of friends having babies- and watching those babies grow. From my best friend in Alabama’s little girl turning FOUR (oh my gosh how time flies) to my sweet girlfriends in Birmingham having little ones, to my besties in Nashville dreaming of giving birth to new life and seasons- this day feels special and celebratory.

I’ve also been thinking about how grateful I am for my own momma. I was raised by an incredibly strong, intelligent, beautiful, spiritual, courageous woman. She cares more deeply for people than anyone I’ve ever known- and I can’t count the amount of times as a nurse she put other people’s needs ahead of her own. Her life is stunningly beautiful.

Crazy-Granola-027

Crazy-Granola-025

And one of my favorite things we did for my mom as a kid was breakfast in bed. Our game plan: roll out of bed early on Mother’s Day and “cook” her waffles, toast, or bacon and eggs.

However, the reality of this situation was that my dad did most, if not all, of that cooking. BLESS HIM. And, with the most joyful suprise energy my brother, sister and I’s sleepy selves could muster, we would clammer into my parent’s bedroom with a tray full of our foodie creations- fresh flower in a vase for Mom- in hand.

From there the plan was for her to eat breakfast in bed. The reality is most likely that about 5 minutes later she was out of bed helping us put Church clothes on. :)

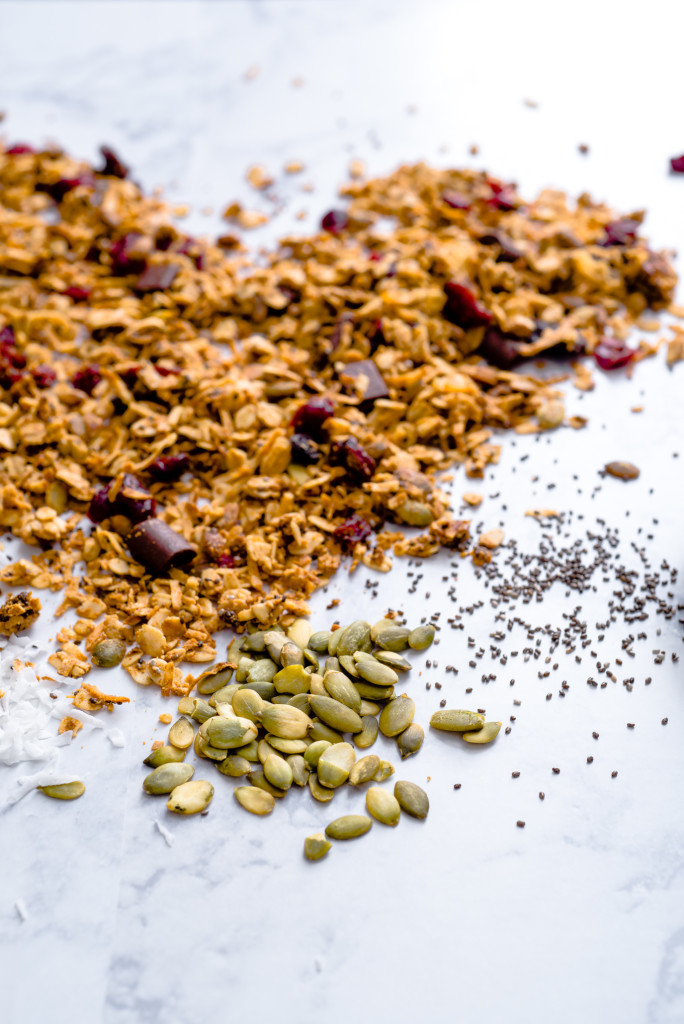
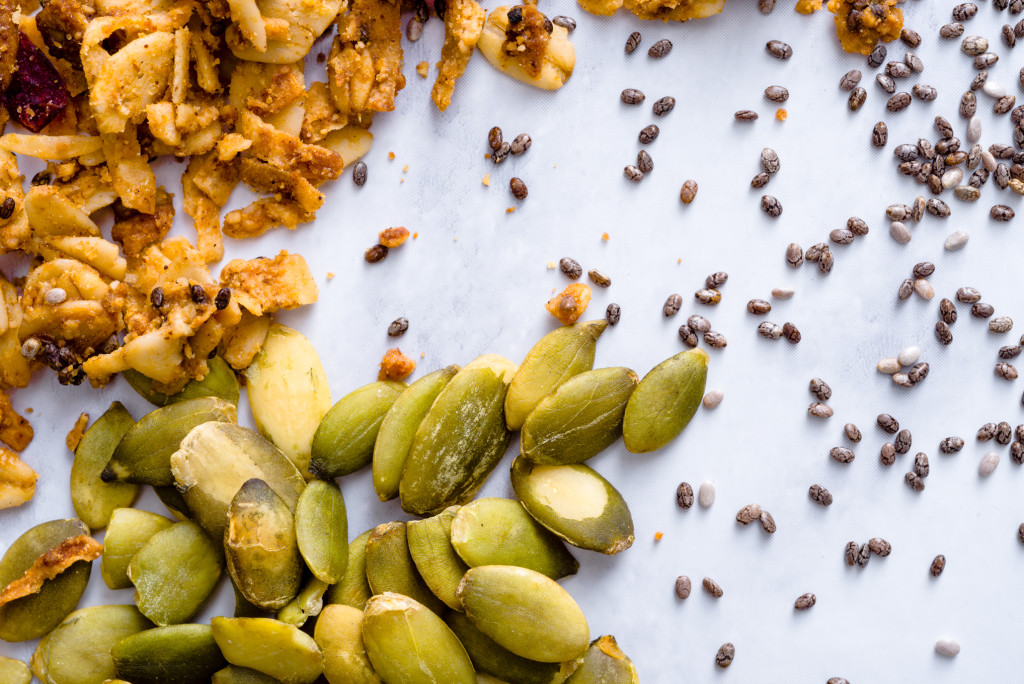
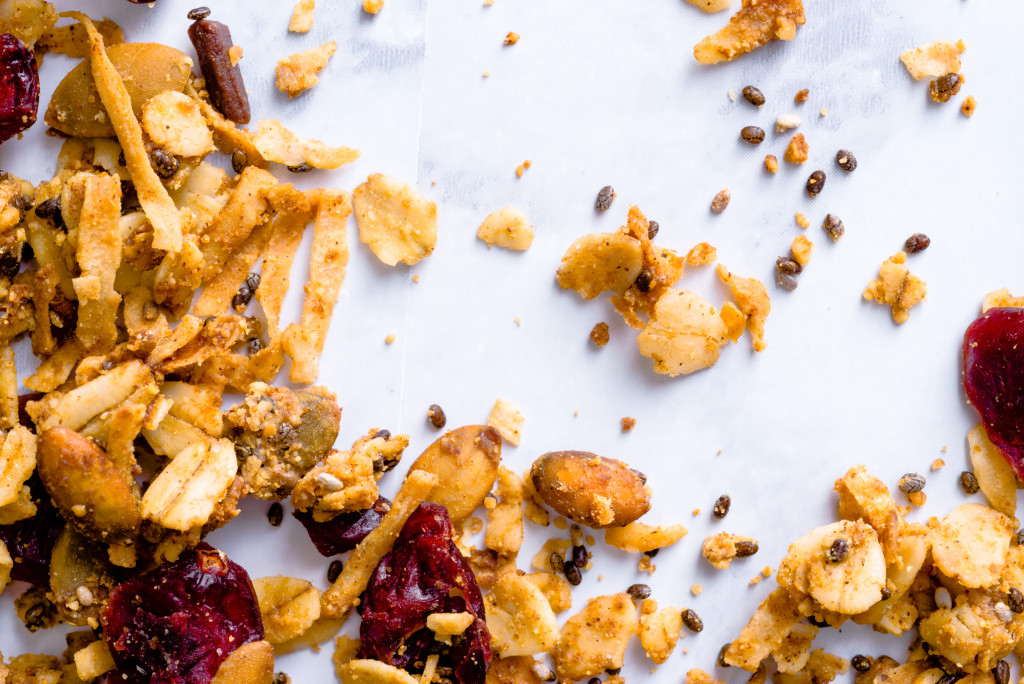
This week’s recipe is an homage to moms by helping younger ones make one of the easiest, use-what’s-left-in-your-pantry granola I’ve developed yet. It’s my way to help you prepare ahead of time to bless your momma! Inspired by Detoxinista’s pumpkin seed granola, I wanted to do a different granola than the ones I had tried in the past.  I was coming off of a series of shoots and recipe development projects that left with me with lots of healthy ingredients in my pantry. This granola turned out to be a fab way to tie them all in.

Crazy-Granola-023

Which brings me back to Mother’s Day. Y’all, here’s our chance to love people with tasty food! Make a batch of this granola for your momma- and feel free to make substitutions to match what she likes. Does your grandmother like cherries? Use those as your dried fruit. Does your mom run triathlons and love almonds? Use raw almonds instead of pumpkin seeds. The possibilities are endless.

I have a feeling that thinking about her- and bringing her breakfast- may just make all of her mornings for a long while.

Crazy-Granola-010

PB Fit Crazy Granola 

This granola makes the best of both worlds- planning ahead and utilizing what you have in your pantry. Feel free to get creative with this and substitute different nuts, spices, or dried fruit/chocolate/nuts to stir in! This granola is also sublime layered with whole milk or dairy free yogurt, or doused in cold almond milk! 

Yield: Granola for a week!

What You Will Need:

  • 1/4 cup raw pumpkin seeds
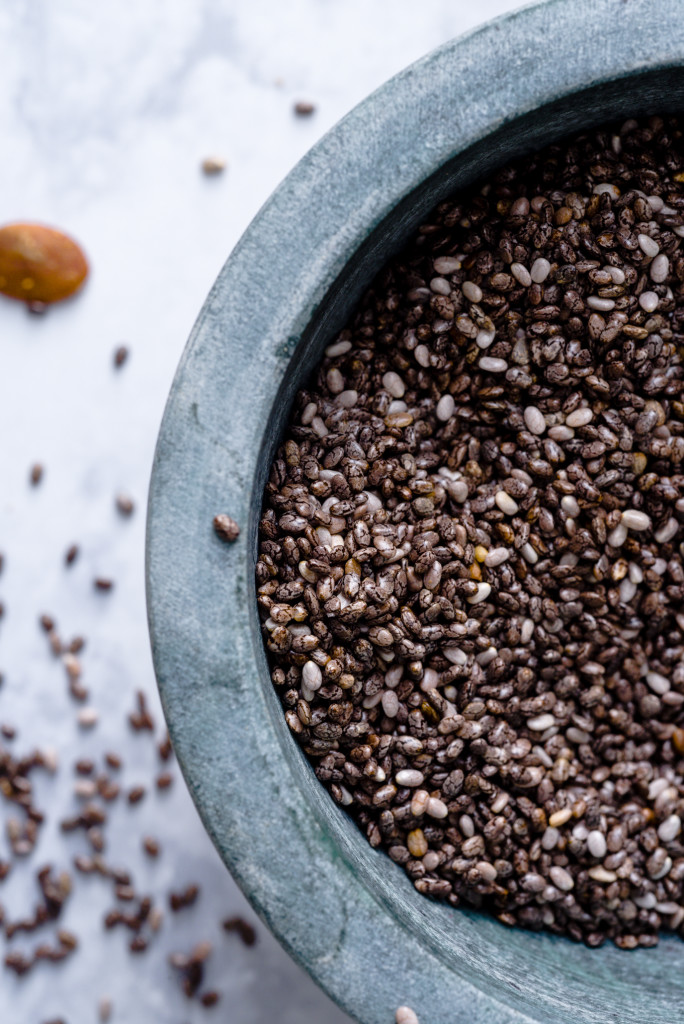
  • 2 tablespoons chia seed
  • 4 tablespoons PB Fit
  • 1 tsp cinnamon
  • 3/4 cup unsweetened shredded coconut
  • 1 cup rolled gluten-free oats
  • 3 tablespoons coconut oil, melted
  • 1 tablespoon honey
  • 3 packets stevia
  • 1/4 tsp salt
  • 1/2 cup dried fruit and dark chocolate chunks

What You Will Do:

  1. Preheat oven to 325. Line a light metal, rimmed baking sheet with parchment paper.
  2. Stir everything but dried fruit and chocolate chunks together in a large bowl with a spoon. Spread mixture into an even layer onto parchment paper.
  3. Bake granola for 10 minutes: remove from oven, stir, and bake 10 minutes more. Let cool.
  4. Once cooled, add 1/2 cup dried fruit and chocolate. Enjoy!


Golden Milk Iced Coffee + Breakfast Tips with a Health Coach

Golden-Milk-Iced-Coffee-002

BREAKFAST!!!

One of my favorite times of the day. Ever since I shouted “RISE AND SHINE!” to my college roommates as I ran out the door to hit up the cafeteria at 7 AM (yes, I was THAT person) my love for the first meal of the day runs DEEP.

Also, breakfast involves coffee, which I consider to be one of the most necessary food and/or beverage groups out there.

Golden-Milk-Iced-Coffee-018

That’s why this week I decided to combine my love of breakfast + coffee + health benefits and show you guys how to make a bang-up golden milk iced coffee that could get you going and bless yo’ brain.

Now, what is golden milk? A super delicious, coconut-based milk laced with turmeric and black pepper said to have anti inflammatory and relaxation properties. It’s wonderfully rich, a bit spicy, a bit sweet, and just right for combining with coffee. Just like with our cheesy turmeric crackers post, combining turmeric with black pepper in golden milk, is a great way to unlock curcumin- which can aid in digestion and stabilizing blood sugar.  Plus, this golden milk is simple, only slightly sweet, and made with dairy-free coconut milk. WIN!

I also realize that breakfast is WAYY more than coffee- and should be- because, after all, if you want to get that gold star MVP award at work you need to be on your game!! So I recruited my great friend Mallory Swain, of Mallory Swain Health Coaching, to hang out on my sofa and teach me her nutritious breakfast ways. Her number one tip? Make a smoothie!!

Also, you can find Mal’s first favorite smoothie recipe here. And her current fave recipe is linked on the YouTube video details!

So this weekend, sit back, relax, blend up a smoothie, check out Mallory’s website, and enjoy some Golden Milk iced coffee. You’ve earned it!

Golden-Milk-Iced-Coffee-014

Golden Milk Iced Coffee

This recipe works best when your golden milk and coffee are hot! I like to make the golden milk ahead of time, keep it in the fridge, then heat it up for about a minute while I make my coffee. This golden milk recipe is a bit modified from Wellness Momma‘s version. Blend, add ice, enjoy!

What You Will Need

  • 8 to 10 ounces fresh, hot coffee (I like the French press method)
  • 1 13.5 ounce can organic coconut milk
  • 2 tablespoons coconut oil
  • 1 tsp turmeric
  • 1/2 tsp cinnamon
  • Pinch of black pepper
  • Pinch of cayenne pepper
  • 1 inch piece ginger, peeled and grated
  • 1 teaspoon organic vanilla extract
  • 1 tablespoon honey
  • Powdered stevia, to taste

What You Will Do

    1. Combine coconut milk, oil, turmeric, cinnamon, black pepper, cayenne, ginger, and vanilla extract in blender until combined.
    2. Heat mixture over medium heat until combined and coconut oil is melted.
    3. Stir in honey until dissolved.
    4. Remove from heat, pour into a jar, and allow to cool (or use immediately in coffee).
    5. Pour coffee and desired amount of golden milk into blender. Blend on medium speed until combined. Taste; add stevia if needed.
    6. Allow coffee to cool for a few minutes; pour over ice and enjoy!