PB & Jelly Smoothie + 5 Peanut Butter Brands I LUV

Peanut-Butter-Jelly-Smoothies-029

So, this is a fresh week- a new start- it’s January!! However, I’m having flashbacks.

Flashbacks to this time a year ago, when I set really high goals at the beginning of the year, and, fast forward a month to February 2016- hadn’t kept a single one.

You guys!! This year has to be different!! So, I’ve been doing a lot of soul-searching, a lot of praying, and learning from the AMAZING Michael Hyatt– and realized that you can really only focus on 8-10 goals A YEAR.

What?!! This is the key. I start my year with 27 goals, feel overwhelmed, and b/c of the overwhelm, run screaming into the night eating Reese’s cups (See last week’s post- I seem to be using Reese’s cups to describe many things these days, hah!)

You know what resolutions I can keep? Those that involve peanut butter. I remember as a kid LOVING the moments I spent at school, unzipping my water-resistant (That’s right, it was the 90’s and it wicked away MOISTURE, people) lunch box to reveal the soft, white bread peanut butter and jelly sandwich my mom made me, warmed through from the Alabama heat with a bit of the jelly leaking into my Ziplock bag. Days where my dad and I came home from the hunting camp to peanut butter sandwiches and salty potato chips with a tall glass of caffeine-free Coca-cola (my dad’s fave). Those were the good old days.

Peanut-Butter-Jelly-Smoothies-056

But I think comfort food doesn’t have to be synonymous with peanut butter and jelly, exactly– though, don’t get me wrong, those things have their place-the love for a classic sandwich can still be incorporated into a smoothie! And this week’s smoothie tastes like a comfort-filled, creamy, peanut butter berry shake. I think you are going to love it almost as much as that smushy, lovable peanut butter and jelly classic in your own lunch box.

ALSO I’d love for you to check out this week’s video, where I discuss my favorite 5 peanut butter brands. Be assured that I am a life-long peanut butter aficionado. My first word was “juice” and my second was either bologna or peanut butter (I kid, I kid- but how awesome would that be). You have your enophiles, cicerones, chocolatiers- I’d like to refer to my self as a peanut-butter-ateer, sort of like a Three Musketeer, but more of a nut butter pioneer. There’s no official certification quite yet- I’ll keep you posted.

So, in NO particular order, the five peanut butter brands I keep in regular rotation and why I love them:

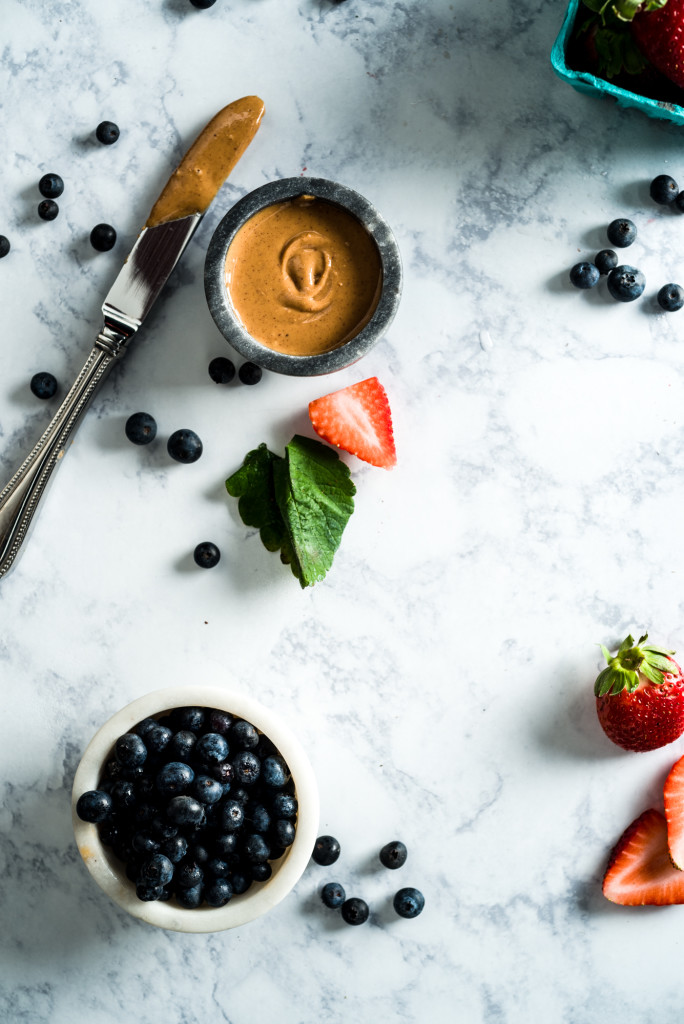
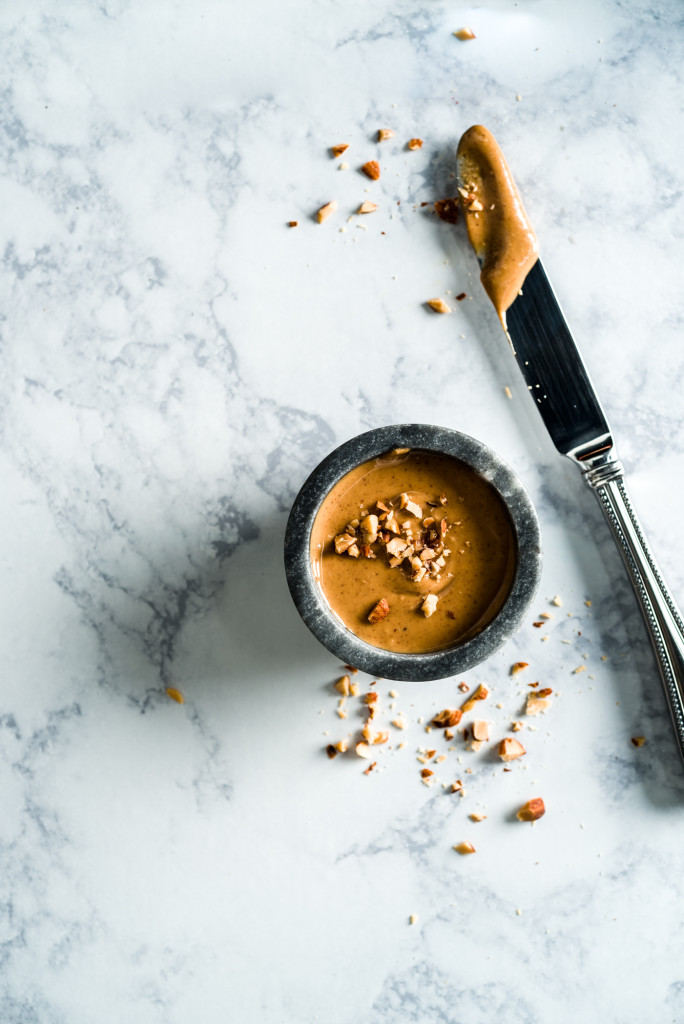
  1. ALDI SimplyNature Organic Peanut Butter: A roasty flavor profile is one of my favorite things about this PB. It’s super creamy and blends beautifully into smoothies (I used it for this week’s recipe) and also goes great with buttery crackers for a snack.
  2. Whole Foods 365 Brand Creamy or Chunky Peanut Butter: I LOVE this peanut butter! My favorite thing to do is eat it straight out of the jar on my sofa. Treat yo’self.
  3. Market Pantry Natural Creamy Peanut Butter: YES!! This has been the discovery of my year. I was in a pinch recently and at Target, and thought- why not? I’ll give it a go! #REWARD. This is my new favorite pantry item.
  4. Kirkland Signature Organic Peanut Butter: Ok, I know, I know that 16 ounces of peanut butter sounds like a lot. BUT ITS NOT when it tastes likes this. Kirkland uses Valencia peanuts, which have a natural sweetness to them. Plus, it has what I want my ingredients list to read for peanut butter: peanuts and salt.
  5. PB2: Ok, this isn’t technically peanut butter, but it is still ground peanuts minus the oil! I love the chocolate flavor AND the plain PB2, the texture of it is great in baked goods and in smoothies. In fact, I even eat it with almond milk mixed in (you guessed it, on my sofa.)

Now TAKE all of that peanut butter knowledge into your fabulous PB & J smoothies this week!!

Peanut-Butter-Jelly-Smoothies-075

And in case you forgot– LUV Y’ALL!

Peanut-Butter-Jelly-Smoothies-028

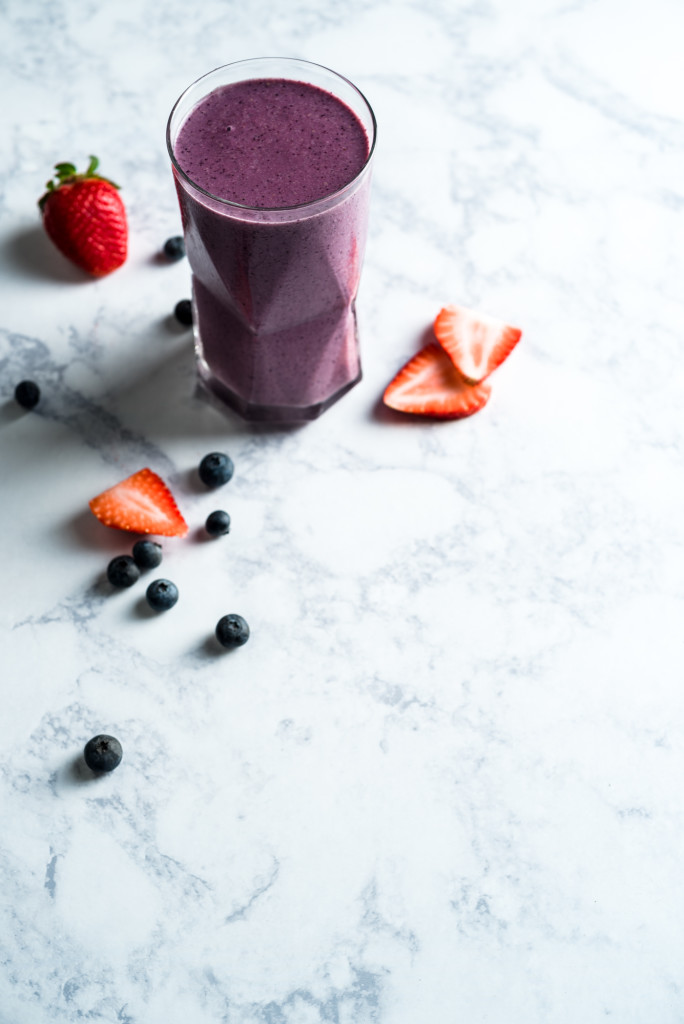
Peanut Butter and Jelly Smoothie

A perfect after-school snack or breakfast treat, this smoothie reminds me of my favorite childhood sandwich! It’s  full of healthy fats with the nut butter and coconut oil, and using frozen berries instead of fresh gives it a great, thick texture. Utilizing stevia to sweeten as needed can help bring out the berry flavor too!

What You Will Need:

  • 8 ounces unsweetened vanilla almond milk (or unsweetened coconut milk)
  • 2 tablespoons peanut butter
  • 1/2 tablespoon coconut oil
  • 1/2 teaspoon vanilla
  • 1/2 teaspoon cinnamon
  • 1/2 frozen banana
  • 1/2 cup blueberries, frozen if you like!
  • 1/2 cup strawberries, frozen if you like!
  • 3 ice cubes
  • 1-2 packets of stevia, to taste

What You Will Do:

  1. Blend the almond milk, peanut butter, coconut oil, vanilla, and cinnamon on low in a blender until combined.
  2. Add banana, blueberries, strawberries, and ice cubes. Blend on medium speed until no large chunks remain, then on high until nice and frothy! Taste and add stevia if you like it sweeter!

SECRET Coffee Routine + Spicy Chocolate Coffee Smoothie

Spicy + chocolate + coffee = yes please.

Helloooooo my precious readers!! I’m pumped! I’m caffeinated! I have nutrition flowing through my veins!!

Why? You ask. Coffee smoothies!! And you know what else? Ladybird Coffee Bombs.

Happy cacao. Vanilla Thunder. FOCUS. The flavors of these grass-fed butter, coconut oil, and collagen butter coffee “pucks” (they look like a beautiful Reese’s cup, but wayyyyy healthier) are intentionally crafted to bless your body AND mind.  All you have to do is blend them into coffee, hot tea, milk- They taste SO good. And they each have as much protein as an egg!!

And one of my favorites- HOLY CACAO- is in this week’s smoothie!!!!

Like we mentioned earlier- I love the benefits of these flavors. Holy Cacao’s description: “FOCUS + METABOLISM BOOSTER + BLOOD SUGAR STABILIZER.” Umm, yesss to all of the above in my morning mug!

Especially if you are up at the crack of dawn, dog biting your toes and/or any limbs hanging off the bed, while emitting a very high-pitched bark squeak. #bigsbyblount

These bombs are the SECRET to my daily coffee routine and have changed my relationship with coffee forever. The way they help you clear your head, bind the effects of caffeine, and deliver even energy for four hours- truly awesome, and truly needed in my world.

In fact, let me count ALL the ways that I love these guys:

That’s right. A dose of clear-headedness, healthy fats, and energy for your day- all in one convenient spot. Like a Reese’s cup but wayyyy betteerrrr. You’ve got to try them, and if you are interested in learning more, just visit check out Ladybird Provisions site! I’m SURE that Sara and Nicole would love to hear from you.

Also- my favorite way to use coffee bombs are 1. Blend it with hot coffee until it is nice and frothy; 2. Freeze coffee cubes+blend with coffee bombs for a smoothie!!

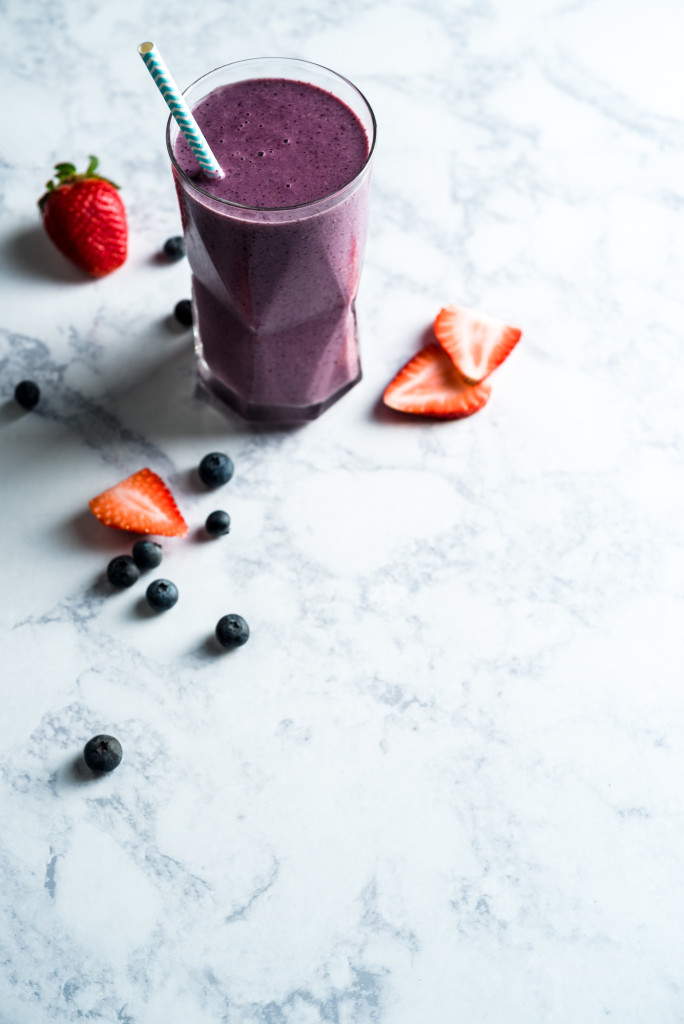
So, this leads us to this week’s smoothie recipe. It’s week #2 of our January Smoothie focus and here’s one guy that’s going to help you focus EVEN more than you already are. It’s full of healthy protein, features a delicious HOLY CACAO coffee bomb, and tastes like a spicy chocolate shake. Deliciousness. Now go get those resolutions accomplished, people!

I wish it was morning so I could drink this.

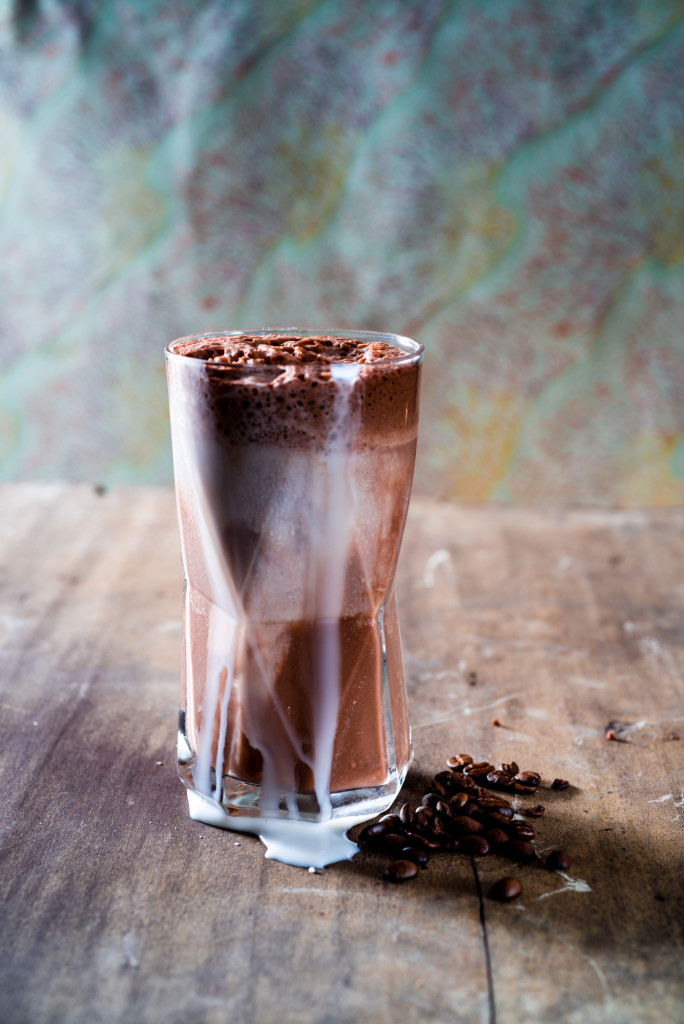
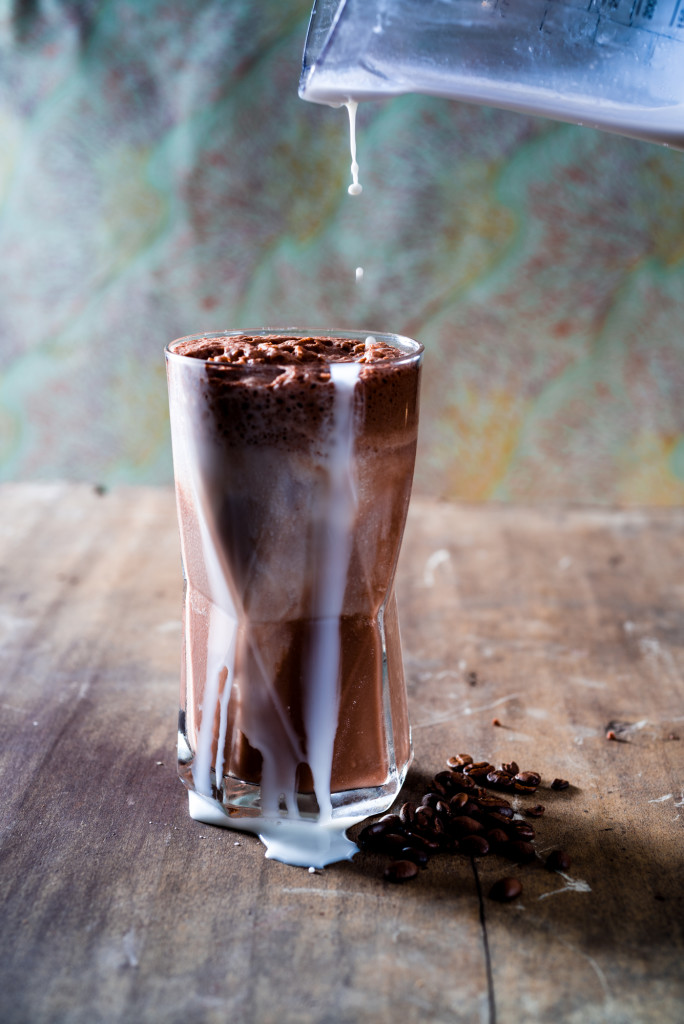
Spicy Chocolate Chili Coffee Smoothie

This smoothie involves little prep; all you need to remember is to keep some iced coffee cubes in the freezer. Use your favorite protein powder (mine is in the Amazon link below) and feel free to use a Happy Cacao bomb if you want less spice!

Serves 2

What You Will Need:

  • 2 cups unsweetened vanilla almond milk
  • 1 scoop chocolate protein powder
  • 1 Ladybird Provisions Holy Cacao coffee bomb (or Happy Cacao if you desire less spice:) )
  • 8 ounces coffee, frozen into small cubes***
  • 1/2 banana, frozen

What You Will Do:

  1. Pour almond milk, protein powder, and coffee bomb into blender. Blend on low until ingredients come together and no chunks of coffee bomb remain. Then blend on medium speed until combined.
  2. Turn off blender. Add frozen coffee and banana. Blend on low, then medium speed until thoroughly combined.
  3. Blast smoothie on high for a few seconds until nice and frothy! ENJOY!

***I like to make a double-dose of my morning coffee, then pour tomorrow’s portion into ice cube trays. Pop those babies in the freezer, and voila!


Your Best Smoothie EVER (TIPS+VIDEO) + Easy Greens Smoothie

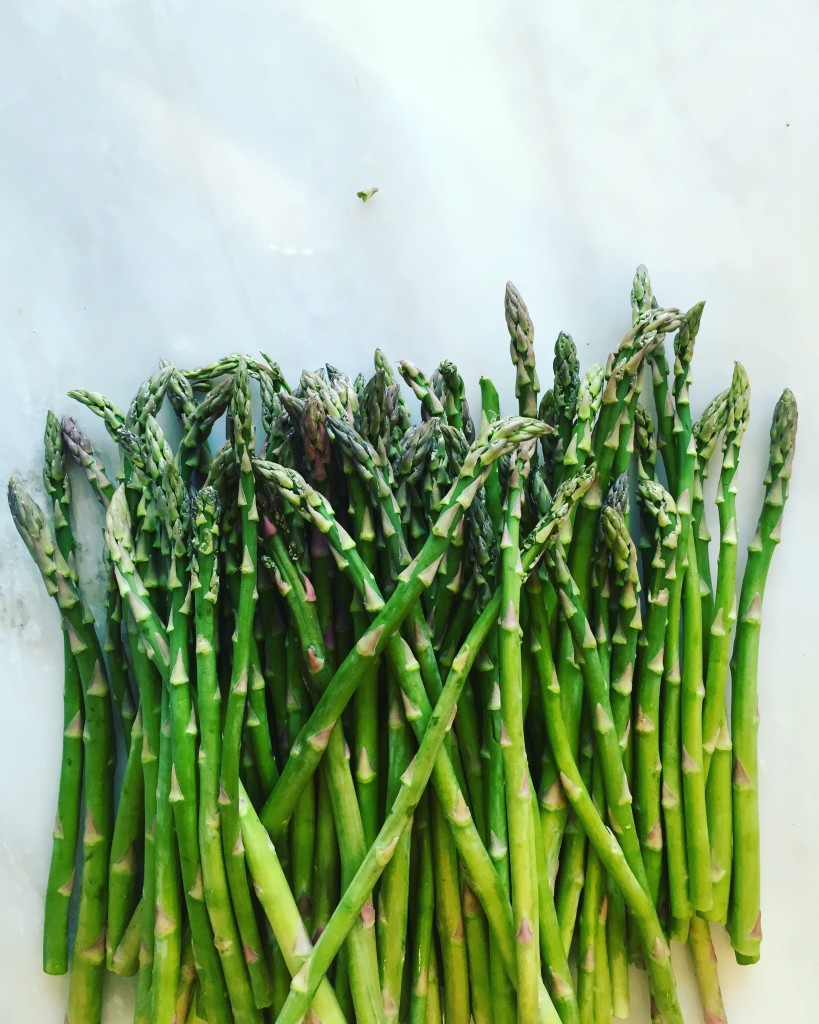
Fresh green asparagus!

It’s JANUARY!! I don’t know about y’all, but I could not be more excited about a fresh start to the year. As we have talked about on the blog, 2016 had a lot of highs and lows, so I am setting my intentions on a steady, thriving year ahead.

You know what else that means? Adding things to our lives that make it easier and more enjoyable. Ways to help us all feel better and live abundantly. And for me, that is- SMOOTHIES! As my friends will tell you, I am a smoothie fiend. I am also a chocoholic and lover of anything that involves candy. However, as I have learned, all that energy (some may refer to this as sugar) is not so awesome to eat for breakfast every day so here is my solution: smoothies.

And in my effort to share with you guys the cooking tips that have worked, and haven’t, here is what we are focusing on in January- smoothies! Smoothie tips, favorite smoothie recipes, and favorite smoothie add-ins will be our topics of interest. This week’s recipe- a greens smoothie.

Did I mention I also don’t love leafy greens? Well, unless they are of the collard variety, bathed in glorious pork fat and served with cornbread.

I’ve tried lots of recipes to get myself to eat more kale, turnip greens, collards, all of those “bitter is better for your liver” plants- those just don’t make my taste buds to a happy dance. BUT what I’ve figured out is that smoothies do- so what if I froze the greens and blended them in with other yummy things? Sold.

So, in an effort to bless you guys with what I’ve learned and get YOU pumped about making your own smoothie creations, here are my Top 4 Smoothie Tips!

  1. ORDER is important: I didn’t realize this until I started making smoothies  daily that there is a rhythm to it all! Steps:
    1. Dry ingredients + liquid: Blend together, on low, your liquid of choice (milk, non-dairy milk, water, juice, coffee) with your dry ingredients (cinnamon, protein powder, peanut butter).
    2. Add frozen ingredients next: It’s helpful if your frozen goodies are in smaller chunks so your blender doesn’t explode (Hah! Several times mine had a distinct burnt metal smell. Probably not so good). So, I like to break my bananas in half, slice my strawberries, pick smaller ice cubes, etc.
    3. Set speed from low to high: After you have added your frozen ingredients, put the blender on low speed until no more large chunks appear. Move to a medium speed setting until you no longer see any fruit/veggie pieces. Then, blast that sucker on high for about 10-15 seconds, or until your smoothie is frothy and ready-to-drink!
  2. Freeze ALL THE THINGS: Texture is so important in a good smoothie! I want mine to be thick and frothy. So, I freeze pretty much every ingredient I put in my smoothies and stash them in large ziplock bags in the freezer. So- kale, bananas, berries, coffee in ice cube trays- ***Tip, frozen coffee cubes cab make your smoothie taste like a Frappucino!***– all of it goes in the freezer box.
  3. Bring the FLAVOR: Check in and see what your taste buds are in the mood for. Is it spiciness? Try cinnamon, chili powder, pumpkin pie spice. Something creamy? Vanilla or almond extract. Sweetness? Try stevia, coconut sugar or honey.
  4. Prep Yo’self. Making breakfast in the morning can be overwhelming, so let’s make it easy!
    1. Make individual baggies of your frozen ingredients. Just put your frozen veggies and fruits for the day in a pre-measured plastic bag and throw that in the freezer.
    2. Measure out your dry ingredients and put them in a small bowl by your blender.
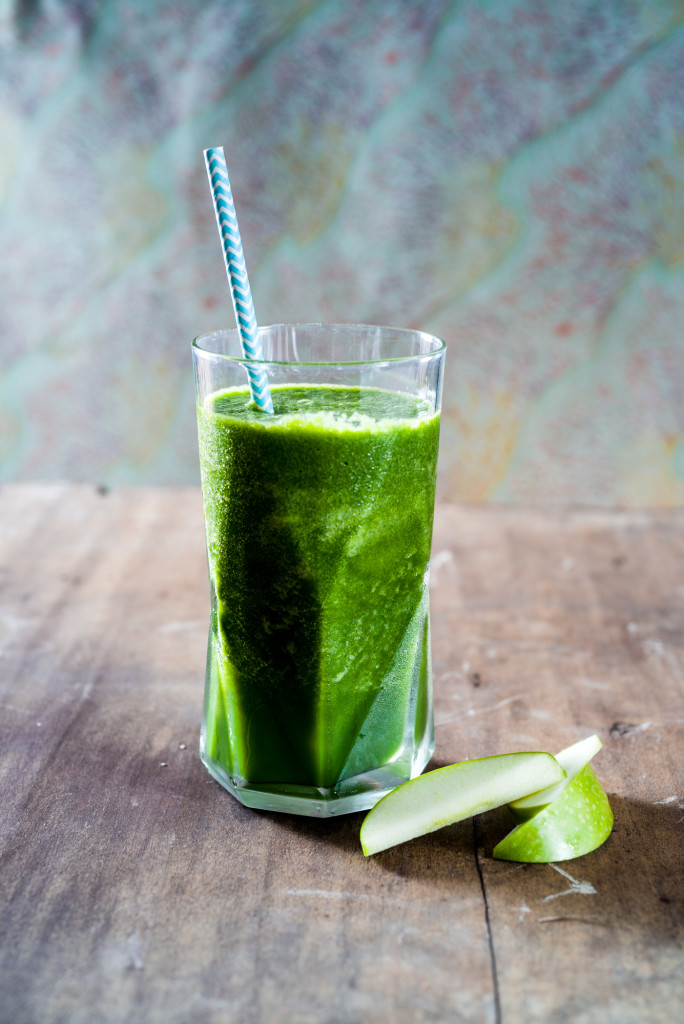
Easy green's smoothie!
Easy green’s smoothie!

Alright, let’s use those tips to make our Easy Greens Smoothie!

What You Will Need:

  • 1/4 cup filtered water*
  • 1/2 cup orange juice*
  • 2 cups frozen kale
  • 1/2 large banana, frozen
  • 1/2 green apple, chopped
  • 1/2 cup filtered water ice cubes
  • Powdered stevia, to taste

What You Will Do:

  1. On low speed, pour juice and water into blender and blend together until combined.
  2. Switch off blender. Next, add kale, banana, green apple, and ice cubes. Blend on low until no large chunks appear. Move to medium speed, and blend until no pieces remain and a uniform color is achieved.
  3. Now, blast that baby on high for 10 seconds until nice and frothy. Taste; if you want it sweeter, add in some powdered stevia. Stick a straw in and enjoy!!

**You can reverse the ratios on your orange juice and water (1/2 cup water, 1/4 cup OJ) if you like things less sweet. In that case, I would add more stevia, to taste.

SIX New Years Eve Party Tips +Hormel Holiday Party Hacks Video!


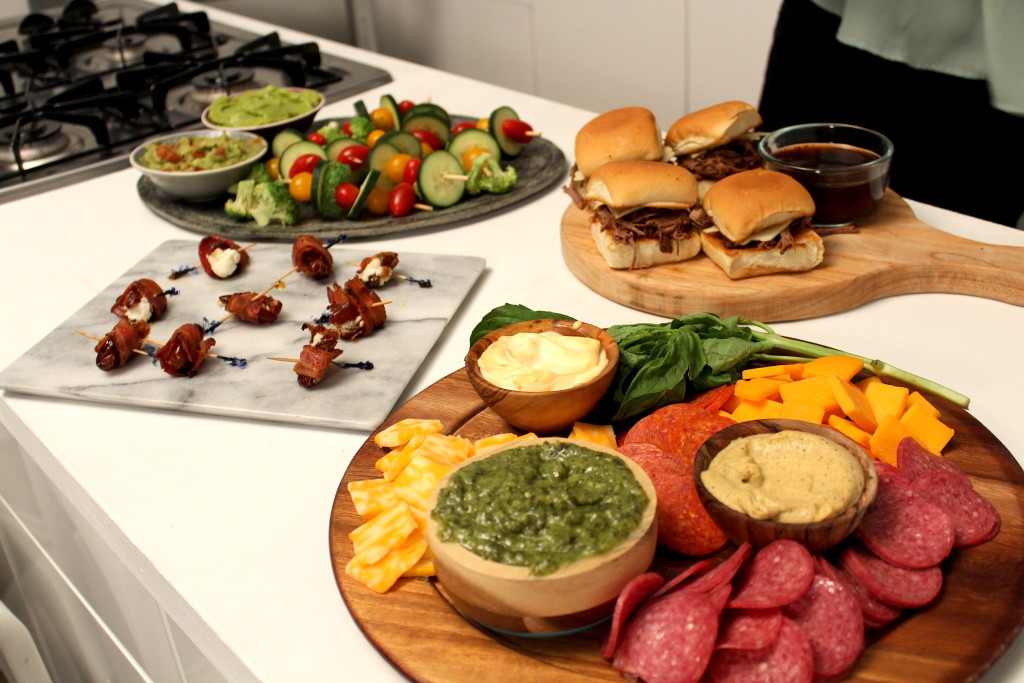
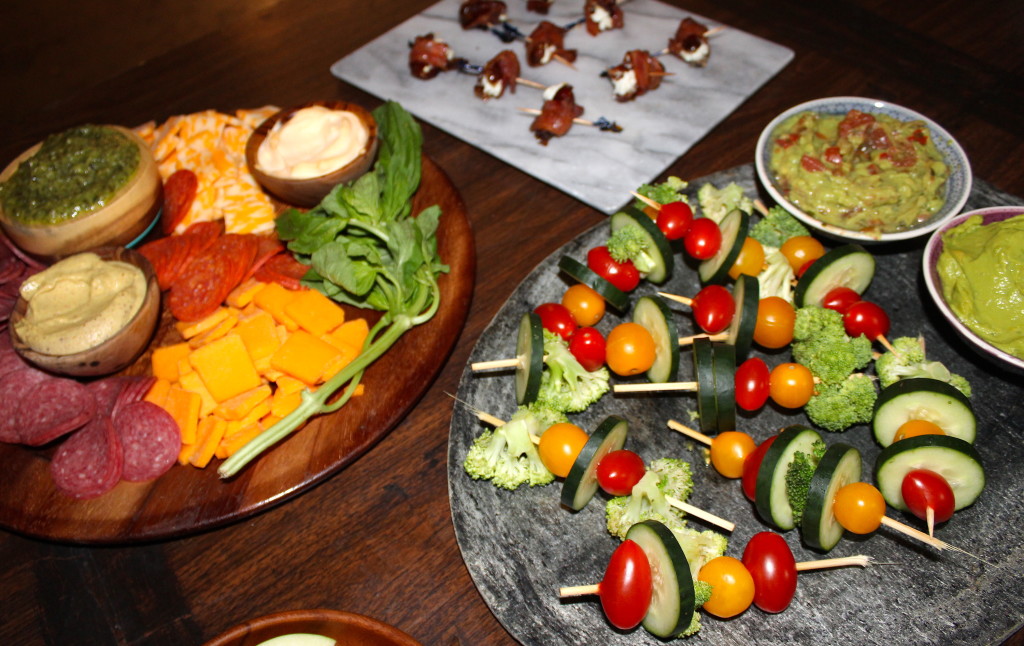
A beautiful Holiday Gatherings spread with something for everyone at your table!

It’s here!! The most sparkly day of the year!! Which makes it one of my favorites- only second to Valentines day in the amount of glitter, goody bags and streamers you can get away with.

I also ADORE a fresh start. I mean, let’s be honest- 2016 was a hard year. Lots of things happened in our world that made us feel rough. But you know what? We made it. And not only did we make it, here on the blog and in your kitchens there was lots of great food that happened along the way.  I think this is cause for celebration, and for throwing the most fun New Year’s Eve party ever. Lucky for us, Hormel has made it EASY to put together a holiday party worthy of the sparkliest of occasions!

In honor or this special party day of the year, I’m going to share with you my SIX (in honor of 2016) NYE Party Tips with coordinating recipes featuring Hormel ready-to-eat products. I think New Year’s Eve is one of the easiest parties of the year to make people feel celebrated and special!

Let’s do this! New Year’s Eve Party Tips:

  1. Keep it simple. When your hosting a later-in-the-evening shindig, most people have already eaten a full meal, so keep the snacks easy to hold and access!
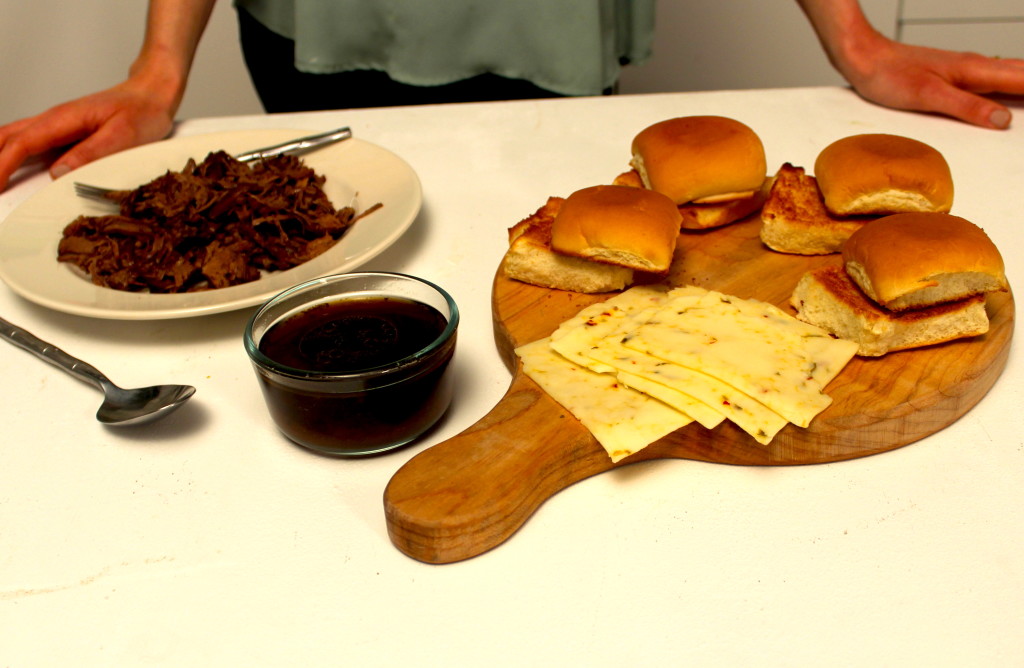
Hormel roast beef au jus makes it easy to create your sliders!

Solution: French Dip Roast beef sliders au jus. The Hormel Slow Simmered Beef Au Jus is perfect for this. All you have to do is toast some slider buns, warm the beef au jus, and pile the beef on top of a bun with a slice of Pepperjack cheese (one of my favorites!) Drizzle some au jus on the beef and cheese, and sandwich the the two buns together. Sandwiches are one of nature’s perfect foods, and making them bite-size means they are the perfect party snack. Plus, you can hold a slider in one hand and a fancy beverage in the other.

2. Give appetizer options! For example- at my New Year’s Eve party tonight we will have everyone from vegans to carnivores to vegetarians. Hormel even makes it easy and quick to feed people on veggie friendly diets- or those who just want a lighter option!

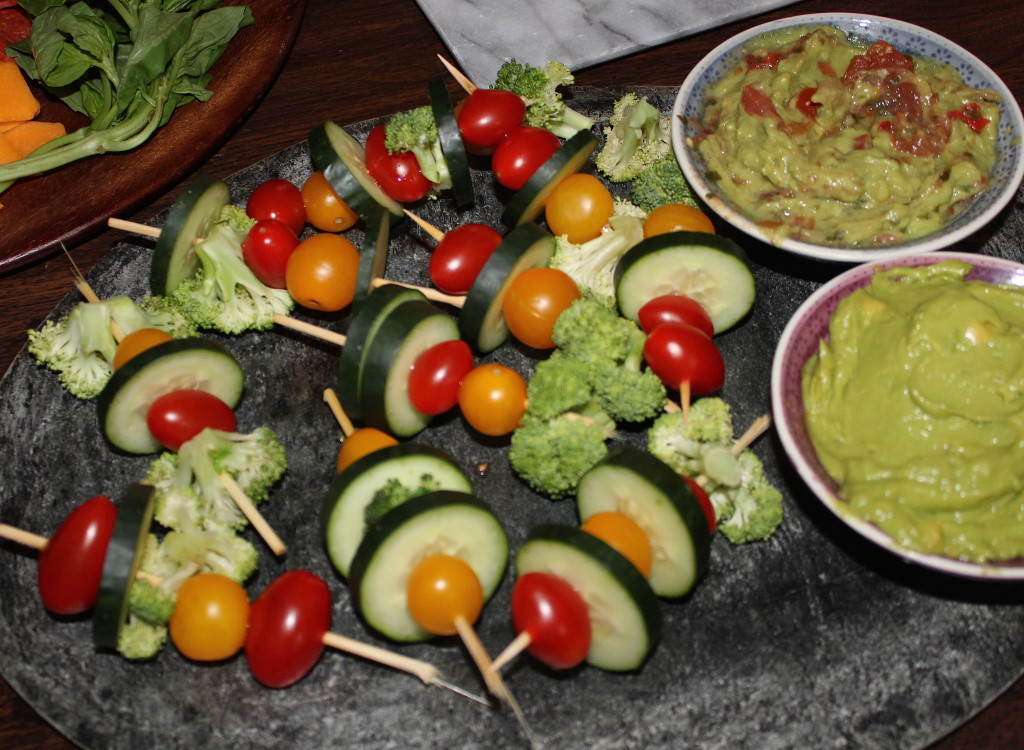
Veggie skewers a plenty with choice of guacamole dips.

Solution: Veggie sliders with Wholly Guacamole dip: I suggest including classic and spicy guacamole for this app; Wholly Guacamole has a ton of flavors to choose from! Just thread fresh veggies like cucumber, cherry and yellow tomatoes, broccoli, etc. on wooden skewers and serve alongside bowls of delicious guacamole to dip.

3. Plan a party playlist! One of my biggest party pet peeves is a lack of music. I went to a baby shower once at a swanky space and there was NO MUSIC. As in, dead silence! It was so awkward! Music helps set the tone for a great night and keeps people energized. You can even look online for suggested NYE playlists- and use those as a starting point to create your own. The great thing about hospitality is that you get to think about the people at your party and what they will vibe to. Like Carlton below, I’ll dance to that!*

carlton-dancing

4. Increase the flavor! Music plays a huge role in creating a festive mood, but so does the food! I like to keep things interesting and upbeat by making sure I bring the flavor.

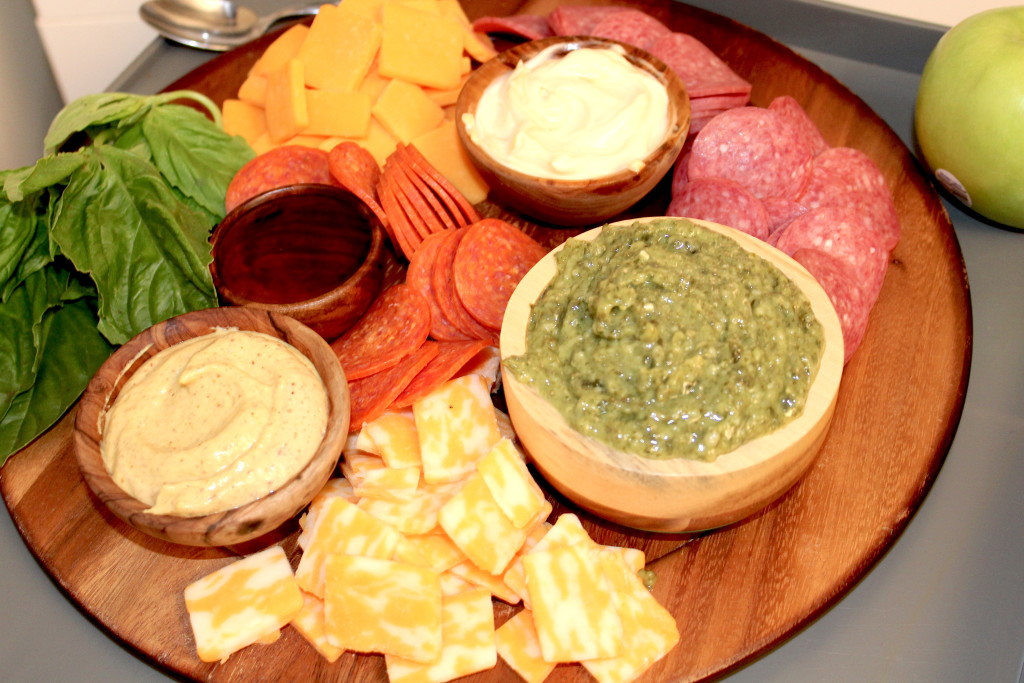
Cracker stack heaven!

Solution: Create-your-own cracker stacks by serving a Hormel Gatherings Party Tray with fresh dip options. In the video, we used the hard salami and pepperoni party tray. I love that these trays come ready-to-go with your meat and cheeses already sliced! The prep work is done for you. Just add the flavors you like for your guests to create-their-own sandwich cracker stacks. I like to offer spicy mayonnaise, high quality mustard and fresh pesto alongside. You can even slice up some fresh apples for a gluten-free snack option!

Another styling tip: serve your dips in complementary (either colored or textured) bowls to complete a pretty look for your tray. Fresh herbs (like basil and rosemary) also add to the visual of it all!

5. Make your guest list special. And by that I mean- have an intention behind why you invite each guest to your celebration. Think about their personalities, how much they mean to you, their interests. By keeping this in mind, it makes for easy conversation starters between friends- and gives you the chance to tell them how grateful you have been for them this year. To me, there is nothing like words of affirmation to make someone (myself included) feel loved! For example- “Emily! I am so glad you made it. I was thinking this year about how much I’ve enjoyed working with you and you totally deserve a chance to celebrate tonight!”

6. Think outside the box. I love a sweet treat, and my husband can tell you that I literally plan my days around when I can have ice cream! But not everyone is quite as thrilled about super-sweet desserts as me. Thinking outside of your normal dessert repetoire by creating something savory and sweet gives party goers the chance to get their hit of sweetness while savoring the moment.

Goat cheese stuffed dates for the win on the marble platter. LOVE!
Goat cheese stuffed dates on the white marble platter, in the mix with all of our yumminess!

Solution: Bacon-wrapped goat-cheese stuffed datesThese are such a brilliant party food! And Hormel is awesome because using their Black Label Fully Cooked Bacon cuts your prep time way down! Just cut a small slit in each date, fill with goat cheese, then wrap each date in a half slice of bacon and secure with a festive toothpick. Put your dates on a parchment-lined, or cooking-sprayed, baking sheet and drizzle with a bit of honey. Bake at 350 for 5-10 minutes, or just until the dates are cooked through.

Also, a styling tip on serving those: Put them on a white marble or other light surface platter! That highlights the rich tones of their bacon-y goodness!

Y’all, parties are all about having fun, and with Hormel ready-to-eat products you can get out of the kitchen and celebrate with the ones you love!

****************************************************

My wonderful friends!! Thank you for being a part of Luv Cooks in 2016. I believe 2017 is going to be our best and most fun year yet. From the bottom of my heart- go get your sparkle on tonight and have a blast! Love y’all!

Celebrate good times, come on!


**This image is from Reddit.com:)

2016 Top 5 Kitchen Fails and Successes + Video!

One of my favorite holiday cakes EVER.

Whew!! Y’all-2016 is almost behind us, PRAISE!

For me, this was a year of a lot of highs, and some lows. My husband and I bought a house together (a dream of mine since I was a kid), I got to work with more amazing food styling clients than I could have dreamed, and I rediscovered my passion for being on camera and helping people navigate this journey we call home cooking.

But 2016 also had its frustrations- recipes that FLOPPED hard in our kitchen; cooking burnt food for some of our first-time dinner guests; and a fight against all-out frustration throughout the year that life wasn’t perfect (in lots of areas) like I had envisioned and wished for.

Then, lightbulb moment. I realized-thank you Lord- that the imperfections- the things that go wrong, my own lack of knowledge, my zoodle FAILS and the frustrating feeling that nags me daily to err on the side of perfection with food and forgo the real relationships that should be fostered instead- those are the things that I hope to share, and help you, work through.

And that’s what I want 2017 to be about for Luv Cooks. Sharing honestly about what didn’t work, what DOES actually work and the tips that have helped me along my journey toward thriving in the kitchen. And I’d love your input! Please comment or shoot me a Facebook message on what questions you have and what you want to see on the blog.

With that, I give you my Top 5 Cooking FAILS and TRIUMPHS in 2016:

Let’s give the bad news first: FAILS!

  1. Trying new recipes with “company”: Growing up in a Southern household, whenever we had friends and family over my parents always referred to them as “company.” For the longest time I questioned this- “Why on earth are business people coming over? This is just Harvey from down the street.” But what they meant by that was “These are people that deserve love, respect, and taking the time to make them feel special while they are with us.” Now that I am older, I appreciate and treasure that lesson. So, don’t be like me and attempt to make vegetarian curry for friends that you’ve never tested and it turns out feeds TWO instead of SIX. Also, make sure you have ice cream in the freezer for “company” and that your apple crisp doesn’t actually taste like lemon juice surprise.
  2. Zucchini Noodles: For the LOVE, I can not figure out how to make these work. I have tried Paleo style, Blount family style- and geez louise every time I make these they taste like soupy veggie water.
A better use for cucumber and/or zucchini than what I made this year.

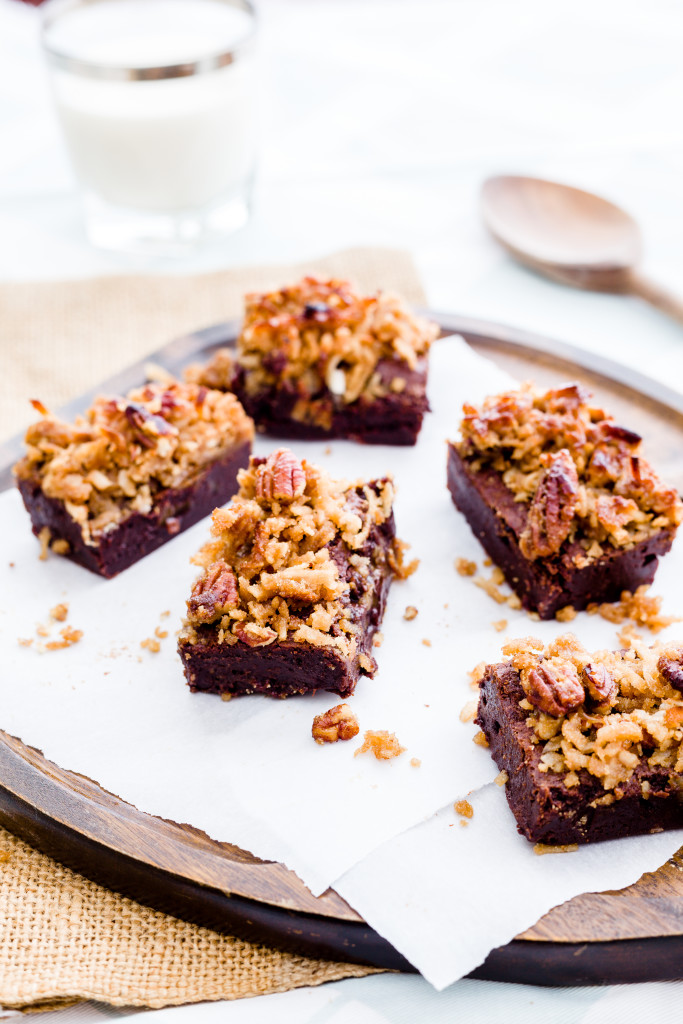
3. Water in chocolate: I was cooking for an event this year that required lots of my Gluten Free Toasted Pecan and Coconut Brownies, which I love. Well, you know what chocolate doesn’t love? WATER. Batch after batch was seizing (turning into a crumbly mess) and I had no idea why. I would make a batch, throw it out, wash my bowl, and start again. Lightbulb. Because of my frustration, I wasn’t taking the time to fully dry my bowl and water was wreaking havoc on the melting chocolate step. KEEP YOUR BOWLS DRY!

4. Flax Eggs. Y’all, flax rhymes with AXE. That’s what happened to every recipe that I tried to use flax eggs as a substitute for the aviary variety. Literally, my blueberry coconut pancakes looked like coconut mush dog food.

5. Inadequate cooking spray: **Embarrassment alert** I was on a food shoot this year making Vivian Howard‘s (who I loooveee) pecan pie. Well, I diligently stirred together the homemade pecan crust, carefully patted it into my pie pan and filled it with yummy pecan filling. Fresh out of the oven, it was beautiful. I arrive at my shoot and go to slice the pie- not happening. It felt like a brick had hijacked the spot where my crusty pie should be. In response, I began hacking at that pie like a deranged sugar addict. Yes, you guessed it, the pan was improperly sprayed/greased and the photographer ended up having to PHOTOSHOP the crust on the pie. Yep, I’m that professional.

Heed Elevated Kitchen's advice and your pie WILL come out of the pan.
Heed Elevated Kitchen’s advice and your pie WILL come out of the pan.

Hope abounds! Successes WERE had and here are my top 5 favorites:

  1. Coconut flour. I love, love coconut flour. It’s a great fit for gluten free recipes. It tastes rich, is great for you, and has a nice texture. It’s also awesome to “bread”/toss veggies in before you roast them, and I like to add about a tablespoon of coconut flour to my smoothies to give them a coconut flavor.
  2. Kerrygold butter: One of my dreams came true this year as I got to work on a commercial for Kerrygold Butter! Praise. The theme of the commercial was holiday baking with Kerrygold butter, and before this shoot, I wasn’t very particular about my butter. I am now changed. THIS BUTTER IS AMAZING. It’s a totally different shade of yellow, makes all the difference in shortbread cookies, and makes things so wonderfully tasty and flaky, especially when a recipe only calls for a few ingredients. Love it!
Brownies with glorious coconut.

3. Homemade broth: Making homemade broth has become both therapeutic and stress-relieving for me. It’s also an amazing use of leftovers. Just throw some chicken or turkey bones and skins in a slow cooker or large stock pot (preferably bones you have pulled from a roasted bird that week, or have in the freezer from a past recipe), leftover veggie scraps (whenever I chop for recipes, I throw my onion scraps, garlic skins, extra carrots in a plastic bag in our freezer) and enough (filtered) water to cover your goodies. Let that simmer for 24 hours, then strain and pour into a glass jar. It should keep for a week in your fridge, or you can put it in a freezer-safe bag in your freezer. If your birds were organic, you can even skim the fat that collects on the refrigerated broth and use it to saute or roast veggies or other meats! SO AWESOME.

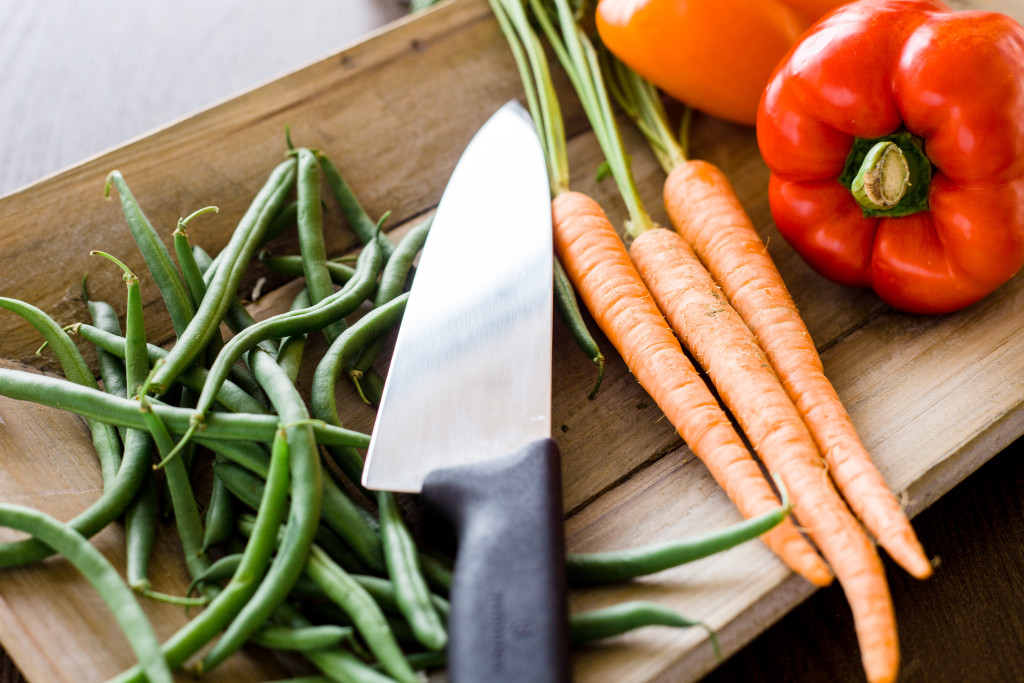
Side angle shot of chef's knife illuminated on wooden platter with fresh green beans, raw carrots, and red and orange bell pepper.
Save those veggie scraps for homemade broth this year.

4. Veggie bowls: Making these has radically upgraded our weekly lunches and made me feel like a healthier human being. A great recipe for them is on Jen Riday’s page.

5. Frozen Peas: Frozen peas are life-changing. Turns out that frozen snap peas are more than likely fresher frozen than they are at your local market. Peas begin losing their flavor the moment they are picked, so frozen ones tend to retain that flavor (and avoid the shelf-life starchiness) that grocery store peas can have. One of my favorite peas recipes is from America’s Test Kitchen: Gravy Training Blog

Ok, that’s this week’s tips and tricks my amazing readers! I hope you have such a great holiday weekend and amazing start to your New Year.


Easy Holiday Dinner Tips with Hormel

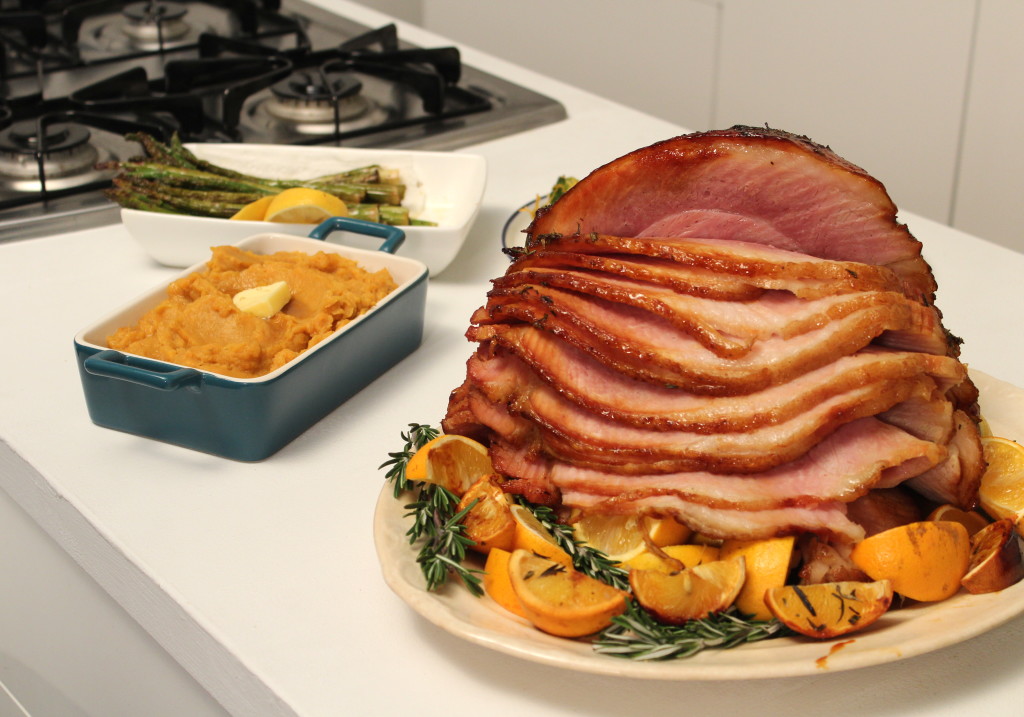
Orange Glazed Ham

WOW.

Umm- are you guys busy these days? I mean- is your holiday season flying by like Santa on a jet ski? Yep, #sameboat. I actually just had to practice some deep breathing a bit ago to calm down about ALL that awaits me on my to-do list between now and December 25.

But you know what? There is HOPE. That’s right, there is a beacon of light that lies across that sea of gift wrap on your living room floor. It’s going to simplify your life, take one MAJOR requirement off of your shopping-bag laden shoulders, and allow you to breeze through the most pressure-filled of Christmas feats- the holiday dinner.

Ham Dinner

That’s right. The once-a-year celebration that involves your family, your friends, and those relatives that you haven’t seen in years but somehow arrive at your doorstep hungry and ready for ALL the egg nog. The people that you truly love and want to feel special around your table. The people you text on the daily. That dinner. The solution? Hormel is here to save the day- and help you feed everyone on your gift list with no host-stress. Pun intended:)

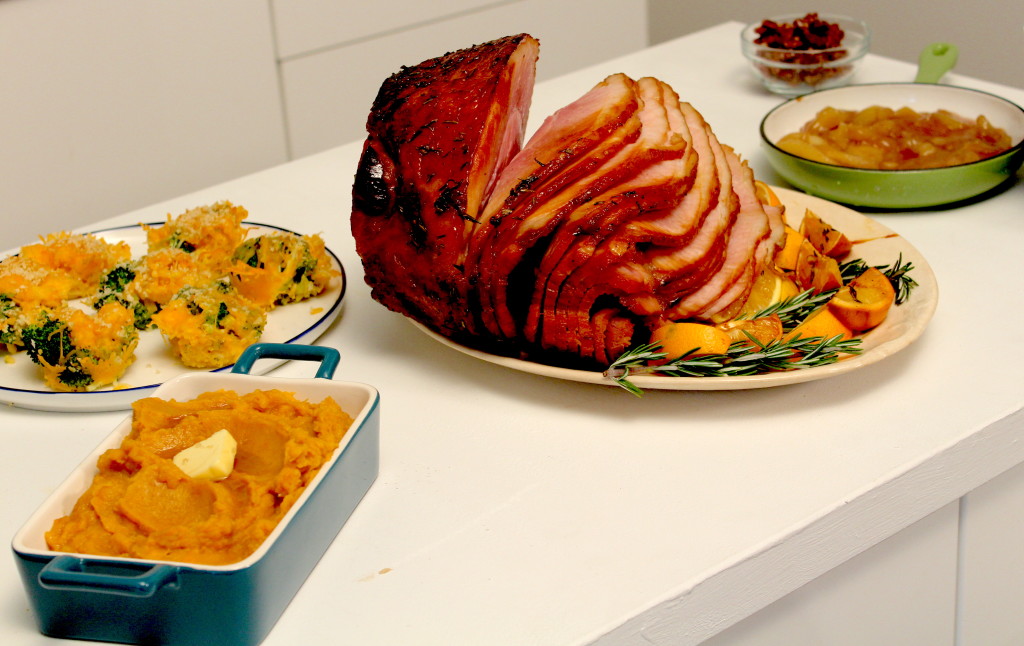
This season I had the chance to partner with Hormel for these easy holiday dinner tips to utilize all I’ve gleaned from my work as a food and prop stylist to create a holiday menu that is both easy to do and will formally establish you as the Holiday Hosting Queen or King. These dishes make simple, fresh tweaks to Hormel foods that are sure to please your fave people. It’s a menu that includes:

  • Orange and Rosemary Glazed Hormel Cure 81 HamThis ham is already cooked, and our glaze only has two ingredients! All we have to do is glaze and bake.
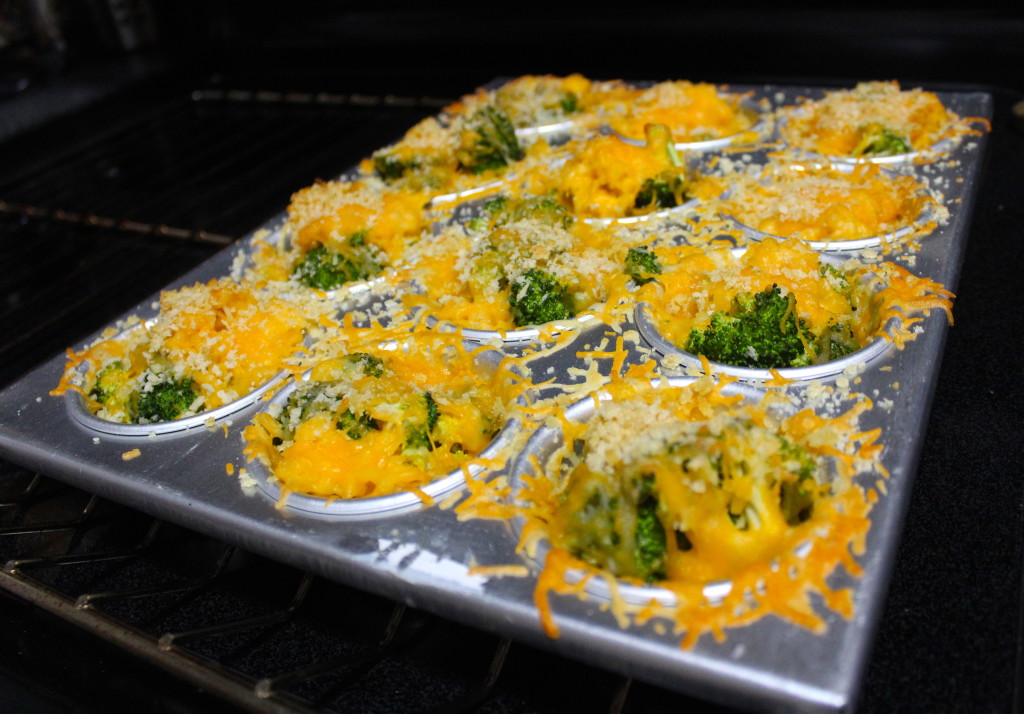
  • Golden broccoli and cheddar rice cupsPerfect for portioning out your buffet- especially when your relatives really love the sides; as in, ahem, maybe don’t leave much for those people behind them in line.
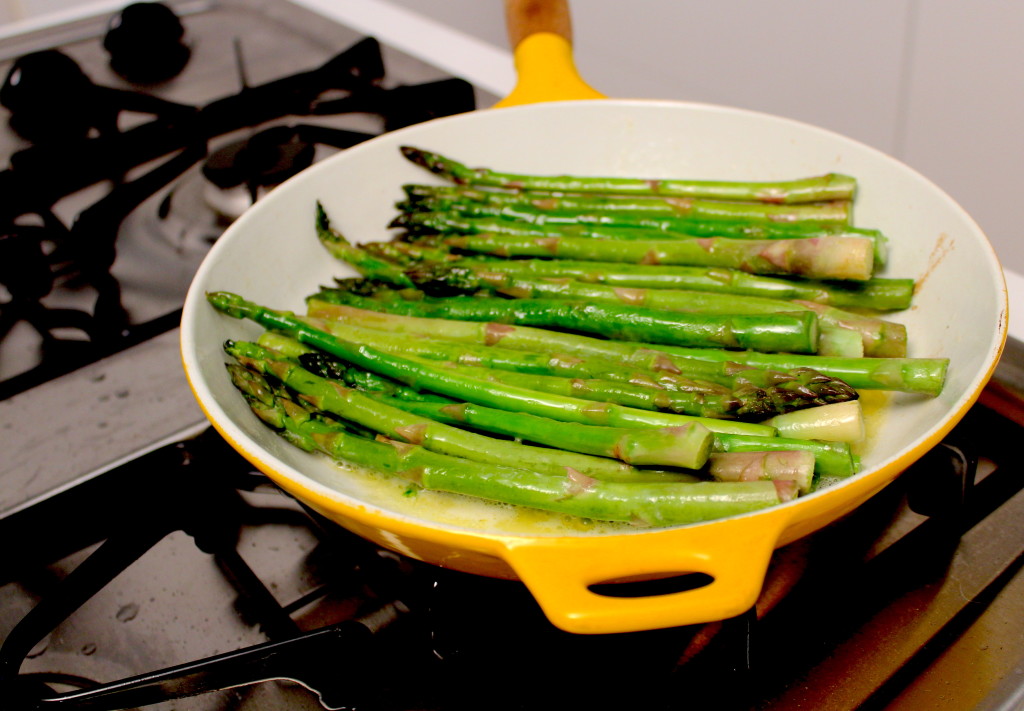
  • Fresh Sautéed Asparagus with Lemon ZestFresh trimmed asparagus + butter+ lemon zest. Voila!
  • Salted Maple Butter Sweet PotatoesUtilizing ready-to-go, mashed potatoes takes the boiling and the pulverizing out of the equation for you. Save that bicep strength for unwrapping presents later!
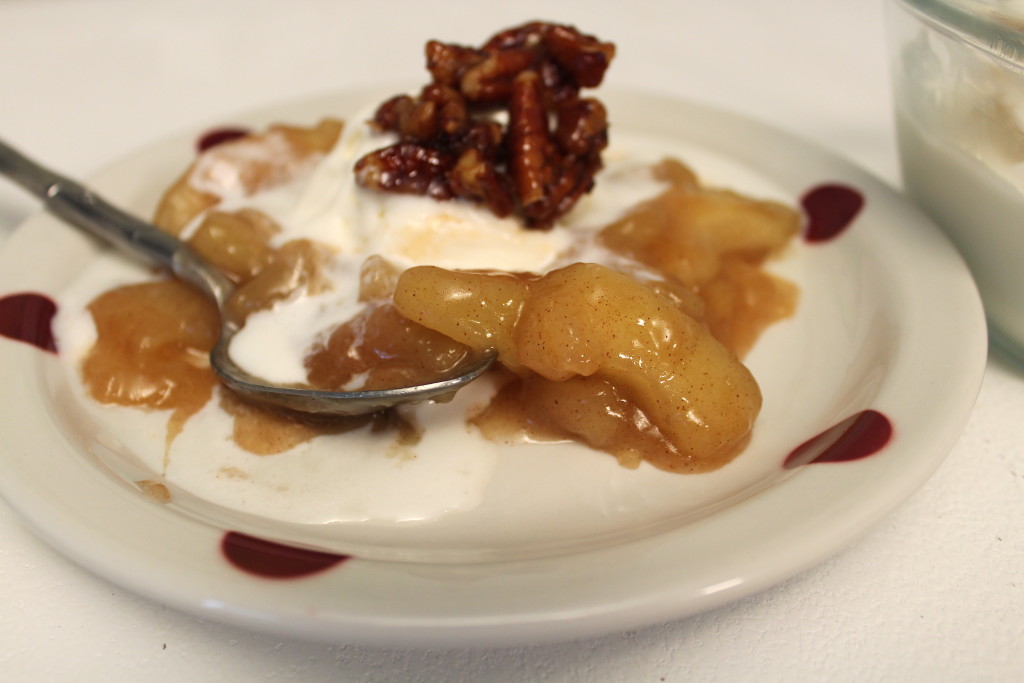
  • Sautéed Apples with Vanilla Bean Ice Cream and Candied Pecans: Sweet apples with creamy ice cream and candied pecans. Yessss pleeeassee!

To see the WHOLE menu and all of the how-to tips, click here: Hormel Holiday Ham Dinner Hacks!

Oh AND surprise!! The Hormel team also took some sweet behind-the-scenes photos I thought you guys would dig.

Let the film roll begin!

Sharing my love of ham with the camera!
Broccoli Cheddar Rice Cups
Our broccoli-cheddar beauties baking up in the oven.
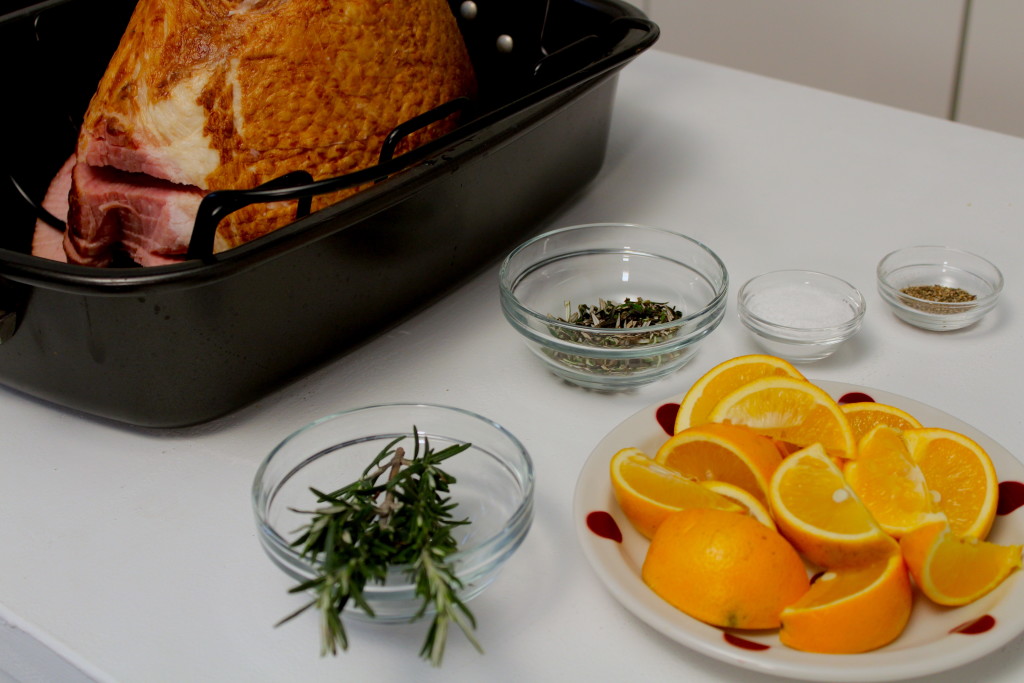
Our Cherrywood Cure 81 ham and glaze ingredients awaiting their glorious debut.
Our Cherrywood Cure 81 ham and glaze ingredients awaiting their debut.
Warm cinnamon apples with vanilla ice cream melting into the fruit, topped with candied pecans for our dessert. Yummmmmmm.
Warm cinnamon apples, vanilla ice cream and candied pecans for dessert.
Fresh sautéed asparagus with butter and lemon zest deliciousness.
Sweet, caramelized glazed ham in all it's glory.
Sweet, caramelized glazed ham in all it’s glory.

You guys, my amazing readers and watchers- I couldn’t be more thrilled to share this video, and this season, with you. You and my friends and family- you guys are the ones that make holiday food special for me. And the fact that Hormel has made an effort to make this easy for all of us- well, I’d say that’s Luv Cooks style: having a blast, cooking delicious food, and making the people around us feel special.

So, from my kitchen to yours, may your table be full of the food, sparkle  and loving warmth of a hope-filled season. I can’t imagine anything more delicious.

TOP TEN Thanksgiving MUST HAVES!

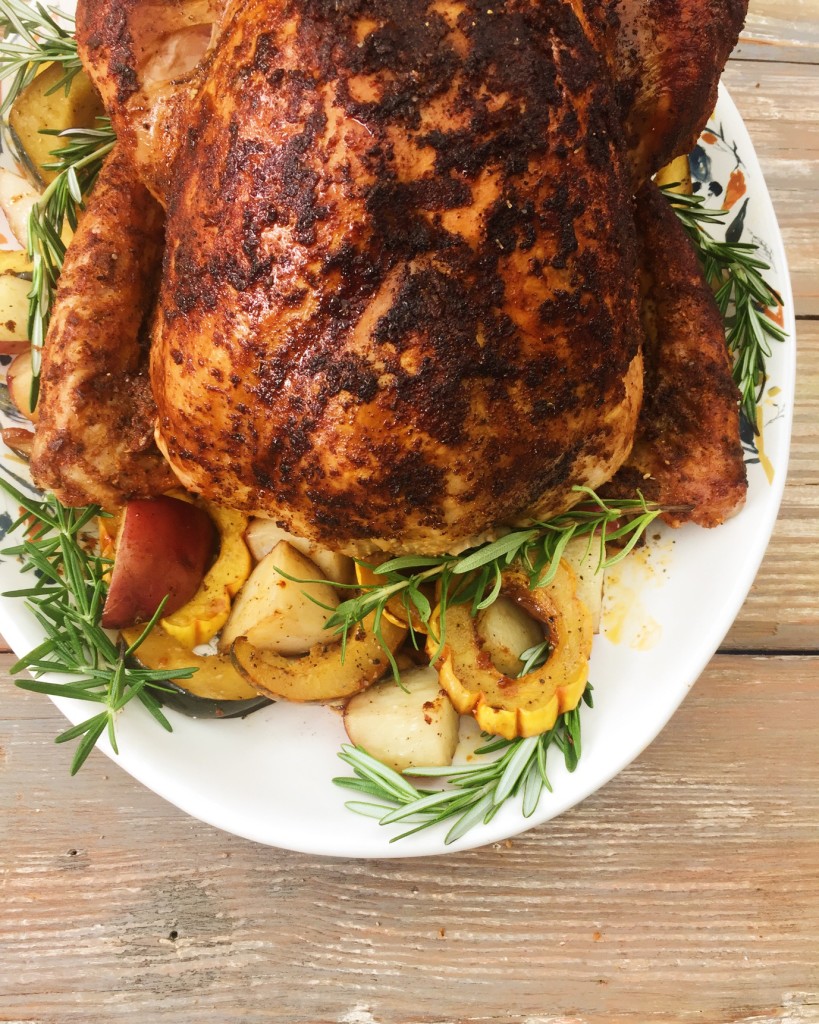
Turkey!

Y’all! The day is ALMOST HERE!!

If you are like me, you are pretty much giddy with happiness. Pumpkin + turkey + cranberry = JOY.

In honor of the best of holidays, here is my Top Ten List of the essentials- from coconut oil to the back buddy- you MUST HAVE to thrive this week.

    1. NUTIVA Organic Coconut Oil, butter flavor : This stuff is the jam. Literally. I put it IN MY COFFEE (gasp, it’s so flipping good); schemear it on toast for breakfast; stir it into quinoa to make it taste yummy; and pour it, melted, over popcorn. #yes

2. Libby’s Pumpkin Puree: The gold standard of all pumpkin purees. Others get a gold ribbon compared to Libby’s blue! It’s perfect, adds moisture to baked goods and is flawless in a smoothie. They even breed their own line of pumpkins so this tastes good. USE IT IN YOUR PIE or else. 😉

3. Kerrygold Salted Butter: Y’all. Y’all. The. Best. Butter. I love using the salted version as part of a brown sugar crumble on fall apples; in Salted Brown Butter Rice Krispie Treats; melted between stacks of warm chocolate chip pancakes.

4. Sun Warrior Chocolate Protein Plus Powder: Oh my geez. I LOVE this stuff. As you know, the holidays involve LOTS of activities and require your energy in a big way. This is the BEST to fuel you in the mornings in a Smoothie or as an afternoon snack!. This brand also sent me a brand new box of protein powder after I spilled mine all over the floor. Love them.

5. Sorta Awesome podcast. Y’all!! These ladies!! I absolutely adore them. This podcast is the perfect pick-me-up, stress reliever and hilarious distraction in the midst of cooking craziness. In the past week alone I learned from this podcast why you should take a bath surrounded by glow sticks, who makes the best spaghetti sauce and a natural remedy for travel anxiety (yes, it’s legal).

6. The Back Buddy: Speaking of stress reliever- get those kinks out y’all!! There is nothing like standing on your feet all morning cooking and lifting that hefty turkey, only to realize that your feet hurt and your shoulders are in knots. This is like the Lord’s gift to sore muscles.

7. Equal Exchange Panama 80% Dark Chocolate Bar: The most delicious dark chocolate bar I’ve ever had. It’s rich and roasty, with a hit of sweetness at the end. Nutritionally I think it probably saves your life. So good! And money from this bar goes to help the farmers who made it!

8. Dark roast coffee: Perk up everyone!! It’s 6 a.m. and time to put that bird in the oven. You know what you need? COFFEE. And dark roast is my fave- particularly Peet’s brand. It’s easy to find on Amazon or at your local grocery store. AND it’s super amazing with #1 on the list stirred in. Whole beans preferred:)

9. Yoga by Adrienne– I just discovered Adrienne on YouTube (after finding out about her via Sorta Awesome). She is great!! Her “strength” workout is one of my faves because she pushes you (you are definitely doing some toning) but it’s not so hard that you swear off the workout forever (uhhmmm, maybe I’ve done that a time or two). Anyway- you are bound to need some alone time over the holidays so roll out that mat.


10. Natural Calm supplement. THE BEST WAY TO FALL ASLEEP. I know, I know, you have been up late watching Gilmore Girls and are now so wired on sugar and coffee that you may be awake for another 6 hours. Have no fear, Natural Calm is here! It is one of my favorite products to gently and naturally help you wind down.

Alright you Thanksgiving warriors! I hope you have the best time cooking, laughing, loving, and snoozing this week. Blessings my friends!

Sweet Potato “Bread” Turkey Sandwiches

Sweet Potato Bread Sandwiches! from Callie Blount on Vimeo.

Who’s excited about Thanksgiving? Can I get a WHOOP WHOOP?

I hear Criss Cross pumped UP in the background of this post!

That’s right. Thanksgiving make ya wanna, “JUMP JUMP!”

And it’s so NOT “wiggly wiggly wack.” It’s where it’s AT!!

Ok, I will stop. But it’s not that I want to!!

Thanksgiving is one of my favorite holidays for many reasons; one, it’s like Christmas without all of the gifting pressure; two, it involves CRANBERRY SAUCE SLICES, and three, you get to eat lots of carbohydrates with the ones you love. #signmeup

This week’s recipe is an easy way to eat the rest of that leftover turkey AND the sweet potato that didn’t make it into the casserole. Actually, come to think of it, if you tried really hard I bet you could smash up the mashed sweet potato and instead make a patty/bread slice of sorts. However, this way is much easier if you are like me and plan to binge-watch the new season of Gilmore Girls in your pajamas with your sister the day after Thanksgiving. So this way definitely appeals.


In case you missed it, Luv Cooks Sweet Potato Sammiches! (me making these tasty treats). You can always tune into Luv Cooks on Facebook Live to check out the week’s recipe; right now, my goal is post videos Tuesday afternoons.

Alright my friends! Happy almost Turkey Day and mad PROPs to you for doing your leftovers planning already. #winning

Sweet Potato “Bread” Sandwiches with Roasted Turkey and Cranberry Sauce

These roasted sweet potato slices act like bread in a delicious, post-Thanksgiving treat.


Thanksgiving Sandwiches❤️️?? from Callie Blount on Vimeo.

What You Will Need:

  • 1 medium sweet potato, sliced into about 1/4 inch slices
  • 1 tablespoon olive oil
  • Sea salt
  • Freshly cracked black pepper
  • Olive oil mayonnaise (to taste)
  • Shredded turkey
  • Slices cranberry sauce (to taste)

What You Will Do:

  1. Preheat oven to 425. Line a dark metal baking sheet with aluminum foil and spray lightly with cooking spray of choice.
  2. In a large bowl, toss sweet potato slices with olive oil, then add salt and pepper to taste and combine.
  3. Spread sweet potato slices on baking sheet, making sure to leave room around the edge of each slice so the air can circulate and ensure crispiness similar to a bread crust.
  4. Bake the slices for 10 minutes, then flip. Bake 10 minutes more, remove from oven, and allow slices to cool slightly.
  5. Once the slices are cool to the touch, spread each sweet potato slice with mayonnaise. Top one slice with shredded turkey, and the other with a cranberry slice.
  6. Sandwich the two slices together and chow down!


Slim Jim Chili + Summertime Joy

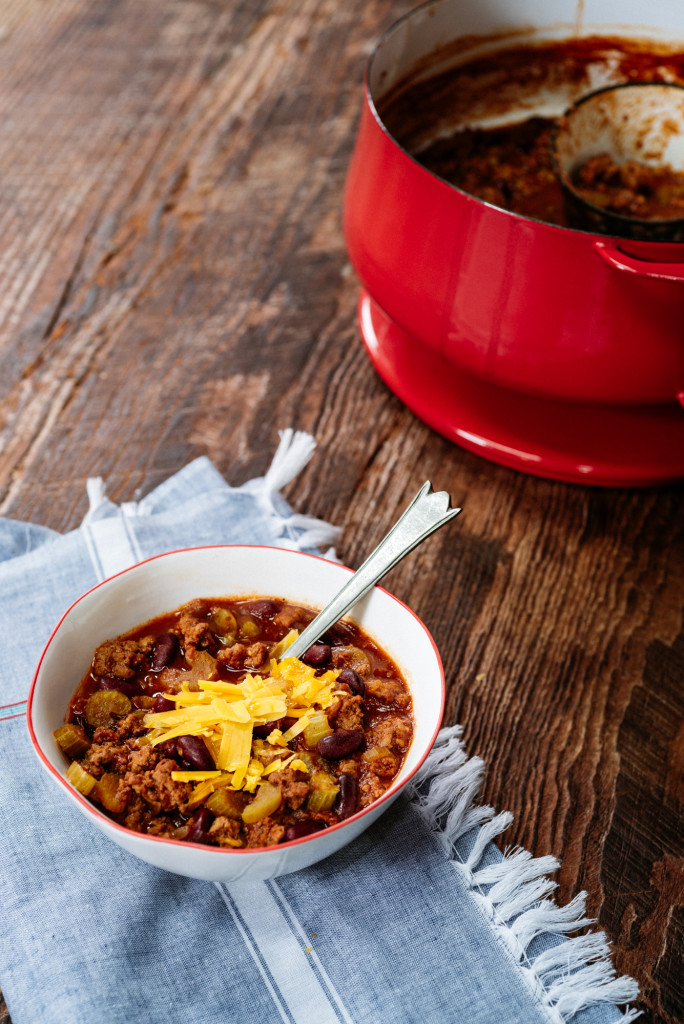
Slim Jim Chili

Today’s post is short and sweet. Think lean ground beef, lots of veggies, and flashbacks to my seventh-grade self in hot rollers.

The video below is maybe the most fun I’ve ever had making chili. For me, chili brings back great memories- warm fall nights, the smell of cumin wafting from a slow cooker, football tailgating, salty Frito’s- but the most hilarious of all involves the hunting camp, staking out turkeys, and ensuing get-togethers with freshly caught wild game at the center of the chili pot.

And now, living in Nashville, I had the joy of NOT trampling through the woods, avoiding ticks and carefully tiptoeing around leaves in my 1990 Timberlands. Instead, I took a leisurely trip to the farmer’s market in my flip-flops to purchase Walnut Hills dry-aged lean ground beef and Smiley Farms produce.

So, check out this version of “dieter’s chili” from The Nashville Cookbook.  For me, chili=happy place, and I am wishing you a bowl full of beefy joy today.

I also dare you to find the Randy “Macho Man” savage cutaway in the mix.

Luv y’all! Happy summertime!


Sweet Potato Puffs & Luv Cooks FIRST full-length video!


GUYS. This could be the most exciting Wednesday I’ve ever had.

Today, this morning, I am so excited to put our first Luv Cooks full-length video into the internet stratosphere!

Shout outs for this project are absolutely due to my incredible husband. He not only wrote the musical score for this whole series, he edited these videos late into the night, and arranged the clips just perfectly (he shows me love and grace in countless ways). Also shout out to friends of ours for lending invaluable opinions to the reviewing process! We couldn’t be prouder. I hope this first video will be a launching point for many, many more to come!

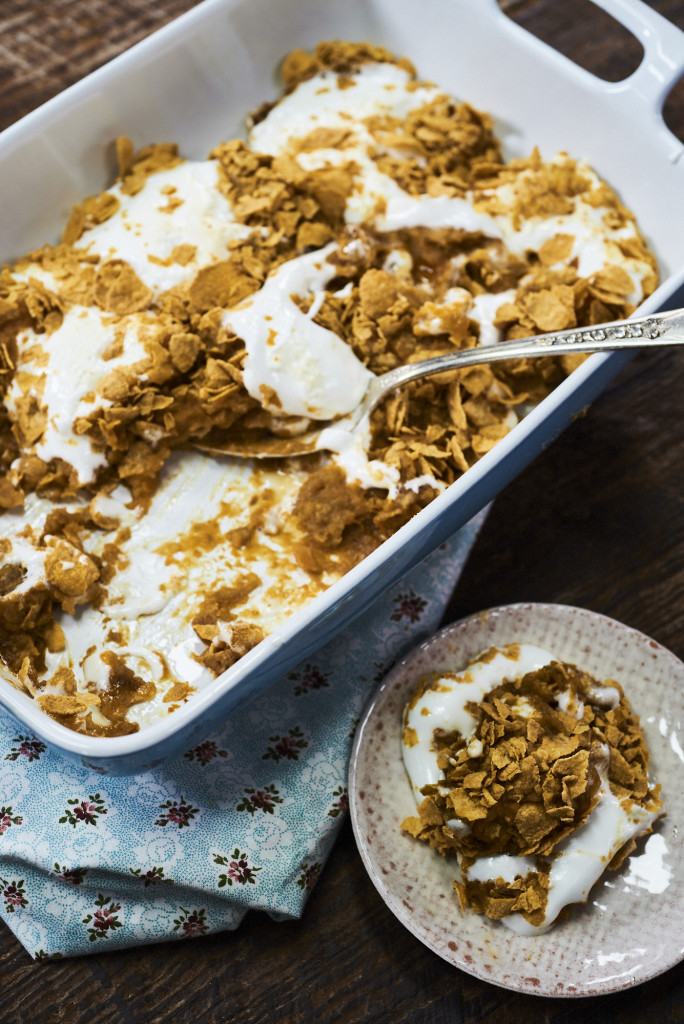
So, take this Wednesday, and be reminded of the fact that dreams DO come true. That things happen in our lives that are beyond our imagination or understanding. And for that, we take marshmallows, roll them sweet potatoes, pecans, and cornflakes, and bake their happy selves until they are lightly toasted. Let’s raise a gooey treat to the fact that life is good- and dreams are worth pursuing.

Luv y’all!

Sweet Potato Puffs
Sweet Potato Puffs

Sweet Potato Puffs by Faye House from The Nashville Cookbook

These easy sweet potato treats will be the hit of your next get-together! They take only a few minutes to throw together after you boil the sweet potatoes, and you get to use an immersion blender.

What You Will Need

  • 4 large sweet potatoes (I like Plano Farms in Nashville; about 2.6 lbs)
  • 4 tablespoons melted butter
  • 4 tablespoons brown sugar
  • 4 tablespoons heavy cream (I like JD Country Milk– their chocolate milk is LEGIT)
  • 1 cup chopped pecans
  • 5 cups cornflakes
  • Jumbo marshmallows (the big daddy kind- absolute biggest you can buy)

What You Will Do

  1. Boil the sweet potatoes until they are tender. Preheat oven to 375 and spray a 9X13 baking pan with cooking spray.
  2. Drain potatoes, then pour into a large bowl. Add the butter, sugar, heavy cream. Whip with an immersion blender until smooth. Wear large apron to guard against sweet potato splatters. Consider wearing a hair net because if, like me, you have long hair, it might end up on your ends.
  3. Stir in pecans to the potatoes.
  4. Pour cornflakes into a large bowl, then crush with your hands (#fun).
  5. Dip jumbo marshmallows into the potato mixture, covering evenly. Now, roll the marshmallows in the cornflakes, then place into 9X13 baking pan.
  6. Once the pan is full, bake for 15 minutes, or until the tops are toasty brown and the marshmallows have melted a bit. Enjoy immediately! (This is a now tater, not a later-tater!)