Fig Layer Cake with Cream Cheese Frosting

Fig cake wrapped in glorious cream-cheese icing.

“The best way to work through a post-Thanksgiving food coma involves a cup of black coffee and fig layer cake.”

This was my original opening line, as I attempted to post/write this on Thanksgiving day.

“Yes, I have already had a slice. Yes, my stomach feels so full that I can not move. But, this cake- y’all- my family and I had a moment.”

That was my second line. And then- the tryptohan from the turkey kicked in, I actually did fall into a food coma, and slept for a day.
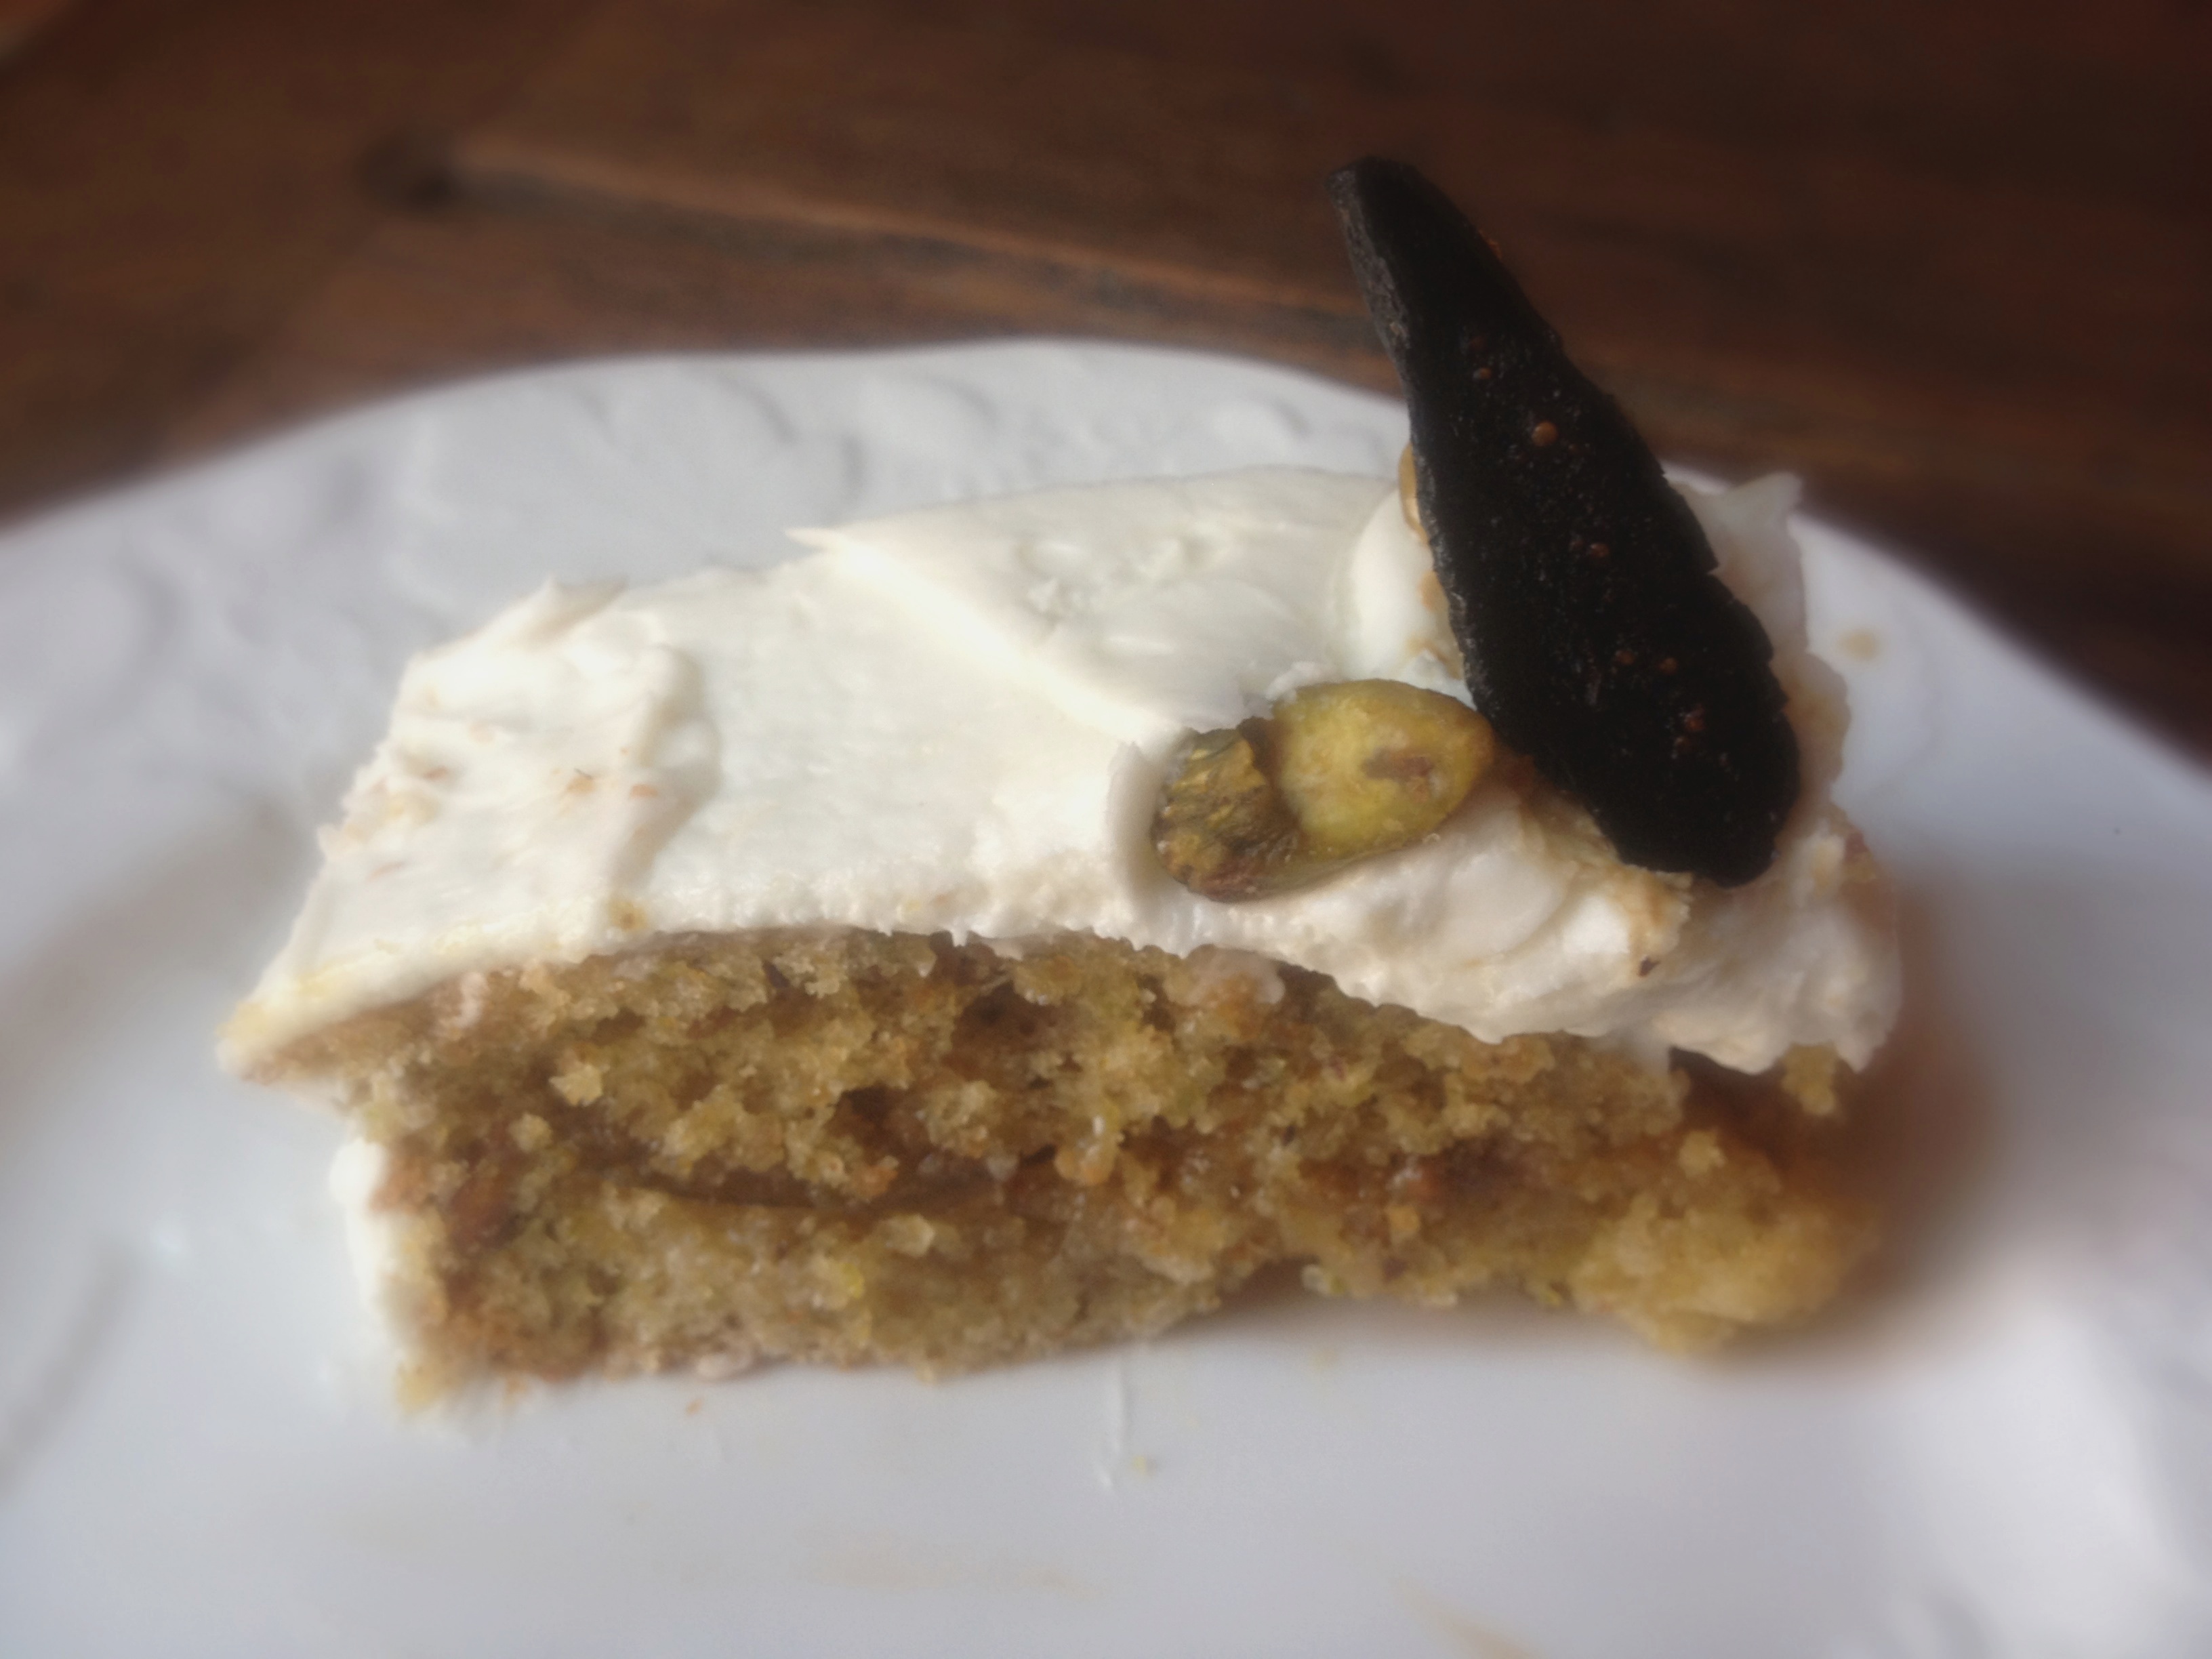
Fig cake in a dream sequence.

But now, here we are, four days later- and my mind has cleared (a bit).

The nutty, slightly salty richness of pistachios layered between sweet figs and topped off with a light layer of cream cheese frosting is remarkable. This has won top honors as my next go-to, impress-your-neighbor cake. And it should be yours too. It was easy to make, involves three simple recipes (or two, if you are like me, bribed your co-worker, and used fig preserves instead of making your own fig compote) and turns out beautifully.

My incredible photographer-brother took this for me. It was way more beautiful than mine, so it fits here.

Fig Layer Cake (This recipe was taken from one of my favorite websites, DesignSponge)

For the Fig Compote:

Sweet talk your incredibly generous co-worker into a can of fig preserves in exchange for brown butter banana bread.

If you don’t have an incredibly generous co-worker who does his own canning, you can make your own.

What You Will Need:

1 1/2 cups whole dried figs
1 1/2 cups water
the juice of one orange (about 1/3 cup)
a couple dashes of salt
2 tablespoons honey

What You Will Do:

Chop figs into small chunks, about the size of peanuts.  Cook in a saucepan with water, juice, and salt until figs are soft and water is evaporated, about 20 minutes.  Add honey and cook for a minute more.  Let cool.

For the Pistachio Olive Oil Cake:

What You Will Need:

1 cup shelled pistachios
1 cup flour
1 1/2 tsp baking powder
1/4 tsp salt
3/4 cup sugar
1/2 cup extra virgin olive oil
1/2 cup milk
2 eggs
2 tsp lemon juice

What You Will Do:

Preheat oven to 350.  Grease 8×8 inch baking pan with cooking spray.

Place pistachios in a food processor.  Pulse them until they are the texture of small gravel (about the size of a half-pea); remove about half of the gravel-sized pieces.  Pulse the rest of the nuts until they are the texture of coarse sand.

In a bowl, combine finely ground pistachios, flour, baking powder, salt, and sugar.  Stir until well combined.  Pour mixture into an electric mixer, then add oil and milk.  Beat with an electric mixer until blended.  Add eggs and lemon juice and beat until mixed.  Stir in the coarsely ground pistachios.

Pour batter into greased pan.  Bake for about 30-35 minutes, or until edges are lightly brown, and inserted knife comes out clean.  Let cool.

For the cream cheese frosting:

What You Will Need:

1/2 stick butter, room temperature
4 oz. cream cheese
2 cups confectioners sugar

What You Will Do:

1/2 stick butter, room temperature
4 oz. cream cheese
2 cups confectioners sugar

Mash ingredients together until roughly combined.  Beat with an electric mixer on high until creamy and well-combined. This method is my new favorite and guarantees really fluffy icing. I may or may not have tasted it multiple times, just to be sure.

To assemble the cake:

Make the fig compote filling first. Let it cool.

Make the pistachio-olive oil cake. Let it cool.

Make the icing. Try not to eat it.

Once the cake has cooled, slice it in half horizontally with a serated knife. Spoon your fig preserves over the bottom cake layer, smashing the figs evenly into the cake. If you made the fig compote, you can spread that evenly too. Then, put your other cake layer on top of the fig layer, and ice the whole thing generously with the cream cheese frosting. Top with sliced dried figs and extra pistachios.

Honey Buttermilk Biscuits

Beautiful, flaky, layered biscuits.

Finally, finally, biscuit success has been achieved.

I don’t know what it is about the relentless desire I have had to make these work. Maybe it’s the fact that I am the oldest of three and become a different person when competition is involved (I once kicked my sister off of my doubles team because I thought she was making us lose); maybe it’s the stigma of growing up in the South and somehow feeling I didn’t quite measure up as a cook if biscuits weren’t in my repertoire. 

Oh, and it could be the flashbacks of what happened the last time I tried to make sweet potato biscuits; you can check that post out here.

But these-this recipe-is pretty foolproof. Just make sure your butter is chilled, you have a gentle hand when stirring the buttermilk/honey mixture into the flour, and you thoroughly flour your kneading surface. As in, pile the flour up and then shake some more out just in case. I like to keep a small bowl of flour by my cutting board to dip into. And it keeps my gummy hands out of the flour bag.

I was also so intent on making these work that I literally measured out the “rectangle” shape the dough should fit into with white icing. OCD, maybe- but I was determined.

Obsessive? Maybe- I like to think of it as mise en place.

So for all you who are also biscuit-challenged, you can do it. Take heart- and proudly pull these babies out of the oven. They smell amazing. And, success is sweet.

Honey Buttermilk Biscuits

This recipe is adapted from Allrecipes.com Flaky Buttermilk Biscuits

What You Will Need:

  • 2 cups  all-purpose flour (This is the best flour to make biscuits with)
  • 2 1/2 teaspoons baking powder
  • 1/2 teaspoon salt
  • 5 tablespoons chilled butter, cut into small pieces (this butter tastes the best, trust me)
  • 3/4 cup buttermilk (I like the full-fat version)
  • 3 tablespoons honey (this is my favorite)

What You Will Do:

  1. Preheat oven to 400°.
  2. Weigh or lightly spoon flour into dry measuring cups; level with a knife. Combine flour, baking powder, and salt in a large bowl; cut in chilled butter with a pastry blender or 2 knives until mixture resembles coarse meal, or it is about in pea-sized pieces. Cover and chill 10 minutes in your fridge.
  3. Combine buttermilk and honey with a whisk, stirring until well-blended. Add buttermilk mixture to flour mixture; stir just until moist. Key word: gently stir. If you are one of those people who take out your aggression on your kitchen utensils/and/or recipes, please go stir something else at this point. Then come back to your dough once your issue is resolved.
  4. Turn dough out onto a floured surface (it is better to over-flour here).  Knead lightly 4 times. Roll dough into a 1/2-inch-thick, 9 x 5–inch rectangle; dust top of dough with flour.
  5. Fold dough crosswise into thirds as if folding a piece of paper to fit into an envelope. You are going to fold the dough towards you like you would if a sheet of paper is in front of you and you are folding it into thirds to put into an envelope. 
  6. Re-roll dough into a (1/2-inch-thick) 9 x 5–inch rectangle; dust top of dough with flour. Fold dough crosswise into thirds; gently roll or pat to a 3/4-inch thickness. Cut and lift dough with a 1 3/4-inch biscuit cutter (don’t twist your cutter as you cut these- that makes the edges rough) to form 14 dough rounds.
  7. Place dough rounds, 1 inch apart, on a baking sheet lined with parchment paper or cooking spray. Bake at 400° for 12 minutes or until golden. Remove from pan; cool 2 minutes on wire racks. Serve warm.
Ok, this is your last biscuit picture. Did I mention how proud I was?

Pumpkin Hummus

I think the birds are jealous of my dip.

They call the first line of a story in journalism school the hook. I was hoping that the title of this post might be your hook.  And I know- it sounds strange. But don’t stop reading now; this dip is delicious.

Once I brought up the idea of a pumpkin appetizer (see previous post) I got so excited at the prospect that I couldn’t relent until I found one that would work. And for the five of you that read this blog, I hear you- you are tired of pumpkin posts. I sense it. But this recipe is amazing- and I promise you it works.

This is my last pumpkin photo for a while. Maybe.

Combining two of my favorite foods (pumpkin+hummus) makes me a bit giddy about what you are about scoop into. This hummus is creamy, rich, and briney with a hint of lemon and garlic. And it would make a perfect appetizer for your Thanksgiving meal. Start with pumpkin hummus, end with pumpkin pie. Which, to my family-you will be relieved to know-will not be my dessert of choice this year.

So bust out your Pilgrim hats (or Indian headdresses), whip out a can of pumpkin, and get food processing.

This recipe is taken from Cooking Light with a few of my own tweaks.

What You Need:

  • 4 (6-inch) pitas, onion flavor (or any of your choosing), each cut into 8 wedges
  • 2 tablespoons tahini
  • a half of a lemon, squeezed and de-seeded (if you like your hummus more lemon-y, reserve the other half just in case)
  • 1 generous teaspoon ground cumin
  • 1 teaspoon olive oil plus more if your food processor is like mine, which means tiny and the blades get stuck
  • 3/4 teaspoon salt
  • 1/8 teaspoon ground red pepper
  • 1 (15-ounce) can pumpkin
  • 1 garlic clove, roughly chopped, which may be uneccessary because we are putting it into a food processor for goodness sake
  • cilantro for garnish

You Will

  1. Preheat oven to 350°.
  2. Cut your pitas in half, then cut each half into thirds with a pizza cutter. Toss the pieces lightly with a drizzle of olive oil and sea salt.  Bake them on a cookie sheet at 350° for 10 minutes or until toasted. (Side note: make sure and space the pieces with room to breathe on each side for the best, crispiest edges.)
  3. Put tahini and the next seven ingredients (through garlic) in a food processor, and process until smooth and a uniform color and consistency. Spoon hummus into a serving bowl; sprinkle with cilantro (or parsley or basil), if desired. Serve with toasted pita wedges.

Black Bean, Turkey, and Pumpkin Chili

Like fall in a bowl.

I think I may be a bit pumpkin-obssessed.

This comes as no surprise to those of you who read my next-to-last dessert post, but there is something about the feel of the season we are in that makes it taste even better. It’s below 60; leaves are falling; the wind is so frosty now it takes my breath away when it blows; and warm, comforting, pumpkin-y foods are the absolute best.

Since I went with a pumpkin dessert last post, I thought a pumpkin entree should be next in line. Come to think of it, now that we are working backwards, a pumpkin appetizer should be up next. And for those of you brave enough to attempt it, we could even turn this into an all- pumpkin meal. Oooh, with a pumpkin chai to drink? Yes please.

Fall’s sunniest flowers

And don’t be afraid if you aren’t quite as obssessed with pumpkin as me. This recipe is simply a black bean chili with extra cumin and a can of pumpkin swirled in. The pumpkin gives the chili a creamy, subtly sweet flavor that I am sure I will go back to again.

Black Bean and Pumpkin Chili (adapted from Whole Foods version)

What You Will Need:

  • 2 tablespoons extra-virgin olive oil
  • 1 small yellow onion, chopped, chopped
  • 1 green bell pepper, cored, seeded and chopped
  • 2 jalapeños, seeded and finely chopped
  • 2 cloves garlic, finely chopped
  • 1 pound ground white or dark meat turkey 
  • 1 can (14.5 ounces) diced tomatoes, with their liquid (I used Hunt’s spicy red pepper version)
  • 1 can (15 ounces) pumpkin purée
  • 1 bag frozen veggies
  • 1 cup water
  • 1 tablespoon cumin
  • 1 teaspoon chili powder
  • 1/2 teaspoon salt
  • Ground black pepper, to taste
  • 1 can (15 ounces) seasoned black beans, rinsed and drained

What You Will Do:

1. Heat oil in a large pot over medium high heat until it makes tiny bubbles.

2. Add onion, bell pepper, jalapeños and cook, stirring frequently, until tender, about 5 minutes. Add the garlic and cook for about a minute more.

3. Add turkey and cumin and chili powder and cook until until browned; just until it isn’t pink. Don’t cook the turkey too long or it will get rubbery.

4. Add tomatoes, pumpkin, water, and salt and pepper and bring to a boil.

5. Reduce heat to medium low and add beans.

6. Cover and simmer, stirring occasionally, for 30 minutes more.

7. Add a bag of frozen veggies of your choice (I like Italian blend) and let it just heat through.

Ladle chili into bowls and serve with sour cream, cheese, tortilla chips, and/or cilantro. Then revel in eating pumpkin (again) for dinner.

Red Velvet Brownies

Red velvet- lightly-sweet, moist, and full of semi-sweet chocolate

Oh, red velvet. Of all the flavors of dessert, I feel you are the most misunderstood. And for that, I would like to formally apologize on behalf of those who do not know what they do and/or taste.

Last night I had the distinct privilege of watching Steel Magnolias (as you can see on the Info page of this blog- this movie is near and dear to my heart) with some of my best girl friends. And in honor of the armadillo cake in the movie -“Who knows what even goes into makin’ gray icin?!'” (as quoted by M’Lynn)- and the fact that my favorite football team, whose colors are also red and gray, play this evening, red velvet brownies were in order.

Red Velvet Brownies (from Southern Living)

What You Need:

  • 1 (4-oz.) bittersweet chocolate baking bar, chopped
  • 3/4 cup butter
  • 2 cups sugar
  • 4 large eggs
  • 1 1/2 cups all-purpose flour
  • 1 (1-oz.) bottle red liquid food coloring (All I could find was icing coloring gel, and it worked fine)
  • 1 1/2 teaspoons baking powder
  • 1 teaspoon vanilla extract
  • 1/8 teaspoon salt

What You Will Do:

  1. Preheat oven to 350°. Line bottom and sides of a 9-inch square pan with aluminum foil, allowing 2 to 3 inches to extend over sides; lightly grease foil. (Confession: I can never seem to figure this method out so I just sprayed a 9X13 pan with cooking spray).
  2. Microwave chocolate and butter in a large microwave-safe bowl at HIGH 1 1/2 to 2 minutes or until melted and smooth, stirring at 30-second intervals. Whisk in sugar. Add eggs, 1 at a time, whisking just until blended after each addition. (Ok, at this point, my arms were burning and I thought my wrists were going to give out. I suggest abandoning the whisk at this point. I think people who write baking recipes either have biceps of steel or no feeling in their appendages.) Gently stir in flour and next 4 ingredients.  Pour mixture into prepared pan.
  3. Bake at 350° for 44 to 48 minutes or until a wooden pick inserted in center comes out with a few moist crumbs (I only baked mine for 3o minutes, and they were perfect). Cool completely on a wire rack (about 2 hours).
  4. Lift brownies from pan, using foil sides as handles; gently remove foil.

I iced my brownies with sparkle white icing. This also made excellent “A’s” on the bite-size mini’s for the aforementioned football team.

Happy Pumpkin Week!

Layers of sponge cake, pumpkin butterscotch, and whipped cream nestled together.

This is a special week because 1.)We can eat as much Halloween candy as possible in one sitting without feeling guilty (which for me involves copious amounts of candy corn) and 2.) We celebrate pumpkins.

There is something nostalgic and happy about pumpkins. They remind me of everything great about fall- hay rides, adorable kids in costumes, cooler air and the smell of sun-burnt leaves. They also remind me of the time as a kid when I tried to scoop out the inside of a pumpkin and eat it.

I was also known to eat dirt from our garden believing in my small brain it was Oreo crumbs. But, I digress.

I learned my lesson the hard way and that pumpkin seeds are meant to be roasted before swallowed. And since then, it has also stirred a fascination in me to cook with pumpkin- it’s slightly sweet, spicy-creamy taste is so reminiscent to me of fall and bonfires and starry nights.

This was the most epic shot of a pumpkin trifle ever.  

So, in celebration of fall, candy, and fun here is a great pumpkin trifle recipe I made this week for my small group of wonderful ladies who deserve brilliant fall desserts. If there was ever a time to be happy about pumpkins, raw or otherwise, it would be now.

Pumpkin Butterscotch Trifle  (This recipe was adapted from A Taste Of Home’s version)

What You Will Need

  • 2 to 3 cups cut-into-cubes spice cake (I made Duncan Hines spice cake from the mix)
  • 2-1/2 cups cold milk (I used low-fat, because in my mind it makes this healthy)
  • 1 can (15 ounces) solid-pack pumpkin
  • 4 packages (3.4 ounces each) instant butterscotch pudding mix (I used Jello Cook and Serve)
  • 1 teaspoon ground cinnamon
  • 1/4 teaspoon ground nutmeg (I used a scant 1/4 teaspoon here and added a bit of freshly grated nutmeg to mine)
  • 1/4 teaspoon ground ginger
  • 1/4 teaspoon ground allspice
  • 2 cups heavy whipping cream
  • A splash of vanilla extract
  • A trifle dish (or huge salad bowl; or one of those plastic pumpkin things you put candy in. Be creative as you celebrate your dessert!)

What You Will Do

  • Cut your cooled spice cake into four sections. From each section, cut the cake into one or two inch squares. You should have four piles of cake squares.
  • Put the bowl you are going to make whipped cream in, along with the beater, in the freezer.
  • Meanwhile, in a large bowl, combine the milk, pumpkin, pudding mixes and spices; beat until smooth. Once the ingredients are combined, pour your pudding liquid into a medium-sized saucepan and bring the mixture to a boil (this should take a about two minutes on medium high; watch it though because it bubbles quickly).
  • Once the mixture starts bubbling, stir it frequently, making sure that the bottom of the pudding doesn’t burn, until it becomes pudding consistency. I stopped cooking mine once it felt about like the texture I would serve it if it was cold. And it’s even better if you get a little bit of darker edges around the sides and bottom of your pan. This will give your mixture a nice roasty flavor.
  • Take the pan off of the heat to let your pudding cool. If you like, you can put it in the fridge to quicken the cooling process.
  • In the meantime, take your mixing bowl and beaters out of the freezer. Whip the cream and a splash of vanilla until stiff peaks form.
  • Commence eating candy.

Once your pumpkin pudding is cooled:

  • Make one layer of your spice cake cubes in the bottom of your serving bowl.
  • Spoon half of your pudding over your cake layer. Then sprinkle that with a second layer of cake cubes (ok, cake cubes is just fun to say).
  • Top your second layer of cake cubes with half of your whipped cream.
  • Sprinkle with a third portion of cubes. Top with the remaining pumpkin mixture, then the rest of the whipped cream.
  • My whipped cream got a bit out of control and was overflowing my dish, but in the original recipe I found I think you are supposed to sprinkle another layer of cake cubes on top. I thought it was prettier with cinnamon, so you can either top it with cinnamon or the rest of the cake cubes. But then that would be a lot of cake cubes.
  • Double-cover your trifle with plastic wrap and chill for at least 2 hours before serving.  Yield: 12-15 servings

Southern, Foodie Birthdays

Chocolate cake with chocolate, chocolate-chip frosting. Yes, it was everything you think it would be.

Combine birthdays and food together, and voila! You have the perfect recipe for a great day. Extend this equation over the course of two weeks and your (my) birthday dreams have now come true.

Of all the birthdays of my life, this past one has been the most dear, and the most special. Turning 16 was great, but let’s be honest- having the chance to eat all you want at 20 of your favorite restaurants, cheer on your favorite football team with your sister at your side, and eat two birthday cakes (chocolate and red velvet) is pretty darn amazing.

Below are some highlights from my food-themed birthday week(s). I hope it inspires you to also don your own birthday tiara, cut a large slice of cake, and count your blessings. Because my friends, birthdays and fabulous food or not- we have so, so many.

This amazing establishment had fritters for the bread bowl, and fried moon pies for dessert.
Front and center are Tennessee cherry chili peppers.
Next best birthday gift: cherry chili pepper hot sauce
RTR!
A great way to start a new year: “Bennie and the Eggs”

Black and White Triple-Chip Cookies

I won’t judge you if you make this your computer background.

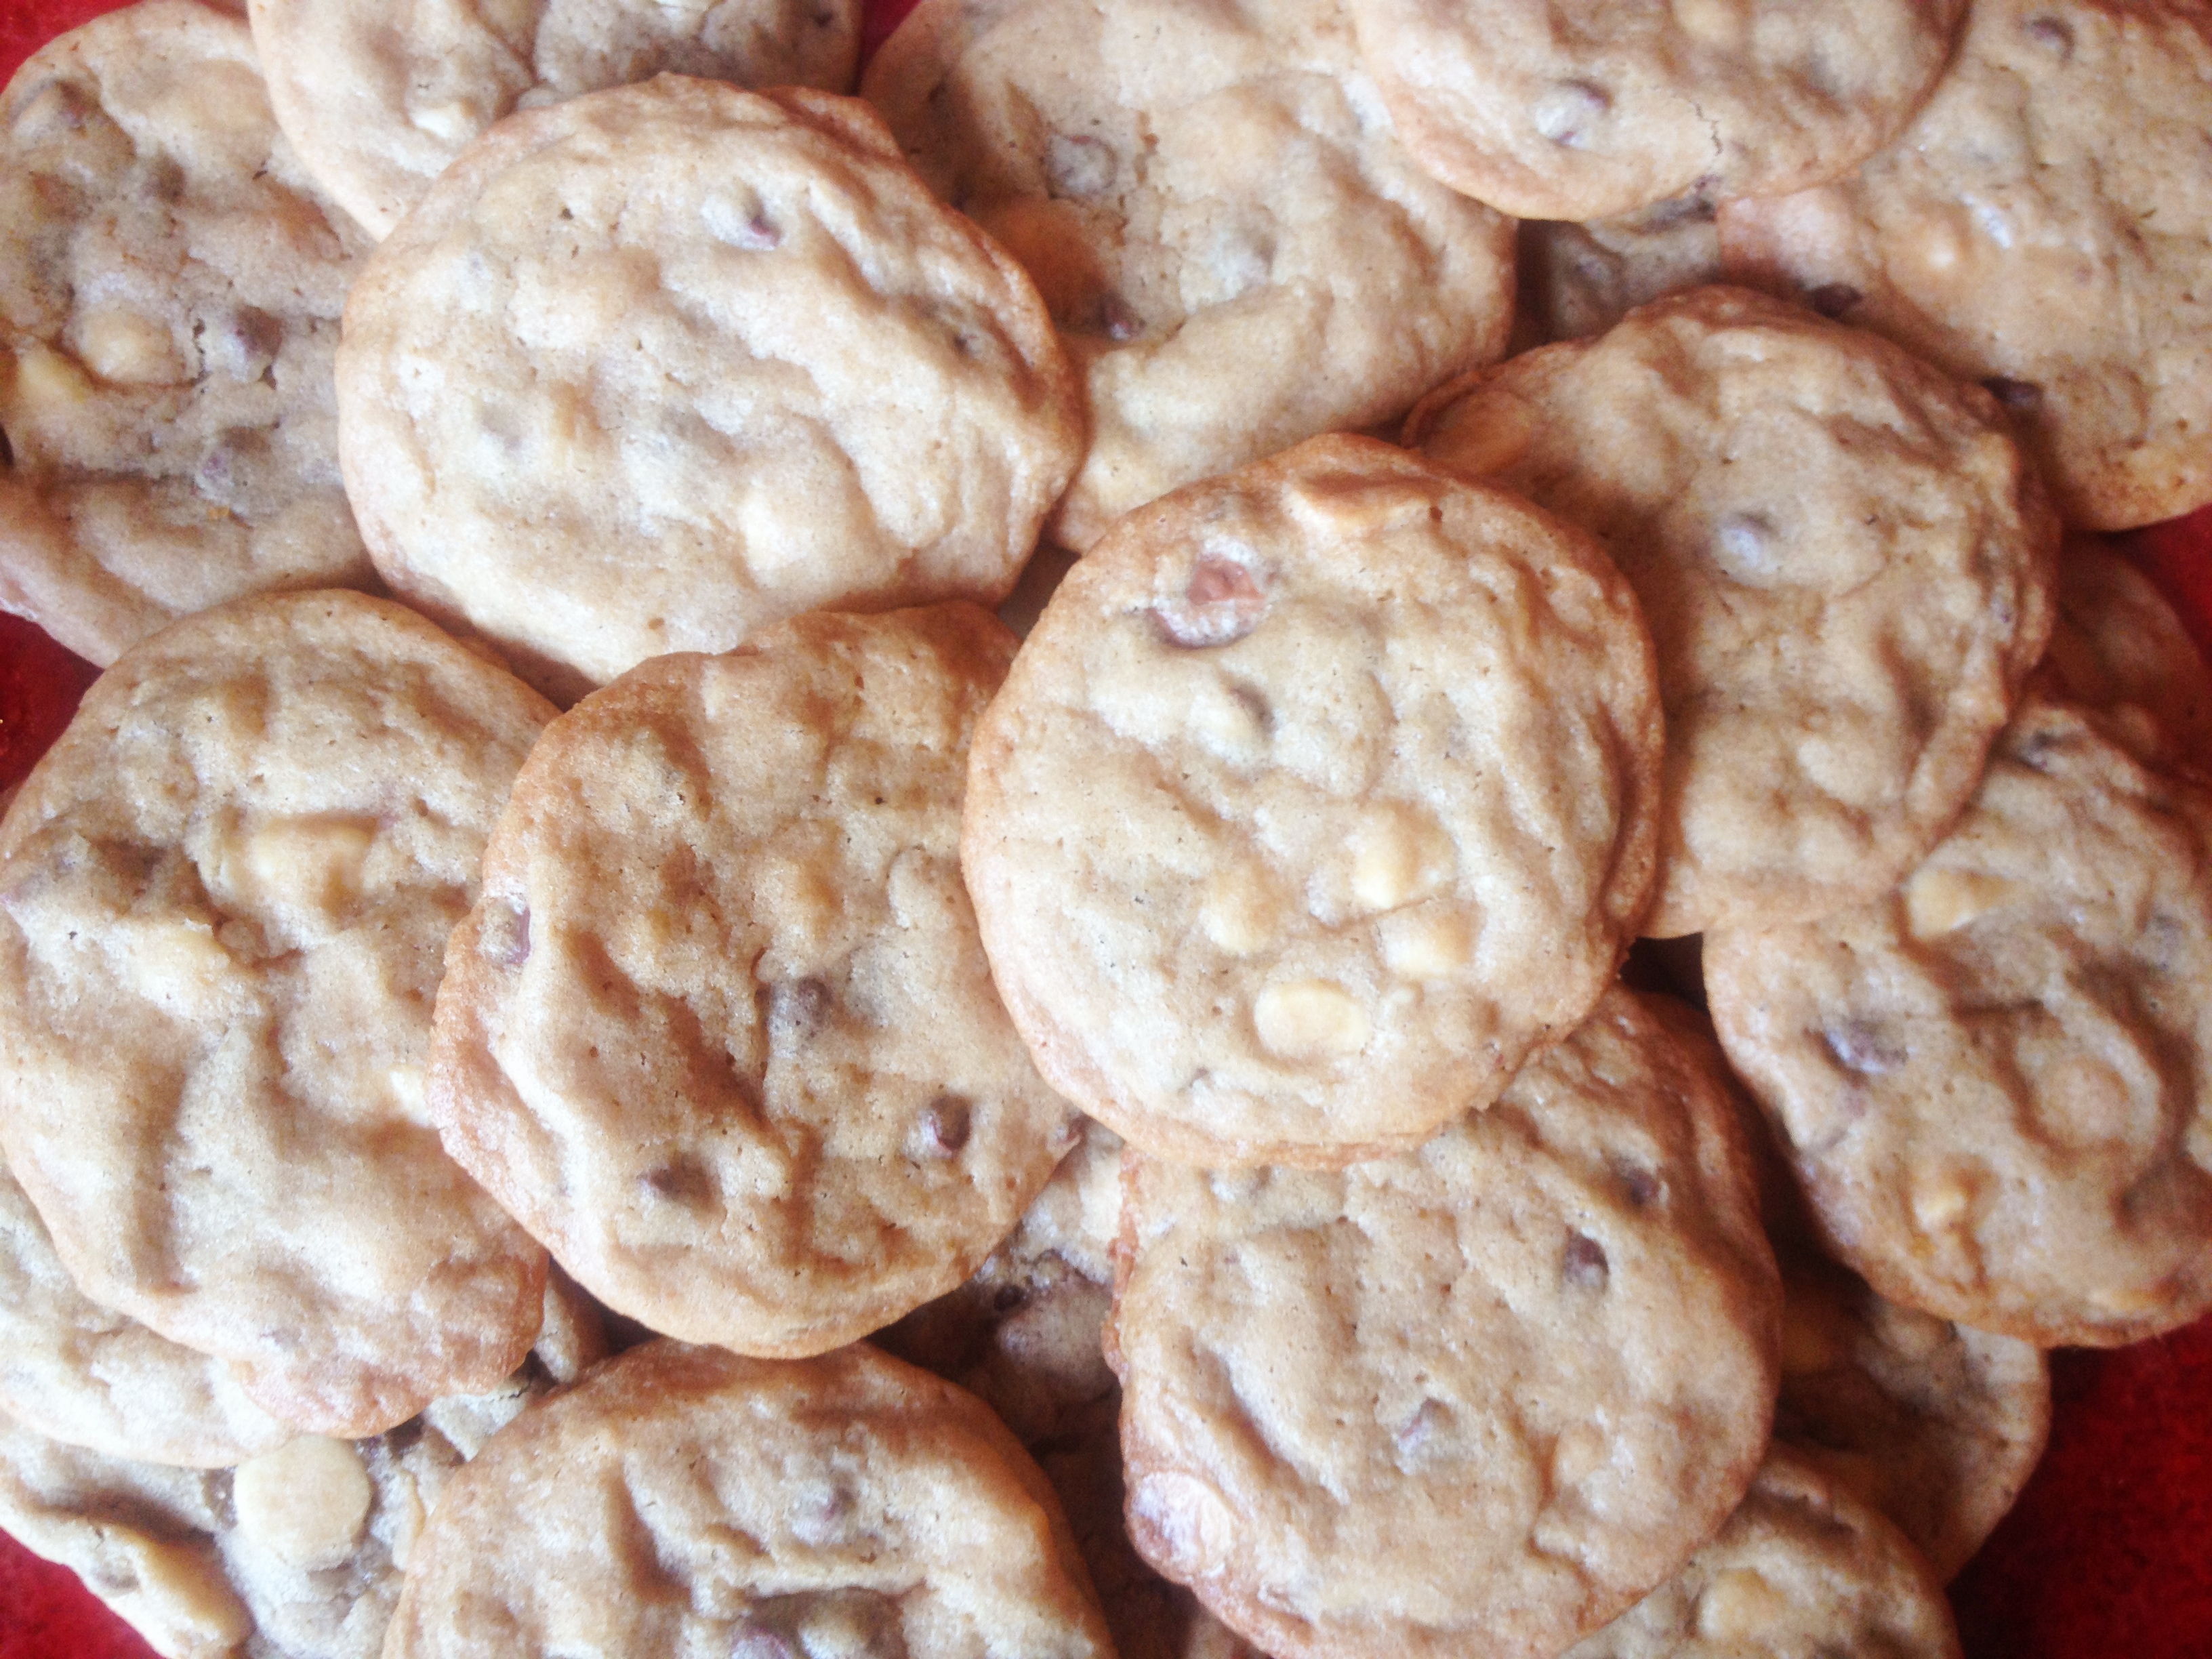
Nothing says luv like a platter of warm chocolate chip cookies, right out of the oven.

And to make these even more luv-able, this recipe uses three different types of chocolate. That’s right- dark, milk, and white chocolate, all in one cookie. Indecisive chocoholics unite! It is time for you to finally make a decision (well, sort-of).

Now, this recipe may seem groundbreaking and fancy, but I promise you it is easy. And I made it from the chocolate chips I had leftover in my pantry from my failed attempt to make homemade peanut butter cups. (Note: I do not know why I tried this. There truly is nothing better than a Reese’s or my friend Emme’s peanut butter eggs she gets in NYC. I just couldn’t make it as deliciously. I mean, the Mars corporation makes Milky Way Midnights. Enough said.)

There is even a trick to these cookies (hint: it involves dissolving baking soda in water), which gives them their crispy on the edges, chewy-on-the-inside texture.

And with dropping temperatures (It’s low 60’s today in the South! Cold front coming through!) now is the perfect time to whip out that Kitchen Aid, find all the chocolate you have, and make a cookie that requires next-to-no decision making. Because let’s be honest- when it comes to chocolate, why shouldn’t we invite everyone to the party?

The Best Chocolate Chip Cookies (taken from AllRecipes.com. I just love this site.)

What You Will Need:

  • 1 cup butter, softened
  • 1 cup white sugar
  • 1 cup packed brown sugar
  • 2 eggs
  • 2 teaspoons vanilla extract
  • 3 cups all-purpose flour
  • 1 teaspoon baking soda
  • 2 teaspoons hot water
  • 1/2 teaspoon salt
  • 2 cups chocolate chips (Here is where the fun comes in. I used semi-sweet (about 60% cacao), white, and milk chocolate chips.)

What  You Will Do:

  1. Preheat oven to 350 degrees F (175 degrees C).
  2. Cream together the butter, white sugar, and brown sugar until smooth. Beat in the eggs one at a time, then stir in the vanilla. Dissolve baking soda in hot water (I just brought a kettle to boil while I was beating the butter/sugar, let it simmer a bit, then added the water). Add to batter along with salt.
  3. Stir in flour, chocolate chips, and nuts. Drop by large spoonfuls onto ungreased pans. I use my Silpat mat here. This will take the nice crispy edges and chewy center to a whole-nother-level.
  4. Bake for about 10 minutes in the preheated oven, or until edges are nicely browned. It took 12 in my tiny oven. And then try and not all of these.

This makes lots of cookies. About 48 to be exact. 

Brown Butter Roasted Banana Bread

Browned butter meets roasted banana.

There is something to be said for a great recipe; one that you can go to again and again and get consistent results. This is one such recipe.

Banana bread is to the baking world what chocolate is to a pastry chef. It’s a basic- a building block that can become your signature, or unfortunately can become your downfall (cue flat piano keys here).

Due to my love of carbs and all things sweet bread,  I have made my share of banana bread. Some of the recipes I tried were good- but heavy and a bit greasy from using oil as a main ingredient. Or I would come across one that said it was “healthy” but tasted about as moist as day-old, stale toast (with the same level of flavor). Others had so much banana, it felt like I might as well have eaten the actual fruit with a box of sugar dumped on top.

Side note here: I do not understand why people put nuts in banana bread. Or in any kind of sweet bread. Or brownies. They are a distraction and take up surface area where their could be a swirl of chocolate/cinnamon/and/or fruit filling. Or just more brown butter and banana.

I came across this recipe it after I read an article by Jeffrey Steingarden in Vogue about the irresistibility of brown butter.  One more side note: why can you not access this article online? This is a travesty and something I would have linked you to.

Anyway, the questions began- what could I add brown butter to? And then Guilty Kitchen answered it for me. What about adding a basic to a basic: brown butter to banana bread? Brilliant.

This bread is the perfect texure- with a light crumble and dense, moist center. Roasting the bananas ahead of time rounds out the fruit’s sweetness, and the deep nuttinenss of the brown butter makes it smell and feel rich. Plus, it has whole wheat flour, and you can substitute Greek yogurt for the sour cream if you are feeling super, Jillian-Michaels-level healthy. I have made it that way and it was delicious.

With fall breezes in the air, it’s just about the perfect thing alongside this coffee from my wonderful friend at Feeling Full. Not so bad for a basic.

What You Need*:

3 medium bananas (fresh or frozen)
1/2 cup butter (I used unsalted)
1 cup brown sugar, packed
3/4 tsp salt
1/2 cup sour cream (or Greek yogurt)
1 tsp baking soda
1 cup cake flour (I used all-purpose and it worked fine)
1 cup whole wheat flour (I prefer King Arthur brand)
1 tsp cinnamon
1 tsp vanilla

What You Do:

1. Roast bananas whole with the peel on for 15-20 minutes in a 350°F oven. They should look almost black; if you use frozen bananas here, make sure you drain off any extra liquid after you take the peels off.

2. Grease an 8″ x 4″ loaf pan.

3. In small saucepan, melt butter over medium high heat. Do not stir, instead swirl the pan and watch until it begins to foam (I like to use a pastry brush to sweep the little brown bits off the bottom of the pan). Once the foam begins to subside, and the butter has browned sufficiently, remove from heat and set aside. Swirl the brown bits one more time to make sure they don’t stick to the pan.

4. In medium sized mixing bowl, stir together brown butter, salt and sugar. Don’t forget the salt at this stage! This may be a bit OCD, but it makes a difference, I think. Also, if you use salted butter, I wouldn’t add more salt. 

5. Stir the sour cream and vanilla into the sugar/butter mix. Mash bananas and add in as well (chunks are okay!).

6. In separate bowl, mix together the flours, cinnamon and baking soda. Stir until well combined.

7. Add the flour to the wet mix in two portions, but try not to over mix. I just stir until you can no longer see ribbons of flour.

8. Pour into greased loaf pan and bake for 45 minutes to 1 hour (in the already preheated to 350°F oven). 45 minutes worked great for me.

9. Cool 5-10 minutes in pan before turning out onto cooling rack. Turn upright and allow to cool completely, although you will be able to cut into it while it’s till warm. And it’s sooo good warm.

*As is par for the course with most of my recipes, this recipe is taken from The Guilty Kitchen with my additions in italics.

Chicken Tetrazzini

My new go-to dish.

I am a chicken tetrazinni convert.

Since childhood, I remember avoiding it.  In cafeteria lines, it was passed over every time in favor of it’s neighbor, baked spaghetti or chicken poppy seed casserole; I would have rather eaten another helping of canned green beans than touch the rubbery, tasteless blob of chicken goo. Or, in other circles, the chicken tetrazzini I came across was brought by well-meaning friends as a gift of family dinner. This version had the dreaded crunchy noodle syndrome: a lukewarm, almost cool bottom with a piping hot, tough, burnt-noodle crust.

But, as a good Southern child, I swallowed every bite, made a “happy plate” (which in my household meant not a speck of food was left), and vowed never to eat chicken tetrazzini again, as far as it depended on me.

When my friend Emme surprised me a few nights ago with a hand-delivered batch of her version, I admit my knee jerk reaction- Run. Far, far away, to pass along to a hungry neighbor I could feel less guilty about giving it to.

But, I should have known this experience would be unlike any I had before. Monique is an incredible cook. Her “Nana’s gravy” has changed my take on marinara sauce (they key is in marinating the meatballs/pork in the sauce all day long, people!) and so I decided to trust her and give it a try.

This chicken noodle dish was refreshingly different. It was creamy, and the noodles were al dente, and the chicken was seasoned and salty. There were even bright specs of red pepper and hearty mushrooms. Gone was the crunchy noddle crust- this was topped with a delicate layer of parmesan cheese.

It tastes even better in a large bowl. Because then you can eat more.

The moral of this story is that tetrazzini can be delicious. And this chicken tetrazzini is my new go-to recipe for sick relatives, new moms, and anyone else who needs a meal delivered. Because for all of the bad chicken tetrazzini memories I suffered, I feel it deserves to have a redemption in someone else’s mind. And for the next child who eats it, bon appetit. May your odds of your chicken tetrazzini being Emme’s recipe be ever in your favor.

Emme’s Chicken Tetrazzini

You will need:

1 16 oz bag of fine egg noodles

8 oz fresh slice mushrooms (white button)

1 Tablespoon Butter

1 Tablespoon Olive Oil

1 can cream of chicken soup (10 3/4 ounce can)

1 can cream of celery soup (10 3/4 ounce can)

22 ounces of chicken stock (fill your empty soup cans to measure)

5 ounces of Half and Half

4 cups of chopped rotisserie chicken

¼ C Chopped Pimentos or roasted red peppers (chopped)

½ to 1 C of freshly grated parmesan cheese

You will do:

In a medium sauce pan, heat butter and olive oil, add mushrooms and sauté until golden.  Add soups, stock, and half and half, and mix with a whisk to incorporate.  Heat on medium until the noodles are cooked (see below).

Meanwhile, cook the noodles according to directions—until al dente.  Drain noodles; add drained noodles back to noodle pot and add the following: soup/mushroom mixture, chicken, and pimentos.  Stir well.  Once incorporated add ½ cup to 1 cup (depends on how cheesy you like it) of fresh parmesan cheese and salt and pepper to taste.  Pour mixture into lightly greased baking dish. Sprinkle with any additional parmesan cheese.  Bake at 400 for 15 minutes until bubbly.

*If bringing to a sick friend or new mom, or freezing, Emme recommends not baking it ahead of time. Also, this makes a good amount, and it freezes well!