Gluten Free Banana Bread and My Life Well Loved

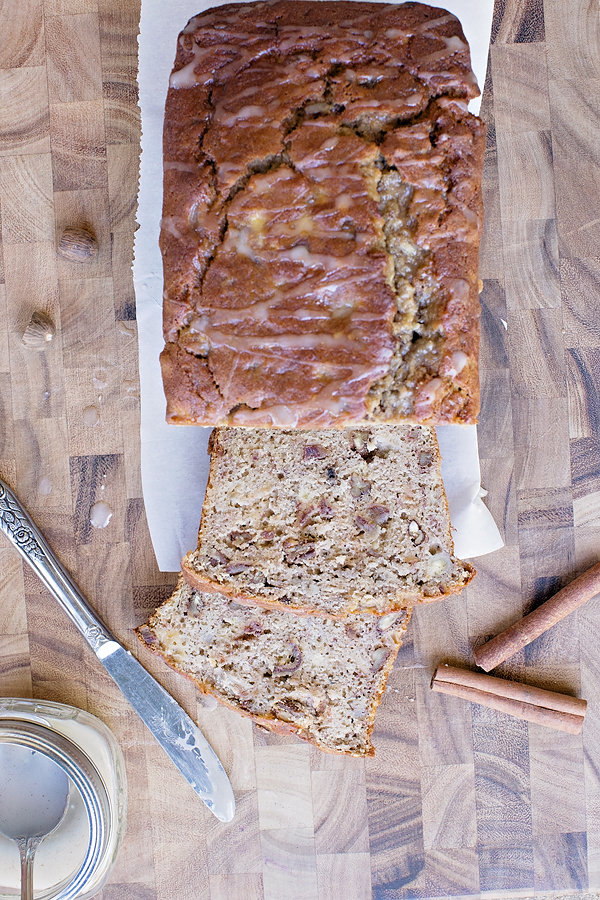
Gluten Free banana bread

Anyone who is familiar with Luv Cooks knows how much I adore banana bread. In my world, banana bread should probably have it’s own Saturday food group pyramid, stacked right above quality coffee and below fresh fruit, complete with a pajama-clad stick figure at the bottom advertising the importance of watching the Cooking Channel as exercise for your cooking muscles. Now this is something I could get behind!

And speaking of muscles, I am so excited to partner with my friend Heather Brown’s site My Life Well Loved for this post! Heather has a knack for succeeding at everything she puts her hand to; seriously, there is nothing she can’t do!; and her blog is NO exception. She is one of the most bubbly, kind-hearted, and energetic people I know, and her passion for life is one of my favorite things about her. She is also a social media wizard and the social media and blogger network director at e-meals.  So not only is she a fashionista, social media consultant, and Pure Barr instructor, she also has a passion for healthy eating.

So click here to visit My Life Well Loved, where you can check out Heather’s fabulous site and find an easy recipe for gluten-free banana bread I am so excited to share (with recipe by My Recipes) and photos by Magen Davis Photography. Enjoy and happy early Saturday!

Gluten Free Banana Bread

Chicken Divan and Making Dinner Time Count

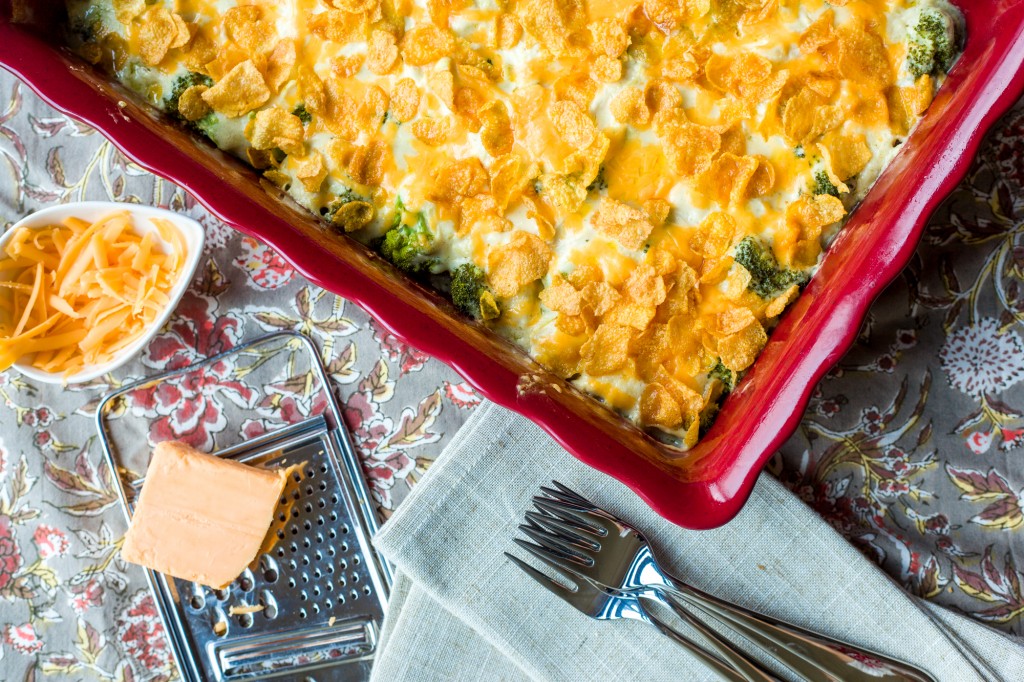
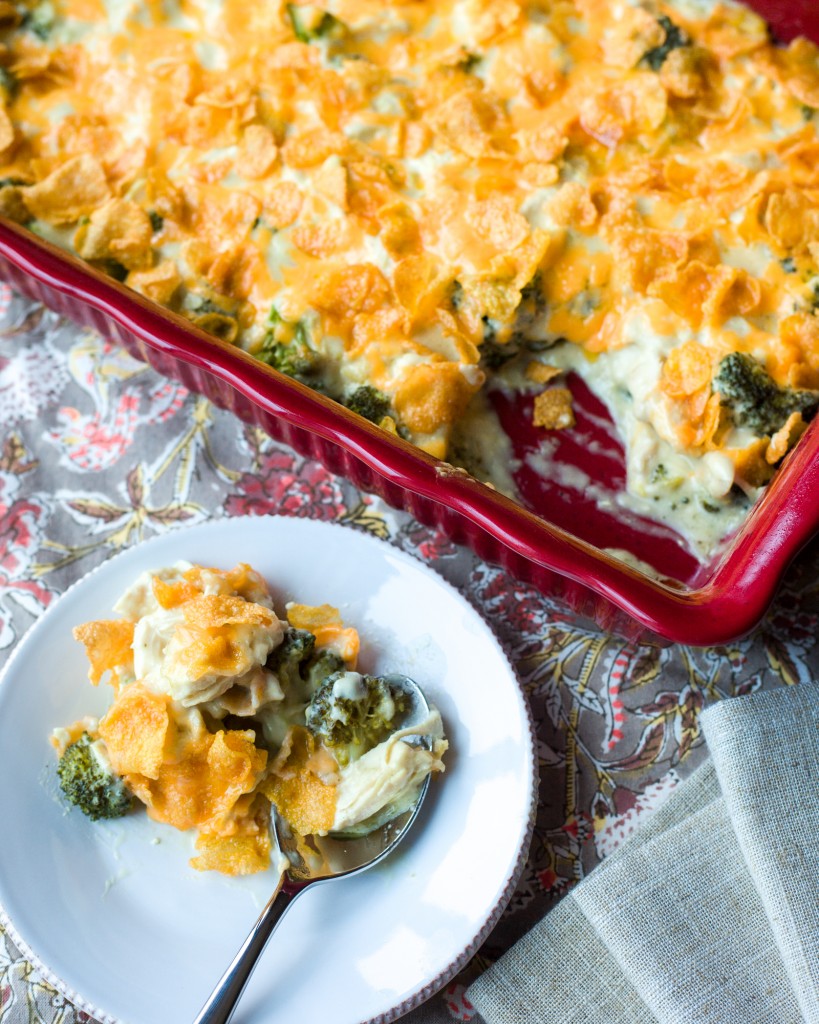
Chicken Divine (Divan)

Y’all!

Fall is in the air; life is in full, golden swing; I am running like a crazy person all over town to assist on shoots and plan a wedding (feelings of glee, planning anxiety and squeal here!! AHH!!), and hopefully we are all eating peanut butter granola energy bars to keep us going.

I can’t think of a better person to share this sweet season with and learn from than the always beautiful, inviting, and relationally gifted Mattye from the lovingkind blog! She is back for our second, October installment together on making meal time matter. And I’m here to share one of the easiest, most deliciously warm recipes I can muster, chicken divan. I think you are going to love hearing from her and making this delicious casserole (and I don’t use the words delicious and casserole together lightly).

So put on some snuggly clothes, smell something pumpkiny and preheat your oven as we hear from Mattye on how we can make our fall meals- admits the wonderful busyness of our lives- even more intentional.

Chicken Divine (Divan)

Make Mealtime Matter

Hey y’all! I’m so excited to be back on the Luv Cooks blog to share some advice that will make your marriage as savory and sweet as your cooking! I promise that if you will purpose to make mealtime matter and cook this Chicken Divan recipe, it will be a happy night in your kitchen and your marriage!

I am not an incredible cook, but I do know something that can make your mealtime significantly better than the average American household. I’m not about to reveal a secret spice, perfected family recipe, or magical cooking tool. In fact, my advice is more about what you leave out than what you put in.

Chicken Divine (Divan)
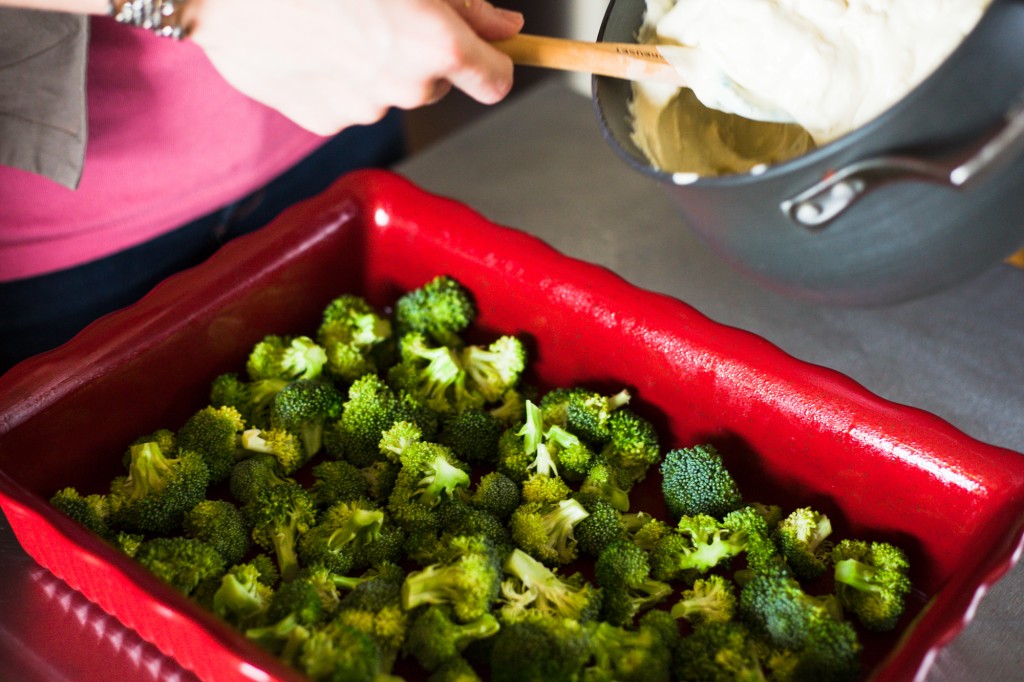
Fresh broccoli pre-saucing

You can literally transform mealtime in your home with one simple step: remove cell phones from the dinner table! Eliminating this one distraction will give you the chance to look into each others eyes rather than stare at a screen and share about your day in a conversation rather than in a status update.

My husband Woody and I made it a rule that no cell phones are allowed at the table for the Woodcock family before we even got married. While dating, we spent months watching husbands and wives and moms and dads at restaurants ignoring each other or their children in favor of their cell phones. While we were not innocent of this ourselves, it was seeing it take place with other people that really grabbed our attention.

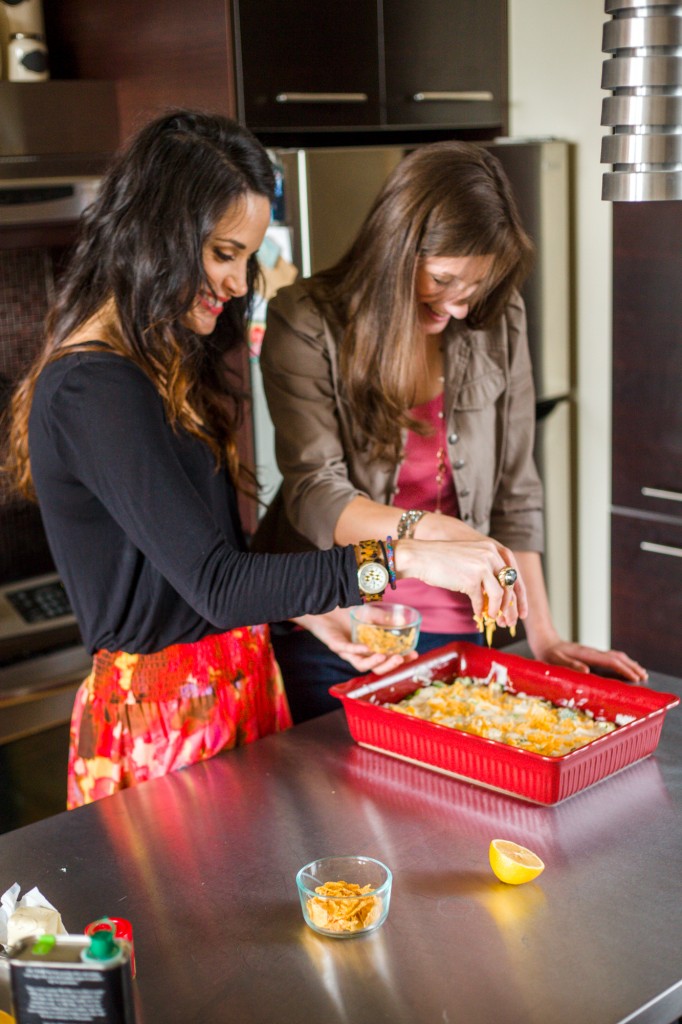
Mattye sprinkling cornflakes on top
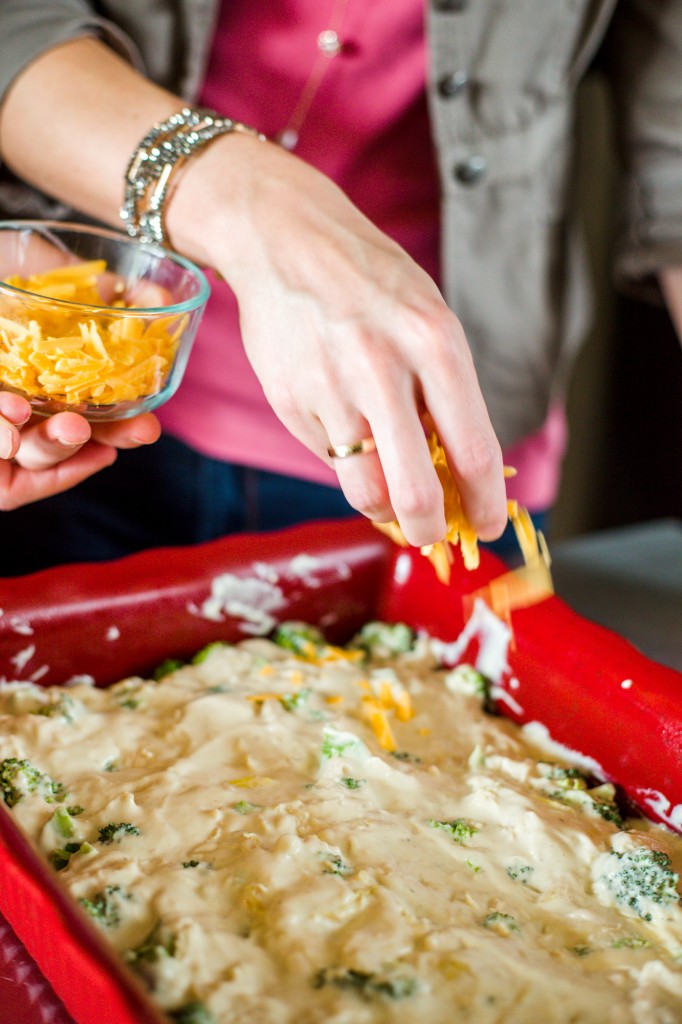
Mattye sprinkling cheese on top

We realized that if we don’t want to one day ignore our children, then we need to start by not ignoring each other. Thus, “no cell phones at the table” was established.

We’re not perfect, and we occasionally slip, but we consistently hold each other accountable. On the occasion one of us starts to pull out our phone to look something up, check a message, or share a photo, the other is quick to give a knowing look and say, “What are you doing?” which is enough for the other to slip their phone back in its place and wait until after dinner to use it. As we hoped it would, this has become a healthy habit in our lives. In fact, having a cell phone present at a mealtime with Woody, or anyone else for that matter, just feels unnatural to me now, and it’s all because of a good habit we made a point to develop.

I love that pairing cell-phone-free, intentional time with your spouse alongside mealtime sets it into a part of your schedule that already happens every, single day—eating! Essentially, you don’t have to find extra time in your schedule, you just have to be more purposeful with the time you already have.

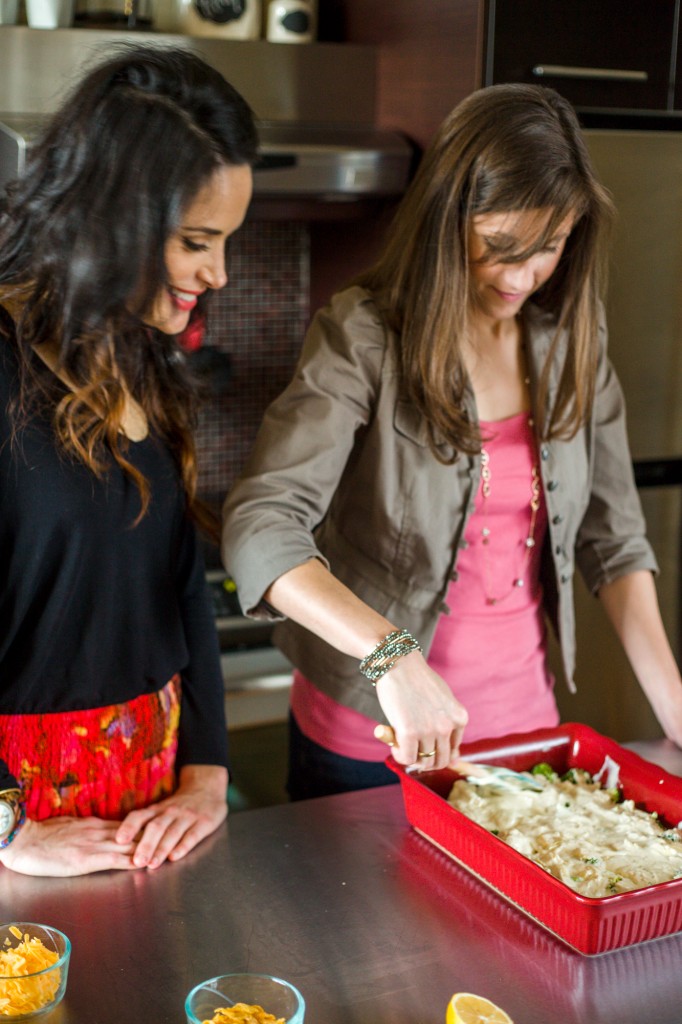
Mattye expertly smoothing out the top of our chicken divan

In our nearly two years of marriage, mealtime has become a gift to our relationship because we have chosen to make it matter. It is a consistent time we pause, connect and really see each other. Even on our busier days, a 20-minute meal can make a big difference for us simply by choosing to set aside our phones and other distractions and focus on one another.

When it comes down to it, this isn’t about living a life based on rules or restrictions; rather, it’s about taking a step back to look at your life, see what matters most to you, and find a way to prioritize it. You won’t always feel like making the extra effort to focus on what you really love most, which is exactly why deciding ahead of time is so important. Base your choice on the life you’re trying to build together, not on how you feel in the moment.

Need a snack while you bake? Bust out a box of cornflakes. Seriously, so good!
Chicken Divine (Divan)
Putting the final touches on our casserole

Friends, make mealtime matter. Make it a time where you don’t only refuel your body, but also your marriage. You can do it, and your future self will be thankful you did.

Chicken Divine (Divan)

Chicken Divan
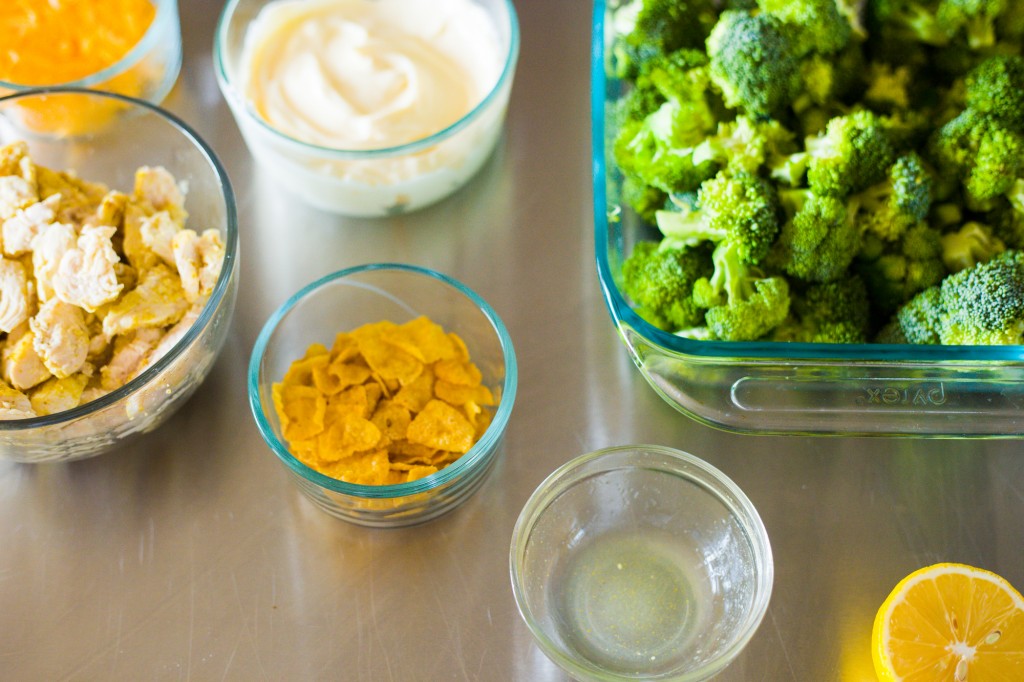
What You Need:
For shredded chicken:
  • 10 frozen chicken tenders (I bought one 32-ounce bag of chicken tenders and took 10 out)
  • 1 tbl olive oil
  • 1 tsp kosher sea salt
  • 1/2 tsp curry powder
For homemade cream of chicken soup:
  • 2 1/2 cups milk (I like unsweetend original almond milk)
  • 7 tbl gluten free flour
  • 2 chicken boullion cubes
  • 2 tablespoons olive oil
  • dash of curry powder
For casserole assembly:
  • 2 lbs fresh broccoli heads, lightly steamed in microwave*
  • 1 cup mayonnaise (I prefer Duke’s)
  • 1 teaspoon fresh lemon juice
  • 1 tablespoon unsalted butter
  • 1 cup grated cheddar cheese (I like Cabot Extra Sharp Cheddar)
  • 1 cup cornflakes
What You Will Do
  1. Preheat oven to 350 and lightly grease a 13X9X2 pan.
  2. Place frozen chicken tenders in an oven safe pan and coat in tablespoon olive oil. Stir together sea salt and curry powder, then sprinkle the spice mixture over the chicken tenders and lightly stir with spatula to evenly coat the chicken.
  3. Once the oven is ready, bake chicken for 30 minutes. Let the chicken cool, then shred to equal two cups of chicken.**
  4. While the chicken is baking, make your cream of chicken soup: In a medium saucepan, whisk together milk and gluten free flour until combined.
  5. Now turn heat to medium, then add bouillon cubes and 2 tablespoons olive oil, whisking constantly until bouillon dissolves and mixture thickens. Turn heat to low and whisk for a minute or two more, until no lumps remain. Take off heat and add a dash of curry powder (a shake or two).
  6. Once the cream of chicken soup has cooled a bit, add mayonnaise, lemon juice, and unsalted butter. Stir to combine with spatula.
  7. Line the bottom of your 13X9X2 pan with the lightly steamed broccoli, making an even layer of veggies. Top with shredded chicken. Using a spatula, gently pour the creamy mixture on top, making sure to scrape the sides of the bowl to get all of that goodness on the chicken/broccoli layer.
  8. Smooth the creamy mixture with your spatula. Top with shredded cheese, then sprinkle on cornflakes.
  9. Bake in 350 degree oven for 25-30 minutes, until cheese is melted and cornflakes look golden brown and crispy. Enjoy!
*I like to put the broccoli in a glass pan, cover with Saran Wrap, and microwave for two to three minutes.
**Shred chicken using two forks or fork and knife into bite size chunks (stringy, too thinly pulled chicken is not good eats). I prefer the pieces to be  juicy and plump. You can also use pulled rotisserie chicken here, but I prefer the flavor combo of the curried chicken:)
Mattye and I enjoying our "chicken divine"
Mattye and I enjoying our “chicken divine”, a term affectionally coined by her neighbor who smelled it across the walkway

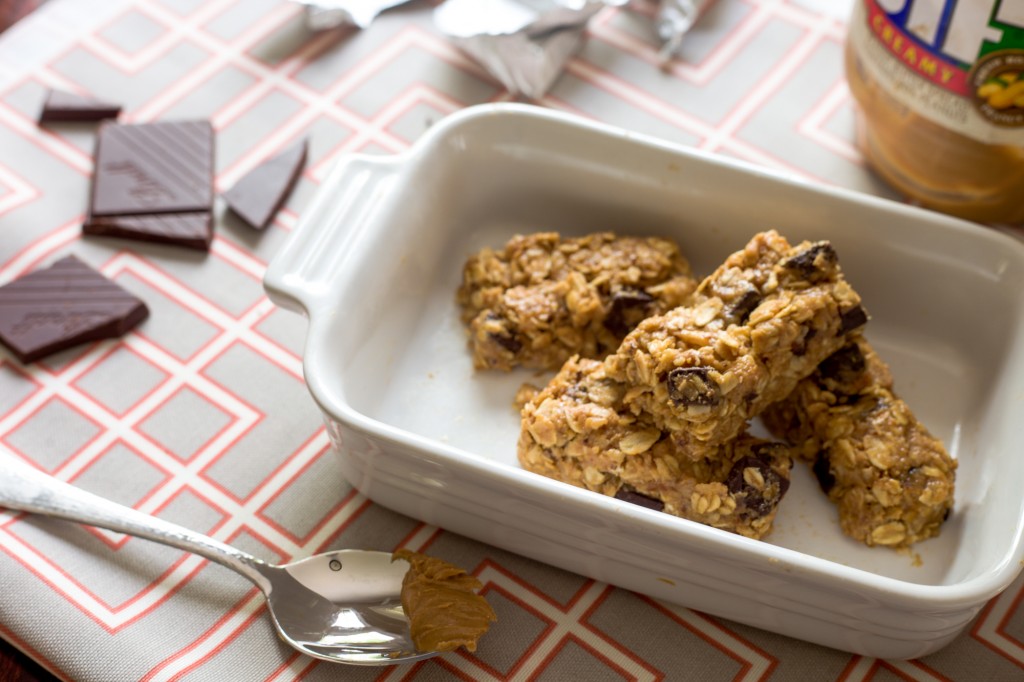
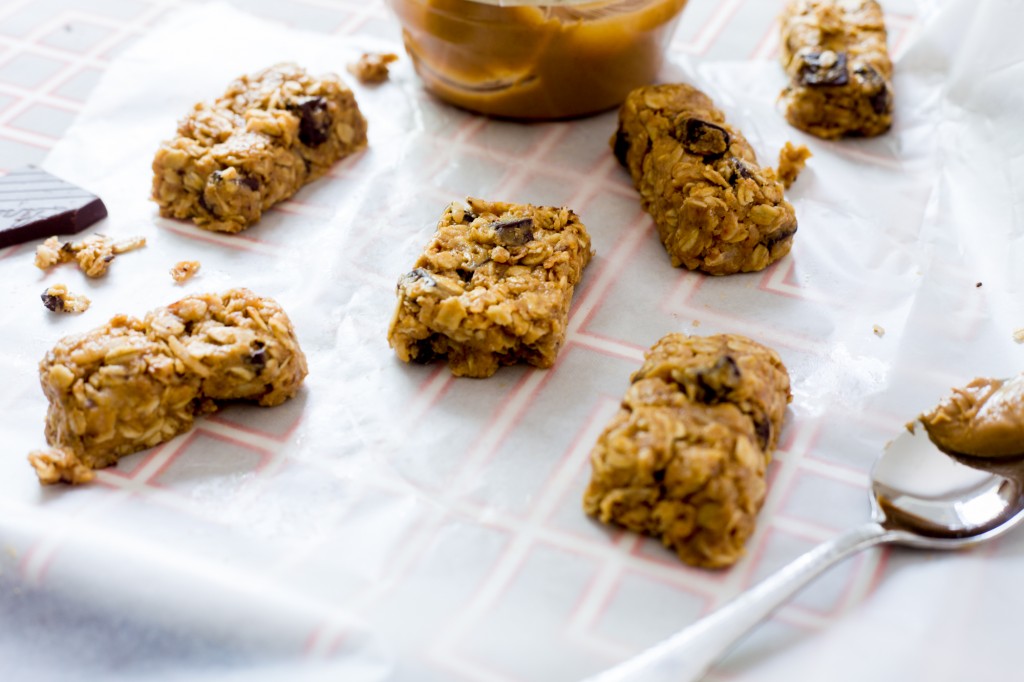
Peanut Butter Chocolate Energy Bars

Peanut Butter Chocolate Energy Bars

Ok everyone, it’s official: fall has arrived.

Not only is it fabulous news that summer is over, here in the South it is officially 70 degrees at night and our formerly green leaves are fading into a light shade of orange. However, if someone could please share this news with the mosquitos that continue to bite the tops of my feet and, at a football game last week, MY FACE, that would be awesome.

I don’t know about you, but not only does the greenery shift in fall, so does my schedule. Weekends are quickly filled with out-of-town football games and outdoor fun aimed to take advantage of every bit of beautiful sunshine you can; week days are just as packed with work and church/friend/family commitments. It’s become a season of lots going on but even more to enjoy.

And during such a busy time, everyone needs a good snack. That brings me to this week’s recipe- peanut butter chocolate energy bars. If you have spent any amount of time on Luv Cooks you are probably very familiar with my love of peanut butter and chocolate (see dark chocolate s’mores with salted peanut butter and peanut butter chocolate crunch granola).

When I came across the no bake energy bites on Gimme Some Oven‘s blog, I was immediately intrigued. Ali is so, so good at creating easy-to-make, easy-to-share recipes with friends and family. This one in particular caught my attention not only because it was a healthy way to incorporate more peanut butter and chocolate into my life, but also because it was just the snack I was looking for amidst all I/everyone has going on. And the toasted coconut stirred throughout brings the creamy, nutty flavors up a notch.

Here is my spin on her version; for me, bars make for a heartier serving, which equals a breakfast item on the go. And as a side note, I have a new peanut butter I love; I used it for these bars and it’s delicious. So enjoy the beginning of your fall season, and not to worry- peanut butter and chocolate energy is on it’s way.

Peanut Butter Chocolate Energy Bars

Peanut Butter Chocolate Energy Bars (From the No Bake Energy Bites recipe at Gimme Some Oven)

What You Will Need

  • 2/3 cup coconut flakes
  • 1/2 cup peanut butter
  • 1/3 cup honey
  • 1 cup oats (I like Bob’s Red Mill old fashioned oats)
  • 1/2 cup golden flaxseed meal
  • 1/2 cup dark chocolate chips (I like Whole Foods’ dark chocolate chunks); you could substitute dried fruit here too
  • 1 tsp vanilla extract
  • cooking spray

What You Will Do

1. Add coconut to a large skillet, then turn your burner on medium heat. Stir the coconut constantly with a wooden spoon until the it smells toasty and turns lightly golden. Make sure you watch this because it can burn quickly! Once toasted, transfer the coconut to a plate and let it cool.

2. Grease an 8 by 8 inch glass pan with cooking spray.

2. Next, spray a 1/2 and 1/3 cup measuring cup with cooking spray. Measure the peanut butter and honey into the cups, then add the pb and honey to a large mixing bowl. Add the cooled coconut flakes, oats, flaxseed meal, dark chocolate chips, and vanilla and mix until combined.

3. Using your spoon, pour your mixture into the greased pan. Press it gently with a spatula or your hands to form an even square (making sure to push the mixture into the edges) in the pan.

4. Chill for at least 30 minutes in the fridge, then use a sharp knife to cut into whatever size bars you desire. Enjoy!


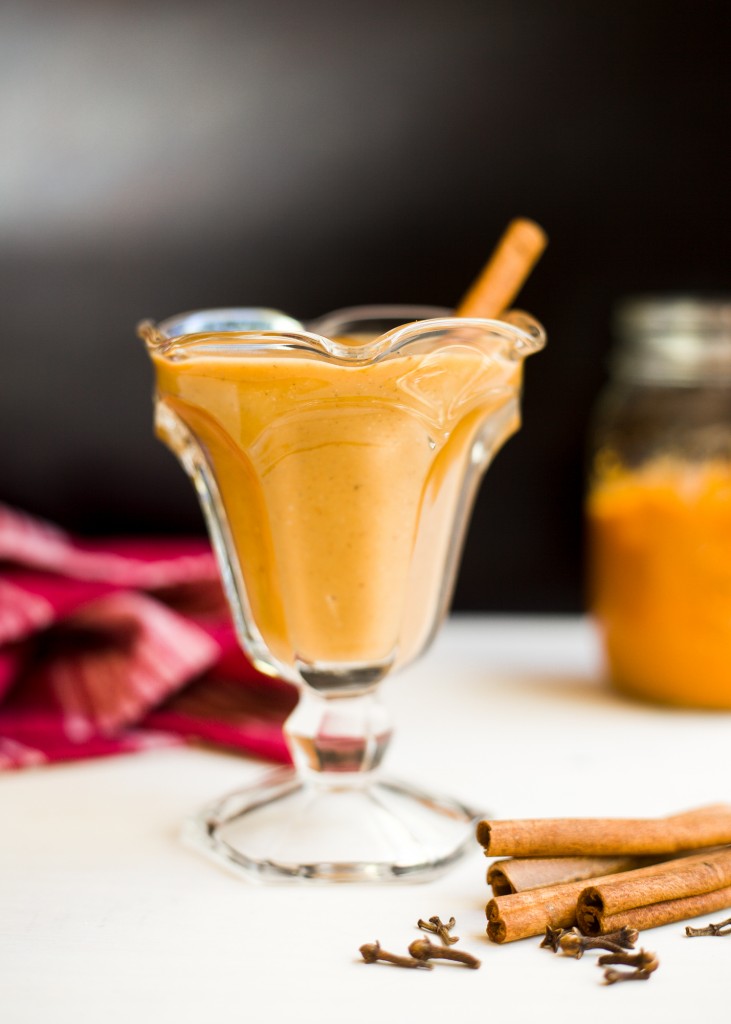
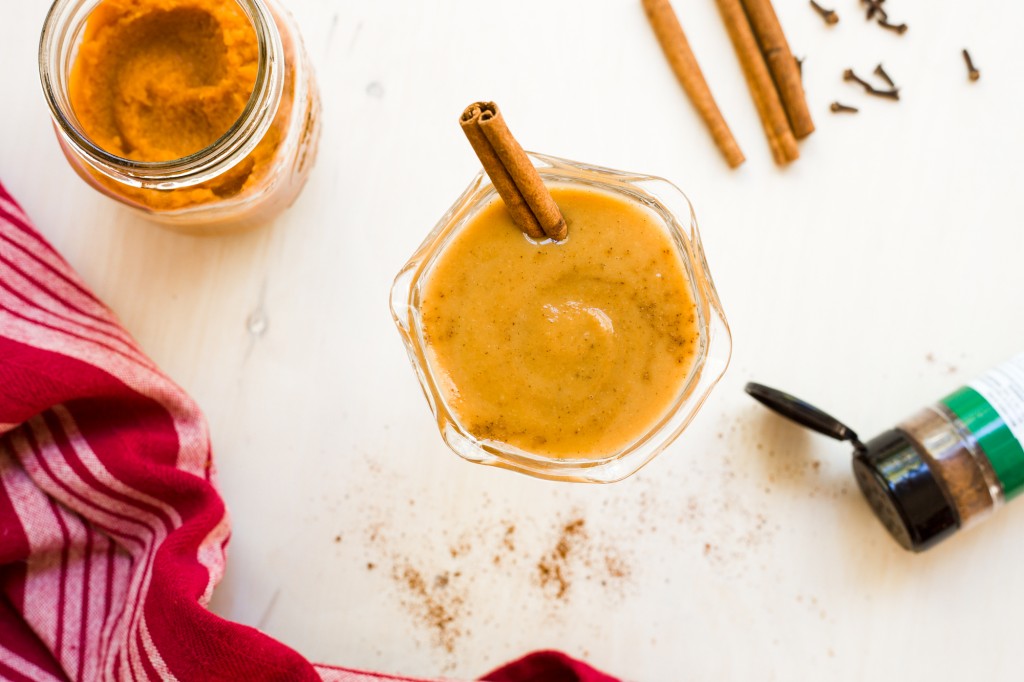
Pumpkin Spice Smoothie

Pumpkin Spice Smoothie

I am not a summer-lovin’ kind of girl.

The idea of a beautifully windblown, laid back lady with beachy waves, a flawless tan, and perfectly cut-off shorts does not describe me on my best of days. Most often I feel like a sweat-soaked*, frizzy-haired cat dramatically lounging on the sofa, looking wistfully out of my window for a sign- ANY sign- that summer in the South has ended.  And the breeze coming from my 36-inch, poorly overworked fan does not count.

I understand that summer’s bountiful produce is a gift. Any one who has tasted a ripe tomato or slice of cold, juice-soaked watermelon in July knows this. But y’all- I think I have eaten enough tomatoes, salads, melon, more salad, and more melon to hold me over for at least another two years.

And to those who claim that fall doesn’t officially start until September 23, please forgive me for ignoring you.  I must cling to the fact that surely fall will be here tomorrow, or I might have a come apart. Wait-was that a leaf I saw falling outside my window?

In an effort to convince myself that the season of all things wonderful- crisp breezes, bonfires, football games, toasted marshmallows, and of course, the pumpkin spice latte– is upon us, here is my first ode-to-fall recipe. It comes in a healthy form because fall is also the time I personally excuse eating 17 Reese’s Halloween pumpkins and microwaved Rotel and Velveeta as meals.

So dive in and get ready for fall. I think I feel a breeze moving already….

Pumpkin Spice Smoothie

Pumpkin Spice Smoothies adapted a bit from Skinny Mom

What You Will Need:

  • ½ cup canned pumpkin
  • ½ frozen banana
  • ½ cup unsweetened almond milk
  • ¼ tsp pumpkin pie spice
  • 1 tablespoon brown sugar
  • Dash of cinnamon
  • ¼ tsp vanilla extract
  • Crushed ice (if you like your smoothie extra thick)

What You Will Do:

1. Put the above ingredients in a blender and whirl away! Add more ice if you like your smoothies slushier, and more milk if you like it less so. Enjoy!

*Some also refer to this condition as “glowing;” i.e., “we don’t sweat, we glow.”  I wish this applied to me.

White BBQ Sauce

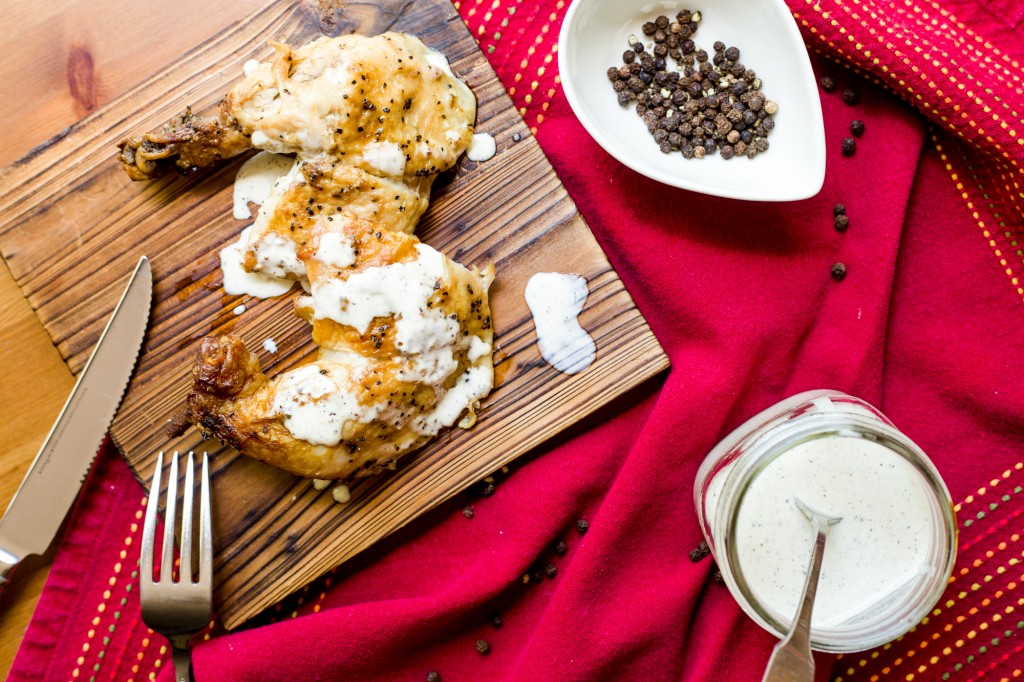
Pure, saucy deliciousness

Y’all, if there ever was a sauce that is as loved or divisive in the South- maybe as much or more than how you take your tea, which football team you cheer for, or who you invited to your last get together- it’s white BBQ sauce.

Your standard BBQ sauce is essential for any proper barbecue, of course.  Whether it’s sweet, spicy, tomato-based or laced with vinegar, frankly, that’s up to you. But white BBQ sauce? I land on it’s side. To me, that sauce is the piece de resistance, the cherry on the sundae, the touch that brings all of the smoky, juicy flavors of barbecue to their pinnacle.

And the power of a good white BBQ sauce doesn’t just end with the meats. In fact, I am such a fan of this sauce that I feel it absolutey necessary that I list my top five favorite foods to douse it with:

1. Smoked chicken (specifically from here, Oh my Lord, is it goooood!)

2. Scrambled eggs

3. White sticky rice

4. Mashed potatoes

5. Sandwiches of any type (BLT, turkey, ham, roast beef, etc.)

The possibilities are endless, and this sauce is oh-so-easy to make. Therefore, I highly recommend you spreading the white BBQ luv and making some for Labor Day weekend.

Without further waxing of the bbq poetic, I give you a slightly tweaked version of the white bbq sauce from Southern Living. For those of you who don’t know about this magazine, their look is absolutely lovely and reminds me of home. Oh, and check out The Daily South for a daily dose of all things Southern and fabulous. It’s currently a standard site in my blog feed!

I hope each of you takes time to get away, love on those around you, and eat some delicious food this weekend. Topped with white BBQ sauce, of course.

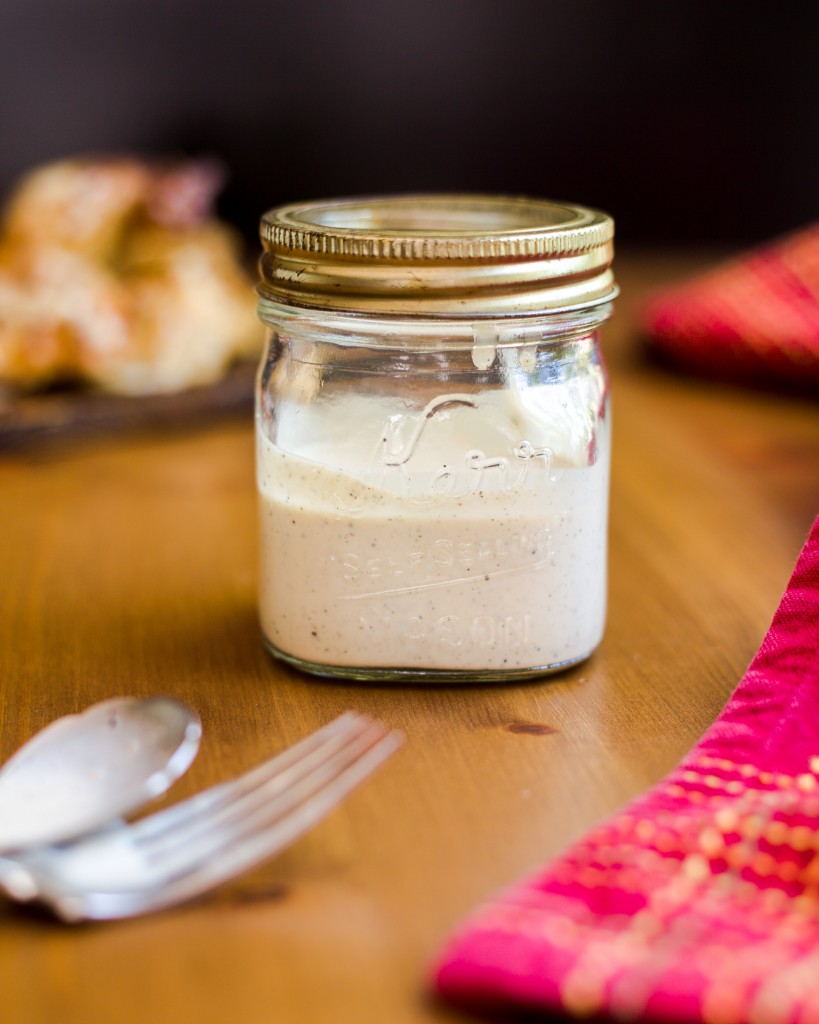
White BBQ Sauce

White BBQ Sauce (This recipe is tweaked a bit from the version here from Southern Living)

What You Need:

  • 1 1/2 cups plus 1-2 tablespoons mayonnaise; I prefer Duke’s
  • 1/4 cup water
  • 1/4 cup apple cider vinegar
  • 1 tablespoon coarsely ground pepper
  • 1 tablespoon Creole mustard (I used Zatarain’s)
  • 1 teaspoon salt
  • 1 teaspoon white sugar
  • 2 garlic cloves, minced
  • 2 teaspoons prepared horseradish

What You Will Do:

1. Whisk together the 1 1/2 cups mayonnaise, water, vinegar, pepper, mustard, salt, sugar, garlic, and horseradish.

2. Taste your sauce and see what you think. I like mine a bit creamier, so I whisked in about 1 1/2 tablespoons more mayonnaise.

3. Enjoy and serve alongside anything you choose! Can’t wait to hear what your fellow tasters think.

Caprese Kabobs with Balsamic BBQ Reduction

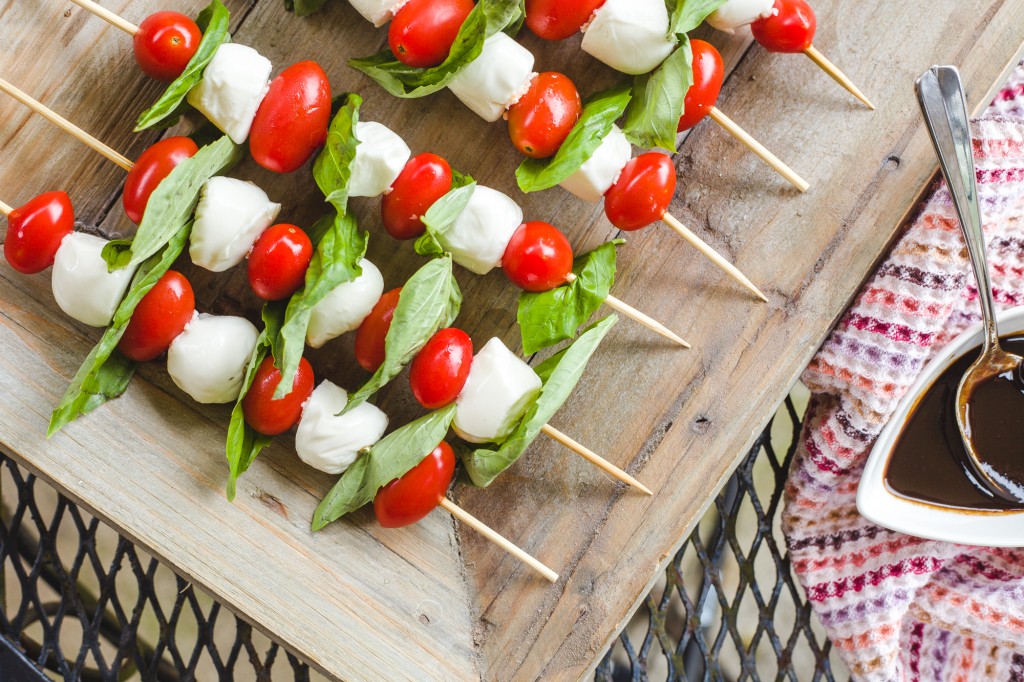
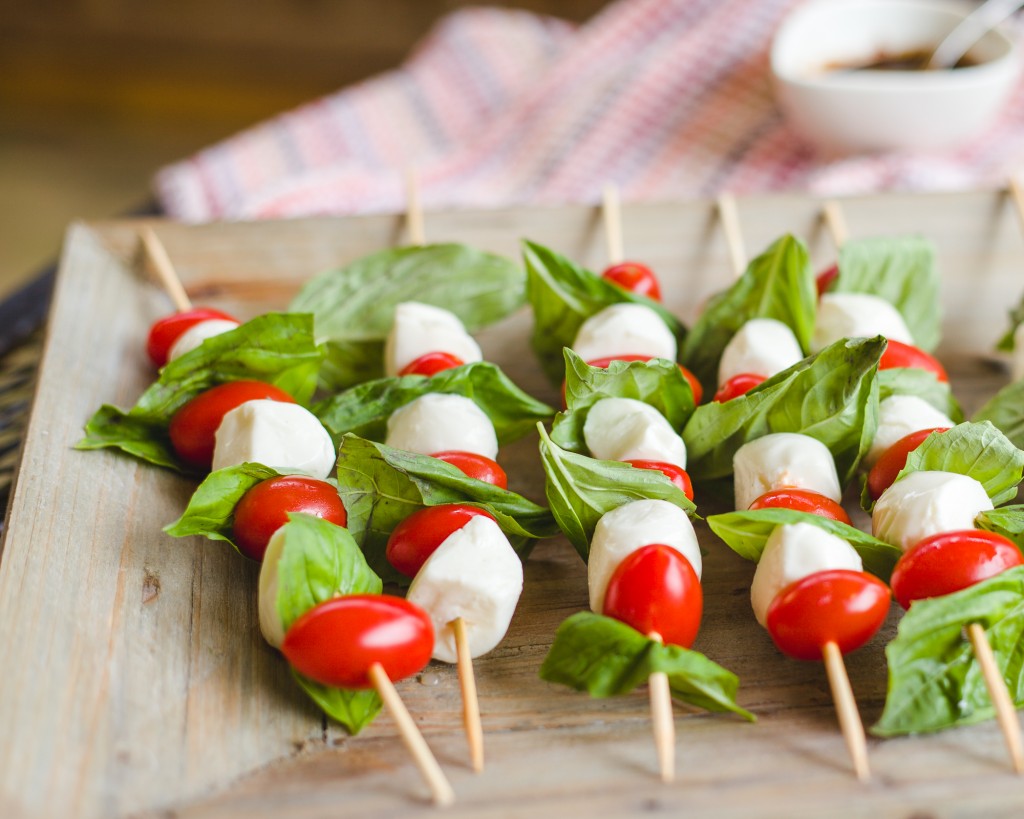
James Farmer's Caprese Kabobs-399-3

Y’all- today’s recipe is as wonderful as one, two, three.

One- stack beautiful summer grape tomatoes on a wooden skewer layered with mozzarella and fresh basil leaves.

Two- stir together balsamic vinegar with brown sugar and a few other ingredients over the stove until a glossy, thick, dipping sauce forms.

Three, pile up your skewers on a tray, pour the balsamic into a bowl and invite guests to dig (or should we say dip?) in.

And friends, there are few summer vegetables as deliciously sweet and fun to eat off of a wooden stick as a grape tomato. Don’t get me wrong- I adore frozen popsicles- but consider this our version of a veggie sweet treat.

This summer has been an exciting one. Styling projects have kept me busy, and the creative people I’ve met along the way have wowed me with their ingenuity, talent, and passion. My amazing boyfriend, friends, and family have continued to love and encourage me to push forward toward my dreams, and I am beyond grateful for their prayers, love, and presence in my life.

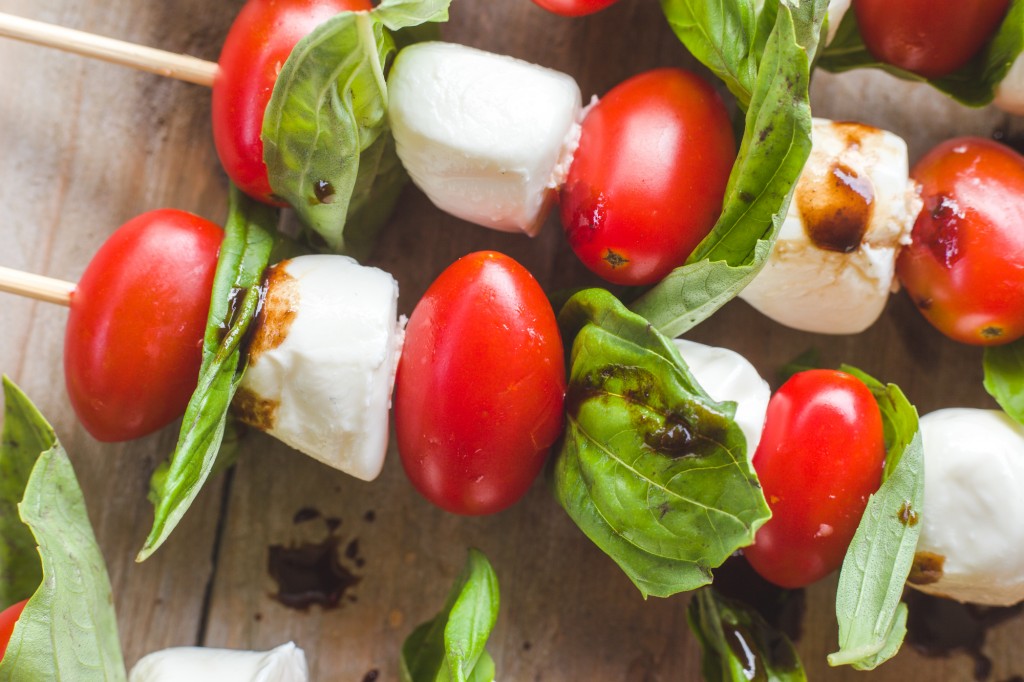
James Farmer's Caprese Kabobs-415-5

But as always, there is something in each of us that draws us in, pulls us back, and anchors us at our core to be who we are. For me, that is, and always will be, food. I sense the same thing in James Farmers’ cookbook A Time To Cook: Dishes from My Southern Sideboard . He is a talented landscape designer, runs his own design business and is the author of another book on the subject, but I feel the same love of food, community, and his family in his writing.  That’s why I like the book, and this recipe, so much. It invites us all to revel in the bounty of summer’s produce- but also in the bounty that is food shared with a crowd. And did I mention that football season starts in 16 days? #tailgating-recipe!

So pull out those wooden skewers, relax outside on a porch, and enjoy a kabob- or two, or three.

James Farmer's Caprese Kabobs-405-4

Caprese Kabobs with Balsamic BBQ Reduction (Recipe from James’ cookbook, A Time to Cook: Dishes from My Southern Sideboard, copyright 2013, Gibbs Smith publishing)

What You Will Need:

For the skewers:

  • 1 heaping dry pint grape or cherry tomatoes
  • 1/2 pound mozzarella cheese, cubed or rolled into small balls
  • About 24 fresh basil leaves

What You Will Do:

1. On bamboo skewers, alternate a tomato, cube or ball of cheese, and basil leaf until the skewer is full.

For the balsamic reduction:

What You Will Need: 

  • 1 1/2 cups balsamic vinegar
  • 1/2 cup ketchup
  • 1/4 cup packed brown sugar
  • 2 tablespoons yellow mustard
  • 1/2 teaspoon salt
  • 1/2 teaspoon freshly ground black pepper

What You Will Do:

1. Combine all ingredients in a medium sauce pan over medium heat.

2. Stir occasionally, making sure the sugar doesn’t stick on the bottom of the pan, until the liquid reduces by about half. It should be thick, glossy, a good consistency for dipping (not too thin), and taste sweet. A good test for me was if it clung to and coated the back of a spoon.

3. Let the liquid cool and serve as a dipper for, or drizzle on top of, your caprese skewers.


Dinnertime Luv and Spicy Sweet Tofu Stir Fry

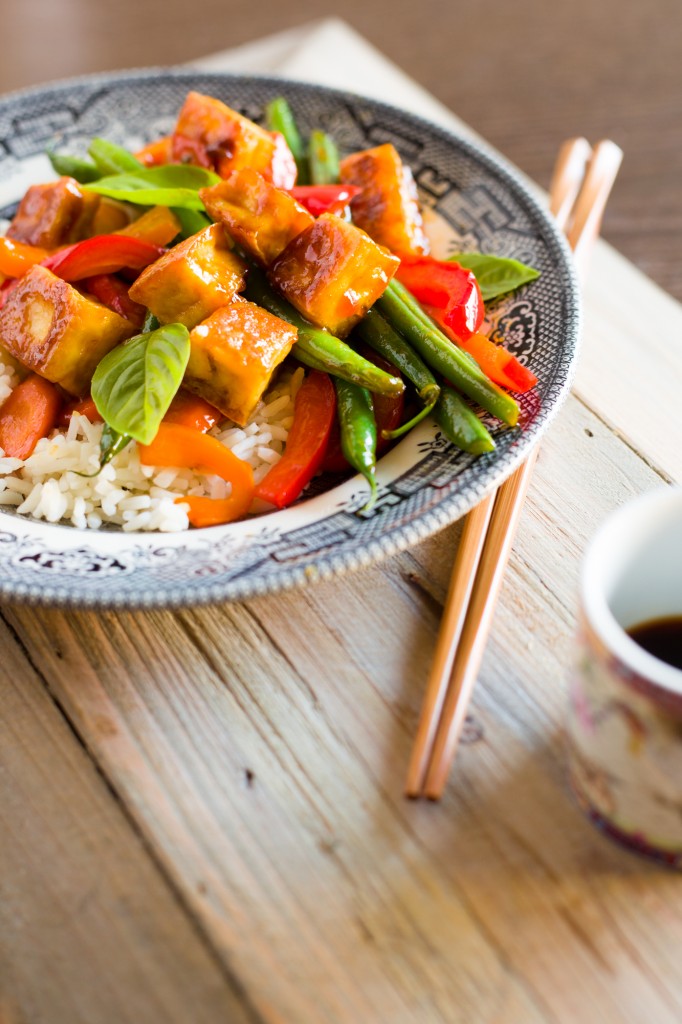
Spicy Tofu Stir Fry
Spicy Sweet Tofu Love

Ya’ll! I am so stoked to begin today a four-part series with the adorable, precious, oh-so-talented Mattye Woodcock of the lovingkind blog. Mattye and her blog are absolutely fabulous for many reasons, but one of the main ones I know you will be drawn to her is her passion for loving people. Whether it’s your spouse, your coworkers, your family- she cares about making our lives the best they can be. So, Mattye is going to take us on a journey of making dinnertime more intentional and fun in the relationship department, and I will be supplying the recipes and tips on the essentials tools every kitchen needs to her blog here. And in the weeks when we aren’t posting, make sure to check out her blog- it’s fantastic!

And here she is!

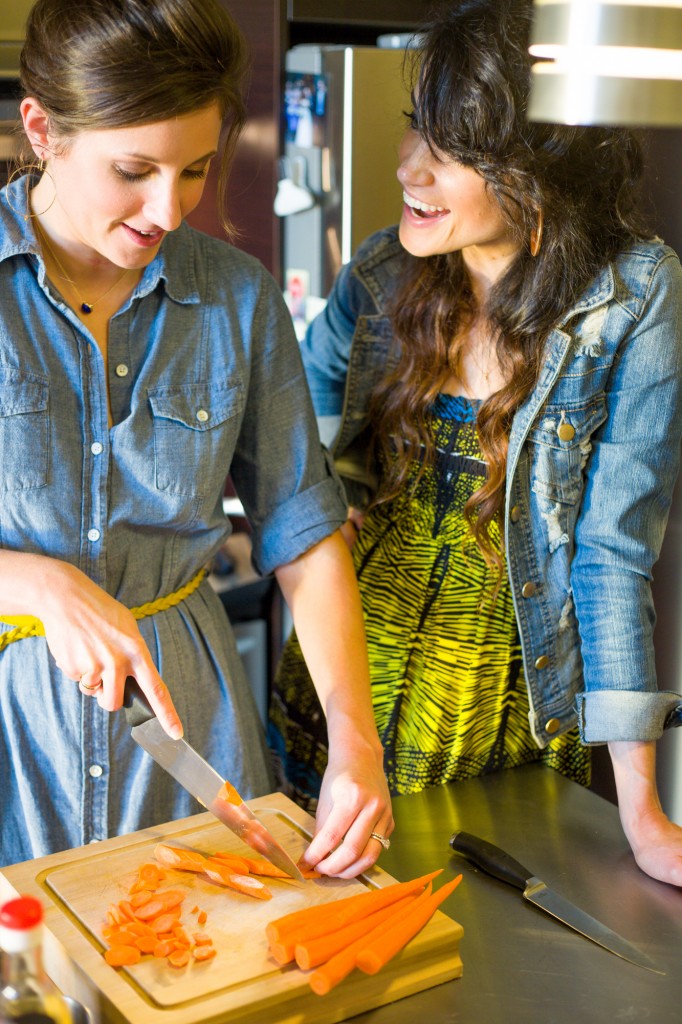
Mattye honing her chopping skills

Hi y’all! It’s Mattye Woodcock here from the lovingkind. I am so excited to partner with your very own Callie dearest of Luv Cooks for a love-filled kitchen collaboration! In this series of posts, Callie will be giving you great recipes for newlyweds and I have the honor of sharing my heart for marriage, love, and how to make mealtime about more than just good food. Thanks for having me as your dinner guest today!

Dinnertime has become one of my favorite times in our home. This isn’t because I’m an amazing cook—I’m not. It isn’t because I have the most lavish dining room—I don’t.

In our almost two years of marriage, dinnertime has often been topped with stress as a garnish and served with chaos for dessert. As I mentioned, my cooking skills are a work in progress, and for a gal who likes to be efficient and good at what she does, this regularly dishes me up a hefty helping of tension. Whether something burns because I’ve cooked it at the wrong temperature or I’ve convinced myself I’ve ruined the meat and it’s no longer safe for human consumption, there have been no shortage of near “come aparts” in my kitchen.

Spicy Tofu Stirfry-226
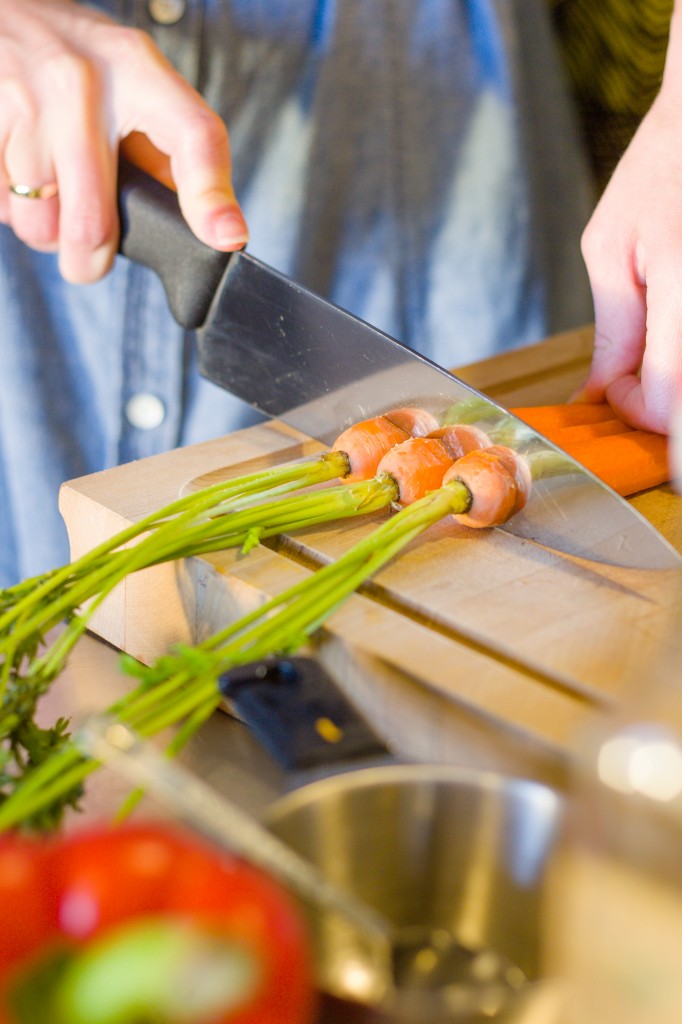
Excellent knife skills by Mattye

Spicy Tofu Stirfry-315 Spicy Tofu Stirfry-330

Why then, you may ask, is dinnertime even a candidate, much less a top contender, for a favorite time in our home? It’s quite simple, really. It’s because of the man who steps in to help me even when I tell him to (please) get out of my way. It’s the man who eats the “ruined” meat, ignoring my hypersensitivity to food safety. It’s him commenting, “this pizza is restaurant quality” after taking his first bite or “ do you like the placemats I set out for our dinner?” when he finishes preparing the table. That’s what makes me love dinnertime.

Spicy Tofu Stirfry-332
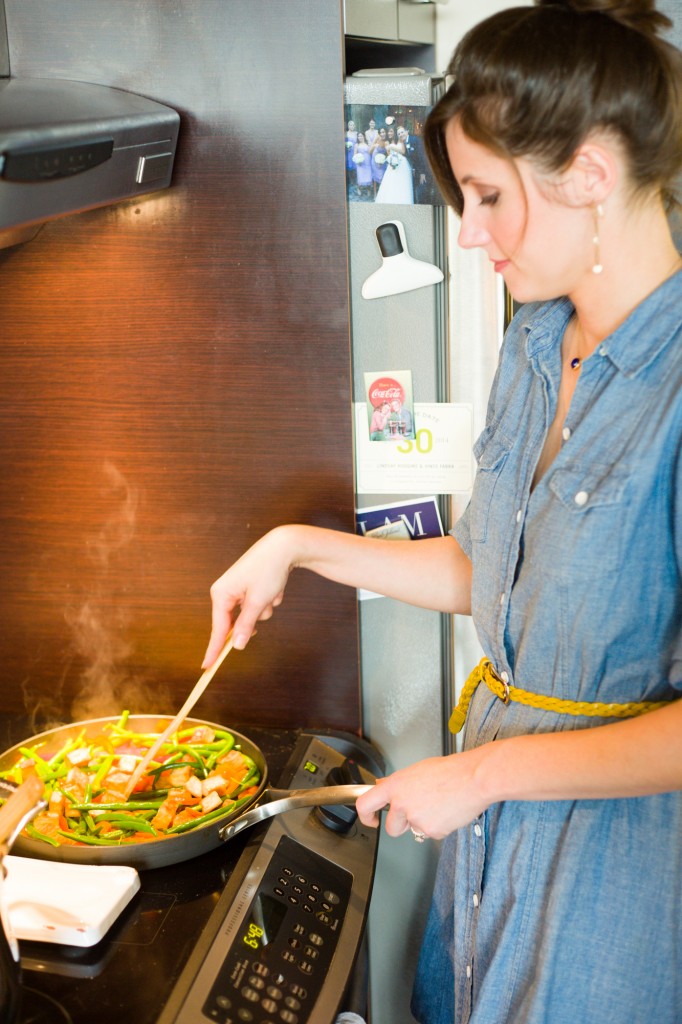
Mattye stirring the stir fry

When I think about it, the imperfections that initially drive me crazy are what end up making dinnertime endearing to me. There is something about it that is so authentically representative of our lives. We make a plan and it doesn’t always turn out like we thought. But even then, we move forward to experience it side by side and support each other through the last bite. The way it comes together is sweet, special and so real.

I think about our life in 20 years and I imagine we will look back on these dinnertimes in the early years of our marriage and smile at the simplicity of them. Our meals are mostly good, but all-around pretty basic, and we sit around our little dining room table, the first major piece of furniture we purchased as husband and wife (after weeks of deliberating no less). But the point is, we do all of this together week after week as we discuss our days, our evening plans, our concerns, our hopes, and a dozen random things in between. There is nothing elaborate or amazing about it, but it’s in these moments that we are writing our story and building the foundation of our life together that make it worth cherishing.

Spicy Tofu Stir Fry

So, in a couple decades, when our life has developed and we have a house and children and days full of things we currently know nothing about, I think we will chuckle as we reminisce on these times and maybe even have a twinge of longing to return, just for one moment, to a night when a ruined piece of dinner meat created waves that were quickly calmed with a little patience and a great, big dose of sweet luv.

Mattye and I loving the foodie moment


Spicy Sweet Tofu Stir Fry

**Recipe adapted from The Minimalist Baker, a fantastic husband-and-wife food blog.

What You Will Need

For the Stir Fry

  • 1 14-ounce package firm or extra firm tofu
  • Cooking spray
  • 2 cups roughly chopped green beans
  • 1 cup diagonally sliced carrots
  • 1 cup sliced red bell pepper
  • 1 cup sliced orange bell pepper
  • 2 Tbsp toasted sesame oil for sautéing (you can also use peanut or coconut)

For the sauce

  • 1/4 cup low-sodium soy sauce (I like tamari because it’s gluten-free)
  • 1/2 tsp dried ginger
  • 1/2 tsp Sriracha
  • 2 Tbsp white sugar
  • 1 Tbsp honey
  • 1 Tbsp corn starch

Optional: white rice; chopped peanuts or additional Sriracha for topping

What You Will Do

  1. Preheat oven to 400 degrees and begin drying your tofu. Remove it from the package, drain, and place it between two thick towels folded into the shape of the tofu. Then place it on a paper-towel lined plate or bowl and top it with something heavy like an iron skillet.
  2. Let it dry for about 15 minutes, changing your towels if they get too wet. Once dry, chop the tofu (with your awesome knife) into roughly 1-inch cubes or rectangles, whichever your heart desires.
  3. Spray a cookie sheet with cooking spray, and arrange chopped tofu on the pan. Bake for 15 minutes, flip over your tofu cubes to ensure even color, then bake for 15 more minutes. This will dry out the tofu and give it a more meat-like texture.
  4. Once the tofu is golden brown and a bit tough and firm, remove it from the oven and set it out to dry a bit more while you prep your vegetables. Ideally, it would set out another 45 minutes or maybe longer. I don’t recommend refrigerating it overnight; I tried this with Mattye and let’s just say it was cheeewwyyy.
  5. If serving over rice, start the rice at this point. I love Uncle Ben’s instant rice.
  6. In a small mixing bowl, whisk together all of the sauce ingredients, then set them aside.
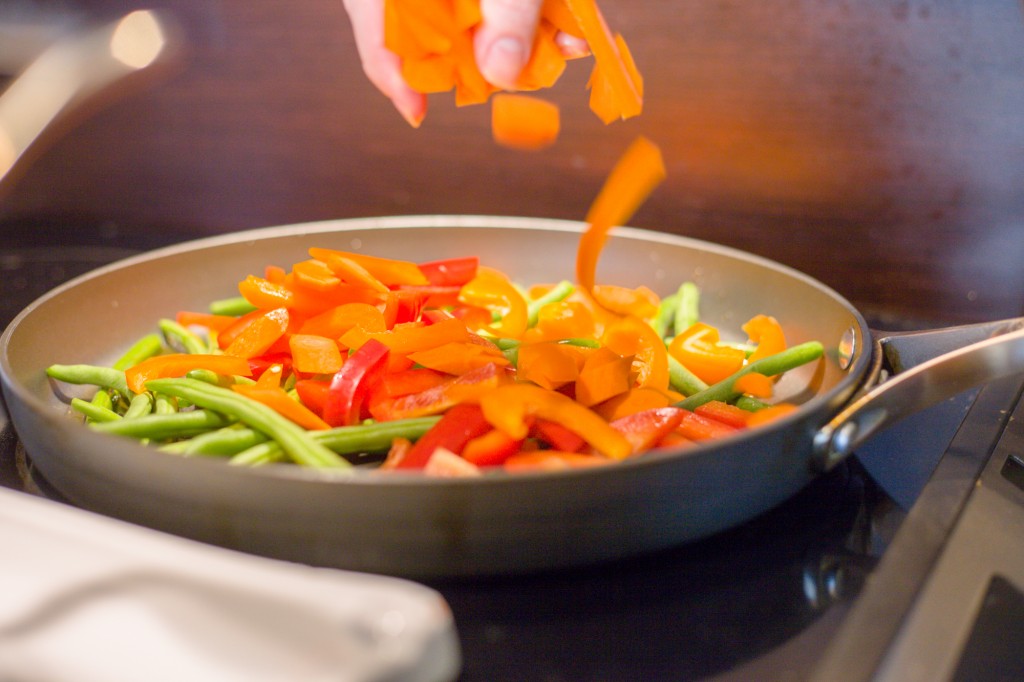
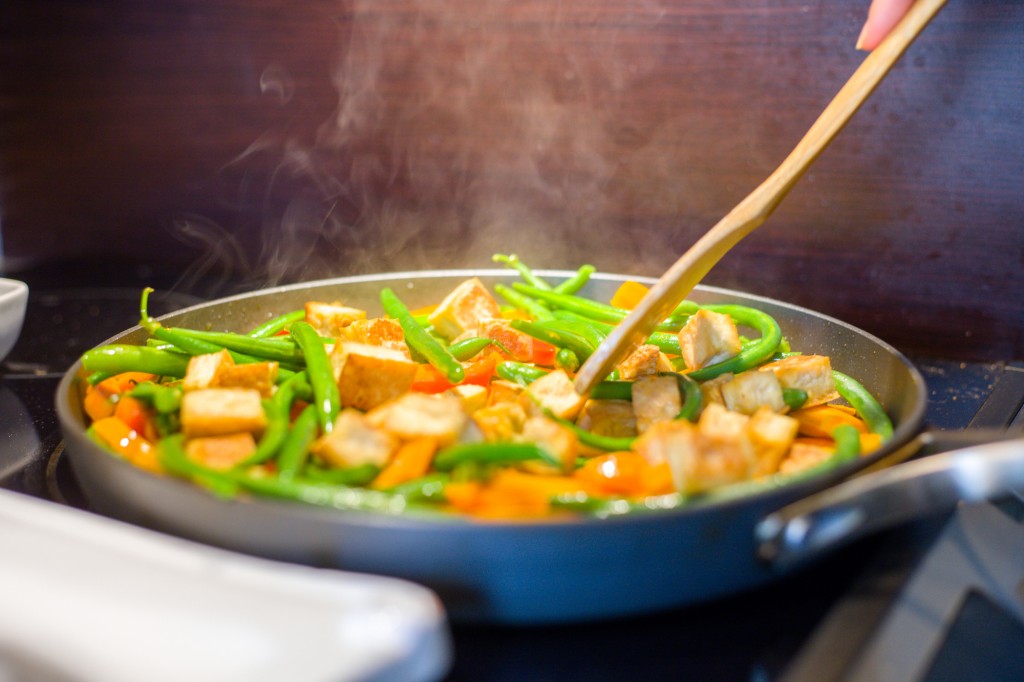
  7. Heat a large skillet over medium-high heat, add oil and swirl to coat the bottom of your pan. Then add (your beautifully chopped) veggies and toss to coat. Cook for 5-7 minutes, stirring often. When the vegetables have some color and have softened a bit (just feel them with your spoon or spatula; they should have some give to them), add the sauce, and stir. It should bubble and thicken. Then add the tofu and stir to coat.
  8. Cook the mixture for 3-5 minutes, stirring often. Try your best to not overcook this; taste it every minute or so to make sure your veggies stay on the crisp side. When veggies are cooked to your preferred doneness, remove from heat.
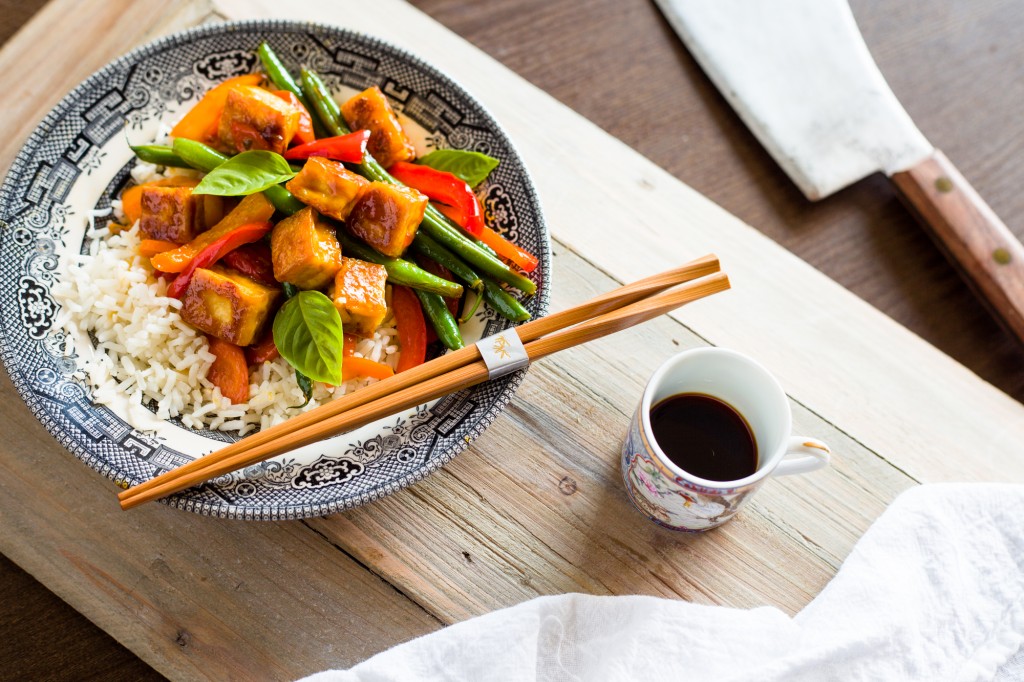
  9. Serve your stir fry as is or over rice for a more filling meal. Enjoy and revel in your delicious, knife-wielding success. Bravo!
Taste-testing with the LovingKind

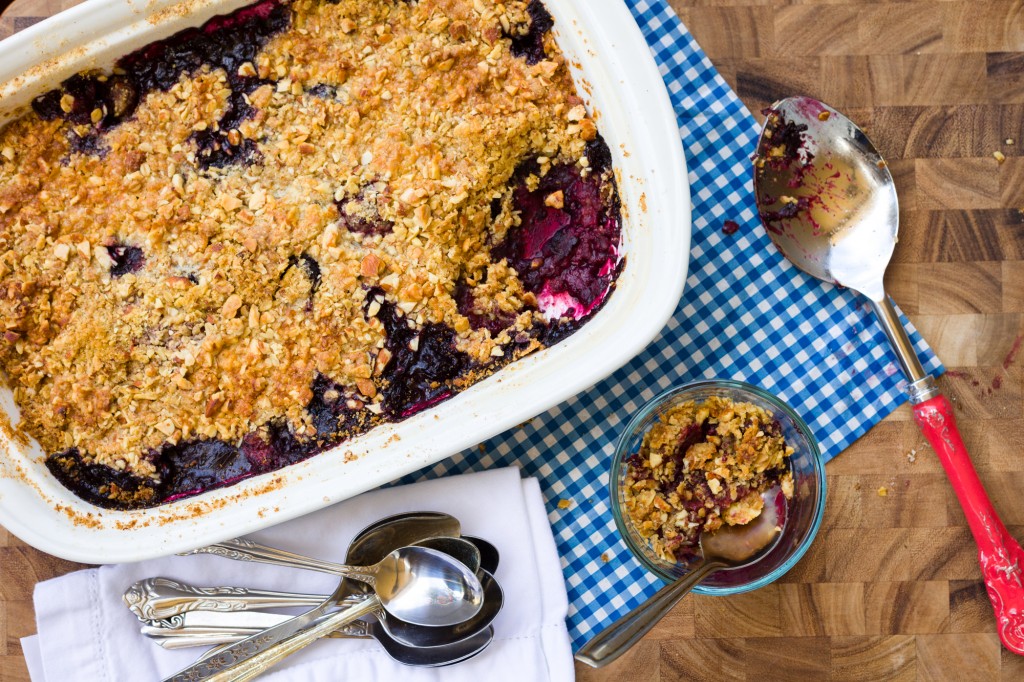
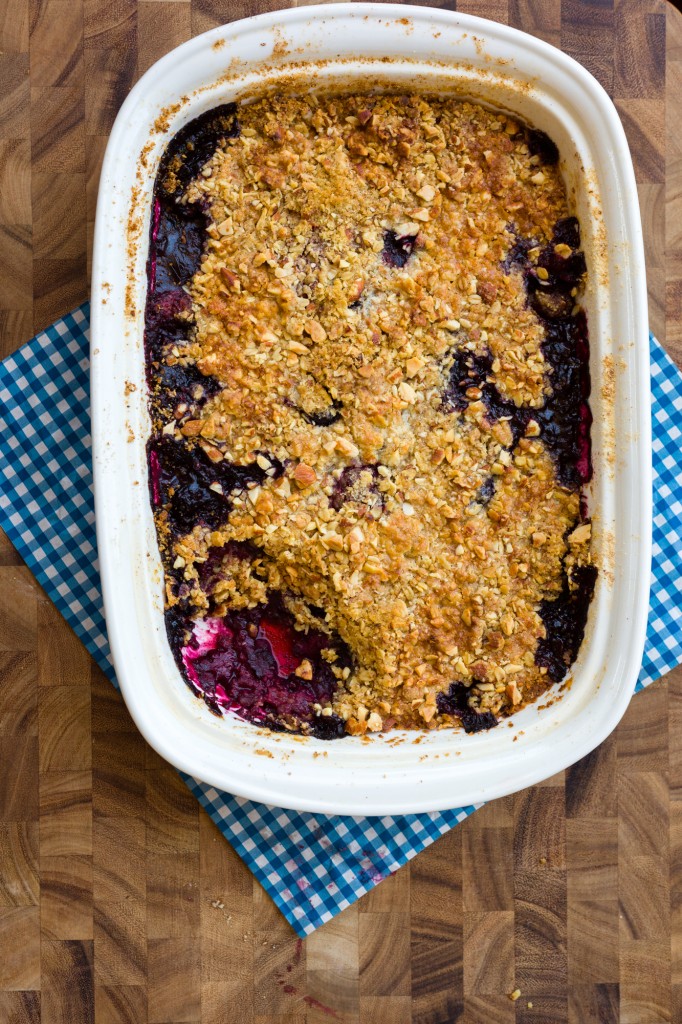
Gluten Free Mixed Berry Crumble

Gluten Free Mixed Berry Cobbler-196

Of all summer holidays, the Fourth of July is by far my favorite.

American independence is a beautiful thing and there is such a sense of nostalgia in this holiday- memories of flags waving proudly from wrap-around front porches; Dreamland ribs so smothered in sauce I had to reach for white bread to sop up the leftovers; my sister and I whizzing through a plastic sprinkler in the mind-numbing sunshine and heat of July.

Gluten Free Mixed Berry Cobbler-183


In the South the Fourth is a proud holiday- pride in our traditions,  pride in the people (aka “company”) attending our Fourth of July parties; and an even more stalwart pride in the power of barbecue and coleslaw to bring people together.

But the piece de resistance to any Fourth of July extravaganza is a dessert carrying the theme-red, white, and blue deliciousness. This mixed berry crumble is a warm, golden treat aside a blast of cold vanilla ice cream; a welcome addition any post-barbecue cool-down.

And I couldn’t be prouder of where my recipe inspiration came from- Courtney Bryant of Kinora Films in Birmingham, Alabama. She is a true Nothern/Westerner turned Southern Belle (but, I believe, was always meant to be a Steel Magnolia). Her grace under pressure, faith, love, and strength of character qualify her for the hospitality pineapple at any Southern soiree.

Friends, I hope y’all have the best, freedom-filled holiday and join me in celebrating our wonderful, inspiring country- and, of course, the American treat that is berries and a crumble.

Gluten Free Mixed Berry Cobbler-176

Gluten Free Mixed Berry Crumble

What You Need

  • 2 12-oz. bags frozen mixed berries
  • 1 cup gluten-free flour (1/2 brown rice, 1/4 sweet white sorghum, 1/4 tapioca or Bob’s Red Mill )
  • 1/2 cup gluten-free oats
  • 1 cup natural almonds
  • 1/3 cup sugar
  • 1/2 teaspoon vanilla
  • 1 teaspoon vanilla extract
  • 12 tablespoons cold butter, cubed into 1/4 inch pieces, and divided into 8 tablespoons and 4 tablespoons

What You Will Do

1. Preheat the oven to 350 degrees and butter or spray with cooking spray a 9X13 inch casserole dish.

2. In a food processor, pulse nuts, flour and oats together until the almonds are in small pieces. Add the sugar, cinnamon, and vanilla extract and mix well.

3. Add 8 tablespoons cold cubed butter and pulse until just combined. The butter should be roughly the size of small peas.

4. Place the frozen berries in buttered casserole dish. Cover all of the berries with your topping, and distribute the rest of your cubed butter evenly on top.

5. Bake for about 50-60 minutes or until golden brown on top.

6. Relax and enjoy hot out of the oven! Also, this would be delicious served with cold vanilla (or chocolate) ice cream.


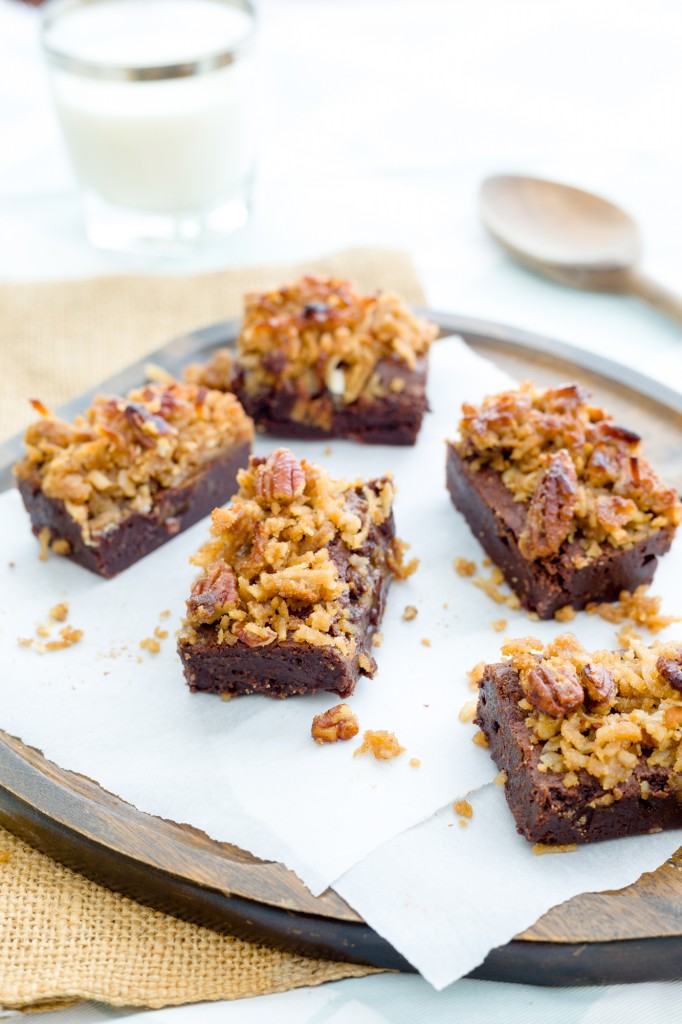
Gluten Free Toasted Pecan and Coconut Caramel Brownies

Coconut Pecan Brownies Gluten Free-114


People who bake know that there are certain things you just do. One, you use flour- sifting it with baking powder for cakes, sprinkling generous amounts of it on a board before kneading dough,  stirring fluffy white batches in for cookies. Second, you use an oven; prepping it until it is blazingly hot and then lovingly pushing your doughy creation into the heat box.

However, baking in the South is a bit of a different story. One, it’s ALMOST SUMMER and no one south of the Mason Dixon line should turn on their ovens. This general rule applies from the months of June until at October. The high outdoor temperature combined with additional indoor blasts of heat equals hair frizziness, a higher likelihood of swear-word-slippage and all-around moodiness.

But the second rule- always using flour- I thought was inescapable. What good cook makes biscuits without White Lily? I can’t bring a banana bread made with millet to a bridesmaids brunch! Where I grew up, it’s about like going to Publix without your makeup on and running into your former high school guidance counselor- nightmare! In so many ways in my life, it’s hard to escape that good ol’ Southern upbringing.

Recently, though, my pride hit the fan when I realized my stomach wasn’t bouncing back from a (let’s say, ahem, “international stomach incident”) like I had in the past. After doing some research, I realized that gluten can be a culprit in stomach uneasiness. And Lord a livin’, how this move from wheat has changed my life!
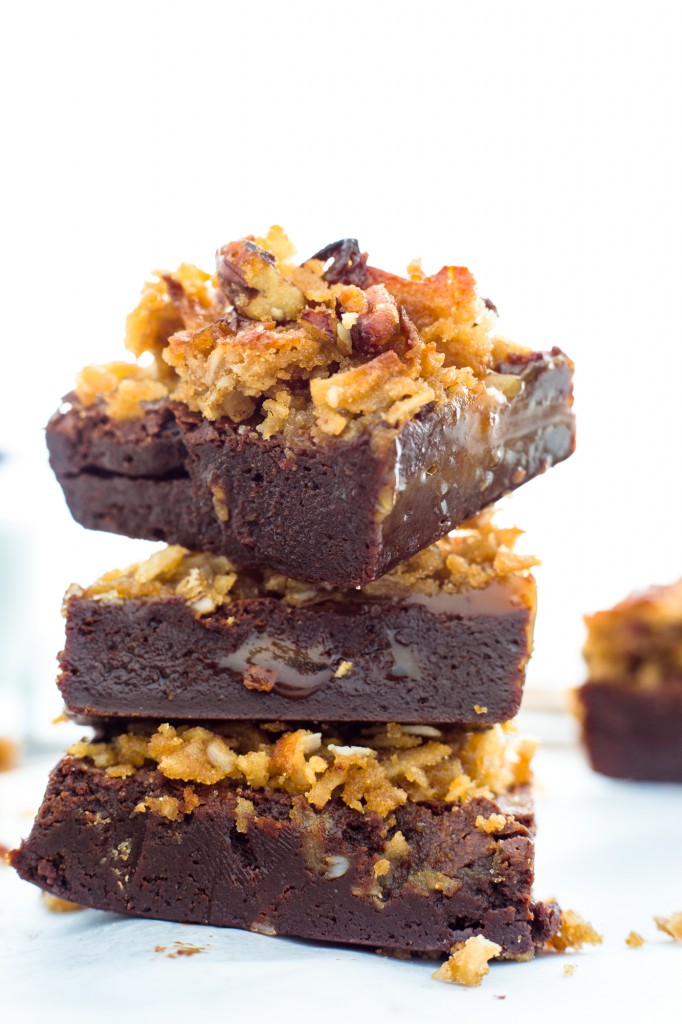
Coconut Pecan Brownies Gluten Free-123

Y’all- I feel so much better, my head feels clearer, and there is an all-around feel-good to my eating that I haven’t had for a long while. But it doesn’t change the fact that I still loooove sweets, and you know, brownies. So here is my attempt at baking a gluten-free recipe from the wonderful, beautiful, inspiring blog The Little White Kitchen. Because you can take the gluten out of the girl, but you can’t take the biscuits out of her psyche. Or the brownies.**
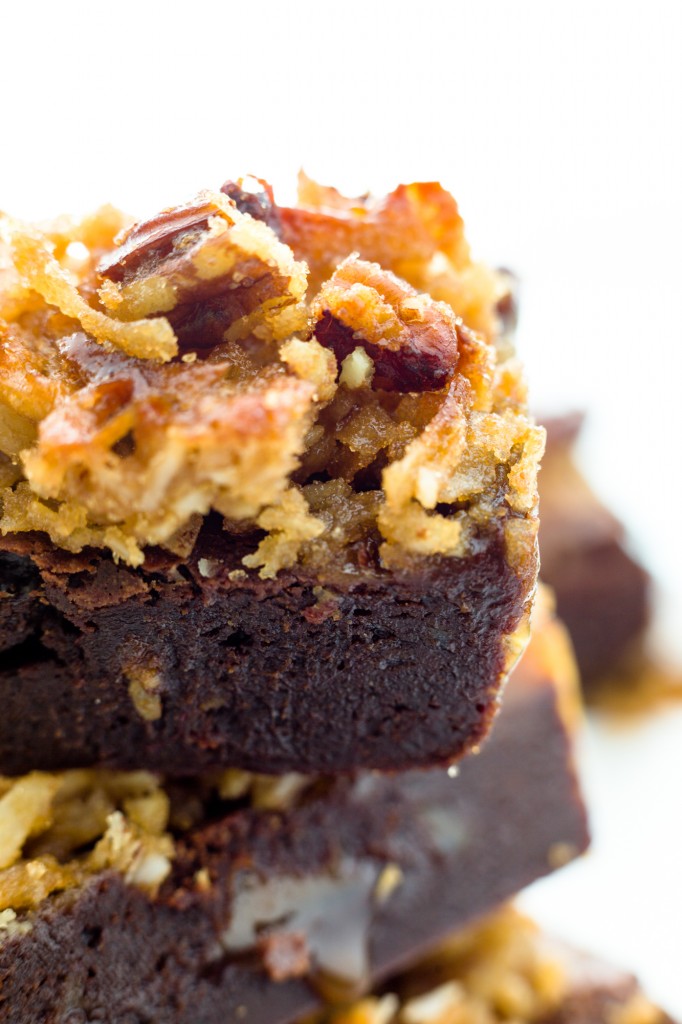
Coconut Pecan Brownies Gluten Free-139

**I’m still working on standing tall when buying gluten-free rice crackers in the aisle at Fresh Market.  If anyone out there has any additional confidence builders, please share.

Toasted Pecan and Coconut Gluten-Free Brownies (from The Little White Kitchen )

What You Need

One batch of brownie dough (recipe below)

One batch of caramel sauce (recipe below)

One batch of pecan coconut topping (recipe to follow)

What You Will Do

STEP A: Make the caramel sauce. Recipe is below:

Caramel Sauce

What You Need

  • 3/4 cup sugar
  • 2 tbsp. corn syrup
  • 1 1/2 tsp water
  • 3 tbsp. unsalted butter
  • 1/4 cup heavy cream
  • pinch salt

What You Will Do

1. Put the sugar, corn syrup and water in a small saucepan. Cook the sugar mixture over medium heat without stirring. With a pastry brush and some water, rinse off any sugar crystals that may form on the sides of the pan.

2. Gently swirl the pot as the sugar melts, but don’t stir (that could crystallize the sugar again). Just keep on swirling it, especially if one side of the pan starts to melt more quickly than the other.

3. Once the caramel reaches a medium amber colour, remove it from the heat and stir in the butter. Whisk in the cream and salt.

4. Set the caramel aside until the first layer of brownie batter has been baked. Keep at room temperature.

STEP B: Bake the brownies.

What You Will Need

  • 10 tbsp. unsalted butter
  • 1 1/4 cups sugar
  • 3/4 cup + 2 tbsp unsweetened cocoa
  • 1/4 tsp. salt
  • 1 tsp. vanilla extract
  • 2 large cold eggs
  • 1/2 cup gluten-free flour blend (I used Bob’s Red Mill)

What You Will Do

1. Preheat the oven to 325 F.

2. Line an 8-inch square pan with parchment paper or spray thoroughly with cooking spray.

3. Combine butter, sugar, cocoa and salt in a medium bowl. Microwave on high for 1 minute and 30 seconds. Whisk until smooth and well-combined (It won’t be completely smooth here, but that’s ok).

4. Whisk in the vanilla, then whisk the eggs one at a time, stirring well until each egg is combined.

5. When the batter looks thick, shiny and well-blended, switch to a wooden spoon, add the flour, and stir until you cannot see anymore flour. Beat vigorously for 40 strokes more with your spoon.

6. Spread half of the brownie batter into the prepared pan and bake for 10 minutes.

7. Remove the pan from the oven and pour the caramel sauce carefully over the baked batter. Spoon the remaining batter onto the caramel and spread it out as evenly as you can with a spatula, making sure to leave lots of undisturbed caramel. Bake the brownies for another 18 minutes, then take them out to let cool (you can insert a knife or toothpick here to make sure they are done; there should be no crumbs left on your utensil).

STEP C: Make the Pecan Coconut topping.

What You Will Need

  • 1/4 cup butter
  • 1 cup shredded sweetened coconut
  • 2/3 cup packed brown sugar
  • 1/2 cup chopped toasted pecans or walnuts

What You Will Do

1. In a small saucepan, melt the butter.

2. Add the remaining ingredients and stir until combined.

STEP D: Top yo’ brownies.

What You Will Do

1. Spread the coconut topping evenly over the baked brownies.

2. Set your oven to broil and make sure the rack is about 6 inches from the top of the oven.

3. Return the brownie pan to the oven and broil the topping until it starts to bubble and turns a nice golden brown. Make sure to keep an eye on it. Mine took a few minutes; I just kept on opening the oven door to make sure it didn’t burn. Once the tops of the pecans turn dark brown pull them out, they can burn before you know it!

4. Once they are ready, cool your brownies on a baking rack and then slice.

ENJOY YOUR GLUTEN-FREE DELICIOUSNESS! Also, these brownies will cut more easily if you can wait on them to cool, then leave them in the fridge for a bit (due to the incredible levels of carmel inside). #yumm


Easy Spiced Tortillas

Homemade Tortillas

I have fallen for tortillas.

About a week ago I took an incredible, life-changing trip to Honduras with She Dances– an organization based in my hometown that works to provide holistic rehabilitation to young women that have been victims of sex trafficking.

Having been surrounded by people who loved and took care of me since I was a child, I really can’t wrap my mind around the life experiences these young women have endured. But y’all- the love in the She Dances house! It blew me away to see all that these young women have supernaturally overcome. They danced, they dreamed, they sang, they laughed- their spirit was contagious, and I left the country speechless with gratitude, blessings beyond measure, and an overwhelming desire to return. I miss each one of them already.
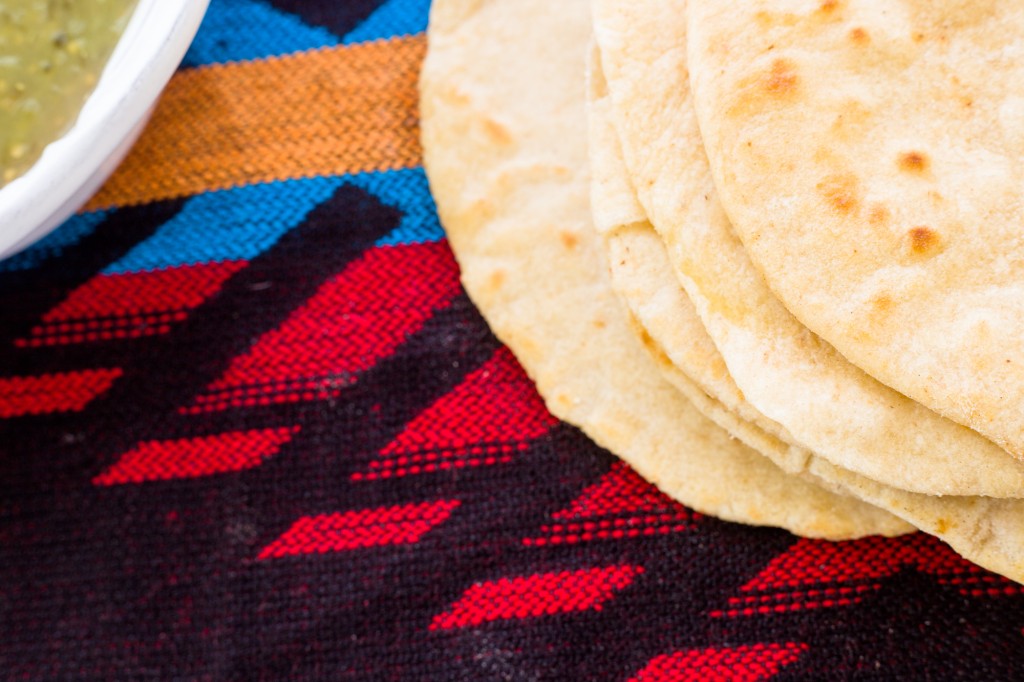
But one of the best things about Honduran culture is the generosity that permeates all they do- regardless of how many people show up, there will be enough food for everyone. I watched in amazement as two pineapples fed almost twenty small children at a friend’s countryside home, and as I learned more about the areas we visited, I realized that the majority of micro businesses revolved around food, and namely, tortillas.

Easy tortillas

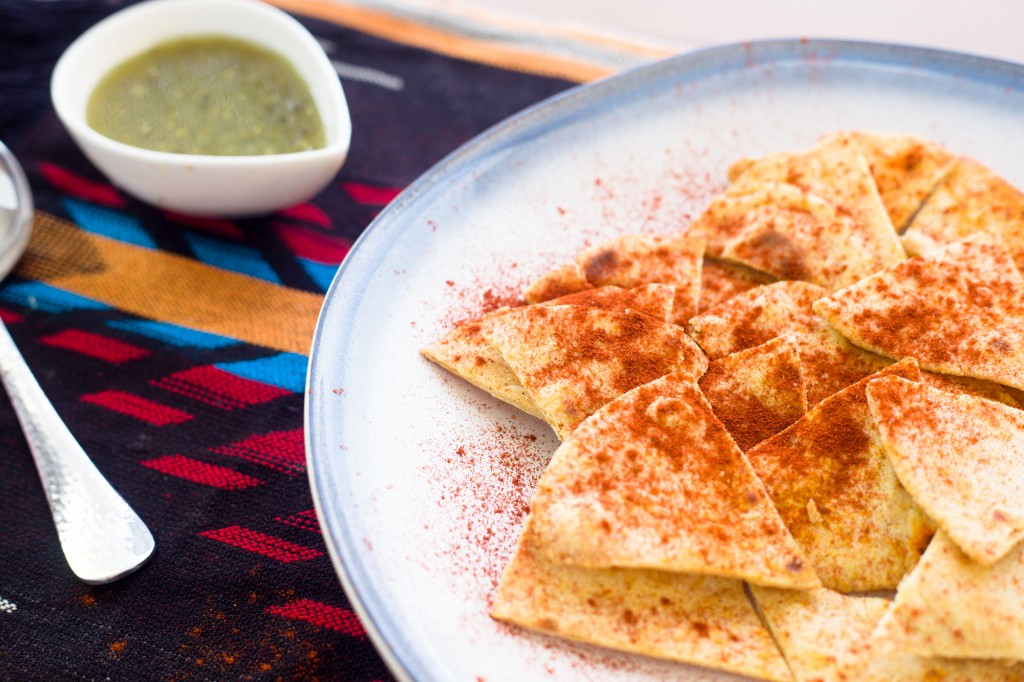
Latin American tortillas are an authentic original; set apart from what we find on the grocery shelves in America. They are sweet, light but thick, and almost wafery in their construction.  We ate them for breakfast with scrambled eggs, salsa, and fried ham, and used them to soak up the last juices from pulled pork for dinner. I did not attempt to recreate that experience here. Instead, I took a somewhat American tortilla recipe (wheat flour, vegetable oil) and added the spices and tastes that bring me back to Honduras. And trust me- these could not be easier to make. It’s absolutely worth the pass-by on the grocery shelf, and these would make phenomenal tortilla chips too. Just toss them in olive oil, add some flaky salt and smoky spices, and bake for a bit in a hot oven.

Tortillas baked and sprinkled with paprika!

Alright amigos; get out the guacamole and shredded pork, gather around the table, and pass the tortillas! Vamanos!

Easy Spiced Tortillas (This recipe is adapted from the inspiring Cafe Sucrine Farine blog)

What You Will Need:

  • 3 cups flour
  • 1 teaspoon salt
  • 1 teaspoon baking powder
  • 3/4 teaspoon ground cumin
  • 1/4 teaspoon onion powder
  • 1/4 teaspoon chili powder
  • 1/8 teaspoon smoked paprika
  • ⅓ cup vegetable oil
  • 1 cup warm water

What You Will Do:

  1. Combine flour, salt, baking powder, and spices in the bowl of a stand mixer. With the dough hook attached mix dry ingredients until well combined. I had to scrape the side of my bowl a few times to make sure the spices were incorporated.
  2. Add the oil and warm water with the mixer running at a medium speed. Mix for 1 minute, stopping occasionally to scrape the sides of the bowl. After about 1 minute, or when the mixture comes together and begins to form a ball, decrease the mixing speed to low. Continue to mix it for 1 minute or until dough is smooth. It will be begin to look like a big, fun, smooth ball. 
  3. Transfer the dough from the mixing bowl to a well-floured work surface. Divide the dough in half, then in half again. Continue until you have 16 fairly equal portions.
  4. Form each piece into a ball and flatten each one with the palm of your hand as much as you can. If the dough is sticky, use a bit more flour.
  5. Cover the flattened balls of dough with a clean kitchen towel and allow them to rest for 15 minutes (before getting your fry-on).
  6. After the rest period, heat a large pan over medium-high heat. Mine ended up cooked on about medium because the higher heat made them a bit, uh hmm, dark and smoky:)
  7. Using a large rolling pin, roll each dough piece into a rough circle, about 6-7 inches in diameter, keeping your work surface and rolling pin lightly floured. Don’t stack uncooked tortillas on top of each other or they will get soggy.
  8. When your pan is  hot, place one dough circle into pan and allow to cook about 1 minute or until bottom surface is lightly browned in places and starting to bubble a bit. Mine started to get tiny bubbles on top when they were ready to flip. If you start getting huge bubbles, like what happens when you make homemade pizzas, the tortilla might be cooking too much on one side.
  9. If your tortilla is browning too fast, which mine did, just take your pan off of the heat and lower it a bit before you put it back on. If it’s taking longer than a minute to see golden brown spots on underside of tortillas, increase the heat a bit. Flip to the other side and cook for about 30 seconds. You want the tortilla to be soft but have small golden brown spots on the surface.
  10. Remove the cooked tortilla from the pan with tongs and stack on a plate until all of your beautiful tortillas are cooked. Allow them to cool completely if not using right away.
  11. When cool, tortillas can be placed in a large zippered bag or plastic container. They will keep well at at room temperature for 24 hours or can be frozen indefinitely (If you can last that long; these things are addictively delicious!)