PB Fit Crazy Granola + Mother’s Day Breakfast

Crazy-Granola-009

Happy Mother’s Day week!

First of all- umm, how awesome are moms?

Crazy-Granola-020

I’ve been in the sweetest season this year of friends having babies- and watching those babies grow. From my best friend in Alabama’s little girl turning FOUR (oh my gosh how time flies) to my sweet girlfriends in Birmingham having little ones, to my besties in Nashville dreaming of giving birth to new life and seasons- this day feels special and celebratory.

I’ve also been thinking about how grateful I am for my own momma. I was raised by an incredibly strong, intelligent, beautiful, spiritual, courageous woman. She cares more deeply for people than anyone I’ve ever known- and I can’t count the amount of times as a nurse she put other people’s needs ahead of her own. Her life is stunningly beautiful.

Crazy-Granola-027

Crazy-Granola-025

And one of my favorite things we did for my mom as a kid was breakfast in bed. Our game plan: roll out of bed early on Mother’s Day and “cook” her waffles, toast, or bacon and eggs.

However, the reality of this situation was that my dad did most, if not all, of that cooking. BLESS HIM. And, with the most joyful suprise energy my brother, sister and I’s sleepy selves could muster, we would clammer into my parent’s bedroom with a tray full of our foodie creations- fresh flower in a vase for Mom- in hand.

From there the plan was for her to eat breakfast in bed. The reality is most likely that about 5 minutes later she was out of bed helping us put Church clothes on. :)

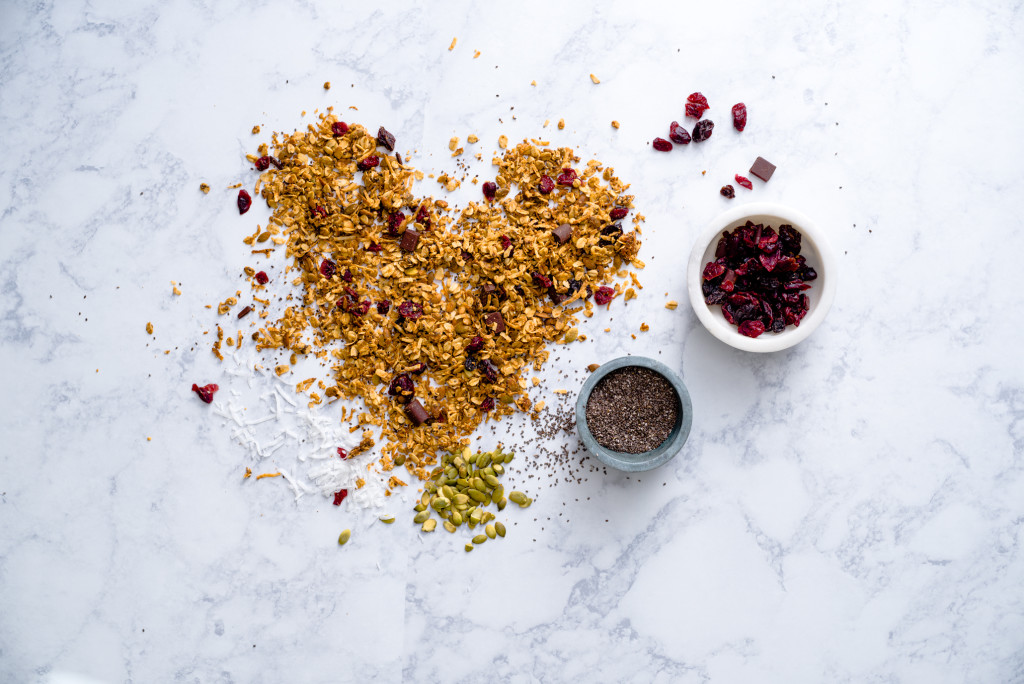
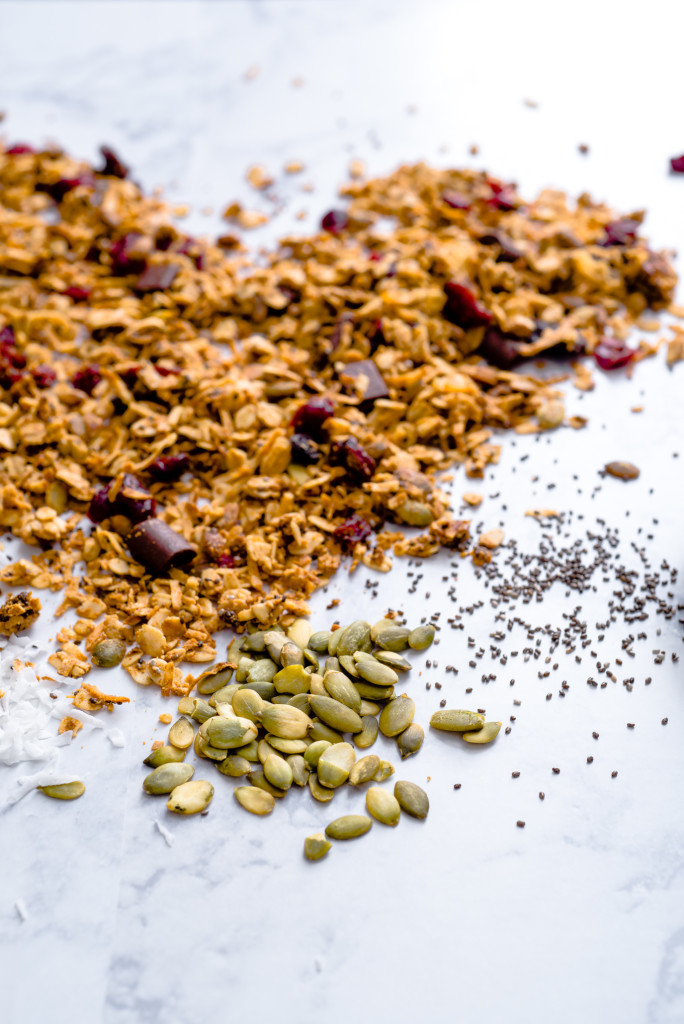
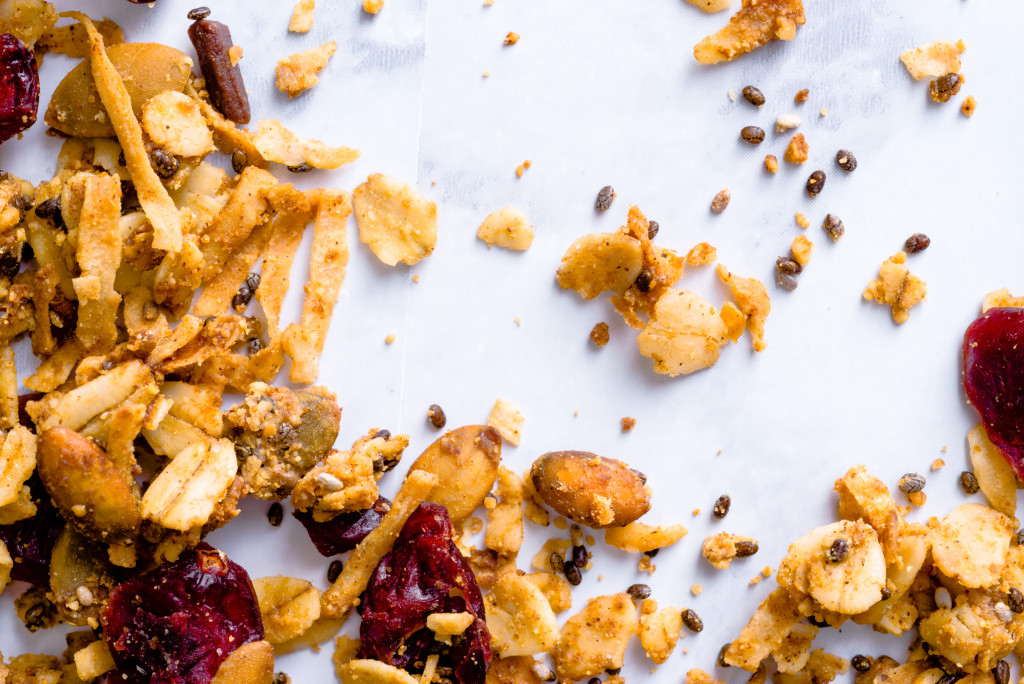
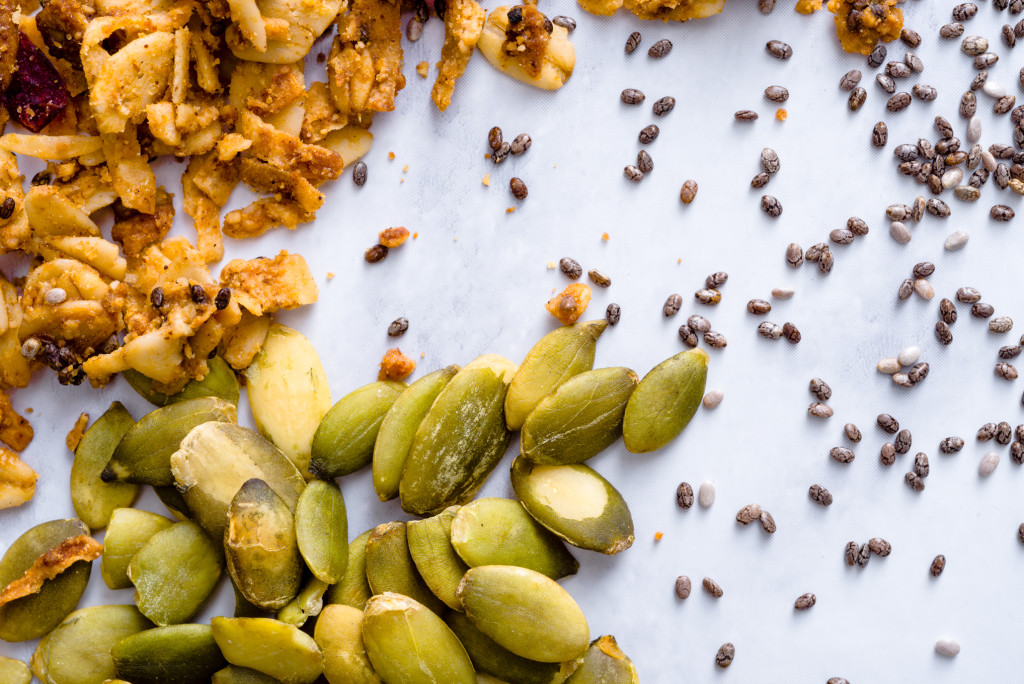
This week’s recipe is an homage to moms by helping younger ones make one of the easiest, use-what’s-left-in-your-pantry granola I’ve developed yet. It’s my way to help you prepare ahead of time to bless your momma! Inspired by Detoxinista’s pumpkin seed granola, I wanted to do a different granola than the ones I had tried in the past.  I was coming off of a series of shoots and recipe development projects that left with me with lots of healthy ingredients in my pantry. This granola turned out to be a fab way to tie them all in.

Crazy-Granola-023

Which brings me back to Mother’s Day. Y’all, here’s our chance to love people with tasty food! Make a batch of this granola for your momma- and feel free to make substitutions to match what she likes. Does your grandmother like cherries? Use those as your dried fruit. Does your mom run triathlons and love almonds? Use raw almonds instead of pumpkin seeds. The possibilities are endless.

I have a feeling that thinking about her- and bringing her breakfast- may just make all of her mornings for a long while.

Crazy-Granola-010

PB Fit Crazy Granola 

This granola makes the best of both worlds- planning ahead and utilizing what you have in your pantry. Feel free to get creative with this and substitute different nuts, spices, or dried fruit/chocolate/nuts to stir in! This granola is also sublime layered with whole milk or dairy free yogurt, or doused in cold almond milk! 

Yield: Granola for a week!

What You Will Need:

  • 1/4 cup raw pumpkin seeds
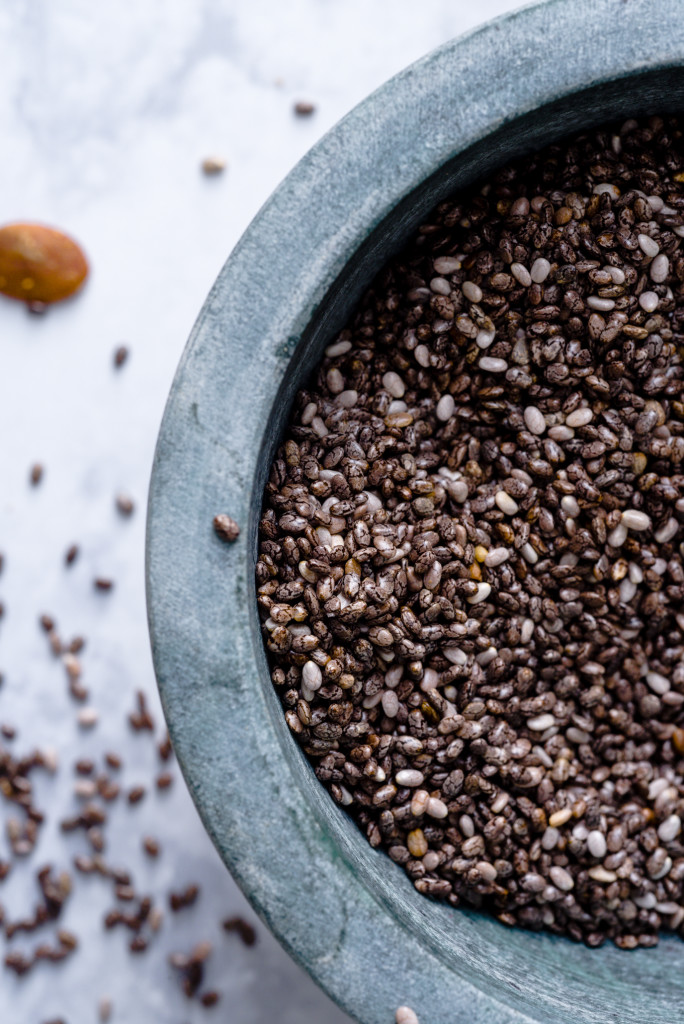
  • 2 tablespoons chia seed
  • 4 tablespoons PB Fit
  • 1 tsp cinnamon
  • 3/4 cup unsweetened shredded coconut
  • 1 cup rolled gluten-free oats
  • 3 tablespoons coconut oil, melted
  • 1 tablespoon honey
  • 3 packets stevia
  • 1/4 tsp salt
  • 1/2 cup dried fruit and dark chocolate chunks

What You Will Do:

  1. Preheat oven to 325. Line a light metal, rimmed baking sheet with parchment paper.
  2. Stir everything but dried fruit and chocolate chunks together in a large bowl with a spoon. Spread mixture into an even layer onto parchment paper.
  3. Bake granola for 10 minutes: remove from oven, stir, and bake 10 minutes more. Let cool.
  4. Once cooled, add 1/2 cup dried fruit and chocolate. Enjoy!


Golden Milk Iced Coffee + Breakfast Tips with a Health Coach

Golden-Milk-Iced-Coffee-002

BREAKFAST!!!

One of my favorite times of the day. Ever since I shouted “RISE AND SHINE!” to my college roommates as I ran out the door to hit up the cafeteria at 7 AM (yes, I was THAT person) my love for the first meal of the day runs DEEP.

Also, breakfast involves coffee, which I consider to be one of the most necessary food and/or beverage groups out there.

Golden-Milk-Iced-Coffee-018

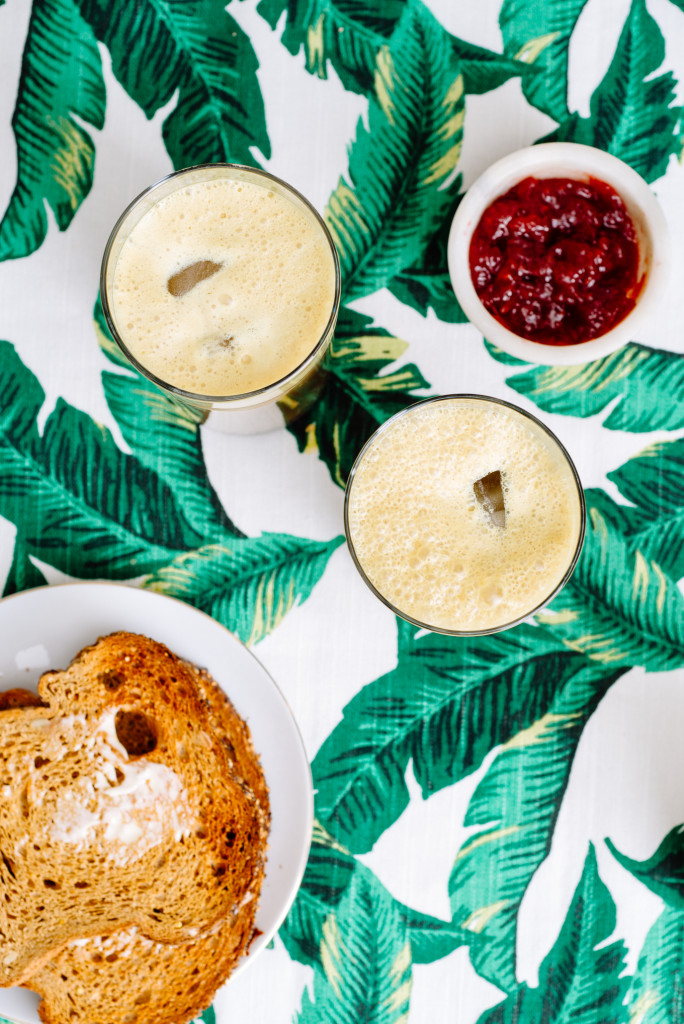
That’s why this week I decided to combine my love of breakfast + coffee + health benefits and show you guys how to make a bang-up golden milk iced coffee that could get you going and bless yo’ brain.

Now, what is golden milk? A super delicious, coconut-based milk laced with turmeric and black pepper said to have anti inflammatory and relaxation properties. It’s wonderfully rich, a bit spicy, a bit sweet, and just right for combining with coffee. Just like with our cheesy turmeric crackers post, combining turmeric with black pepper in golden milk, is a great way to unlock curcumin- which can aid in digestion and stabilizing blood sugar.  Plus, this golden milk is simple, only slightly sweet, and made with dairy-free coconut milk. WIN!

I also realize that breakfast is WAYY more than coffee- and should be- because, after all, if you want to get that gold star MVP award at work you need to be on your game!! So I recruited my great friend Mallory Swain, of Mallory Swain Health Coaching, to hang out on my sofa and teach me her nutritious breakfast ways. Her number one tip? Make a smoothie!!

Also, you can find Mal’s first favorite smoothie recipe here. And her current fave recipe is linked on the YouTube video details!

So this weekend, sit back, relax, blend up a smoothie, check out Mallory’s website, and enjoy some Golden Milk iced coffee. You’ve earned it!

Golden-Milk-Iced-Coffee-014

Golden Milk Iced Coffee

This recipe works best when your golden milk and coffee are hot! I like to make the golden milk ahead of time, keep it in the fridge, then heat it up for about a minute while I make my coffee. This golden milk recipe is a bit modified from Wellness Momma‘s version. Blend, add ice, enjoy!
What You Will Need

  • 8 to 10 ounces fresh, hot coffee (I like the French press method)
  • 1 13.5 ounce can organic coconut milk
  • 2 tablespoons coconut oil
  • 1 tsp turmeric
  • 1/2 tsp cinnamon
  • Pinch of black pepper
  • Pinch of cayenne pepper
  • 1 inch piece ginger, peeled and grated
  • 1 teaspoon organic vanilla extract
  • 1 tablespoon honey
  • Powdered stevia, to taste

What You Will Do

    1. Combine coconut milk, oil, turmeric, cinnamon, black pepper, cayenne, ginger, and vanilla extract in blender until combined.
    2. Heat mixture over medium heat until combined and coconut oil is melted.
    3. Stir in honey until dissolved.
    4. Remove from heat, pour into a jar, and allow to cool (or use immediately in coffee).
    5. Pour coffee and desired amount of golden milk into blender. Blend on medium speed until combined. Taste; add stevia if needed.
    6. Allow coffee to cool for a few minutes; pour over ice and enjoy!

Cereal Taste-Testing and My Favorite Nut Mylks


Rainbow Lucky Charms
Rainbow Lucky Charm bark by Aww.Sam! Her site is THE CUTEST.

We have eaten a lot of vegetables on the blog this month and for that I am SO grateful! But I do have a confession to make.

Some days, at the end of a long photo shoot, or just creative day in general where my brain is spent- all I really want is a bowl of crunchy goodness doused in ice-cold milk. Or MYLK, as all of the fancy nut-based milk companies are starting to spell it.

CC FIVE!
Salty Canary’s Count Chocula donut prep. FAB.

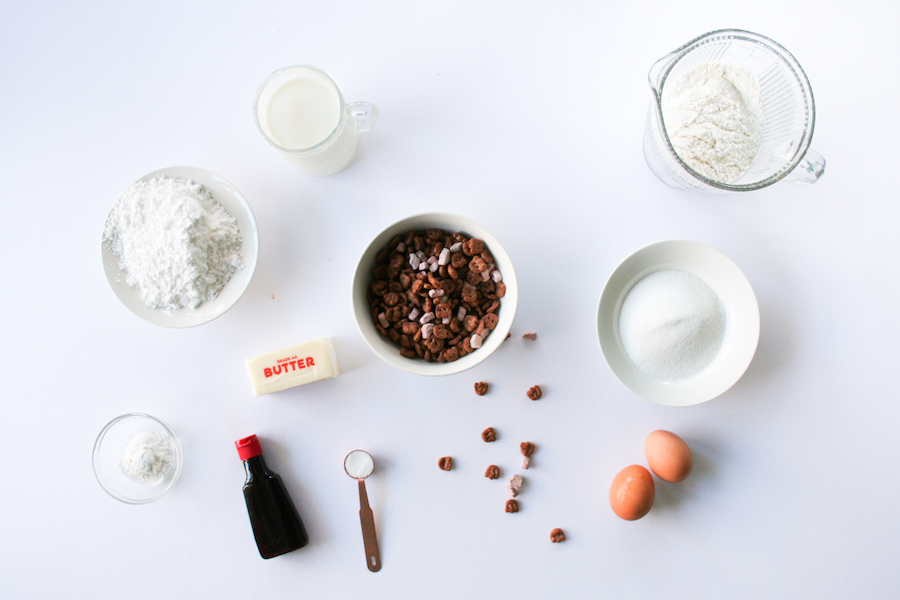
So this week, I decided it was time to take a break from cooking, and celebrate cereal. Pure and simple- just deliciousness in a bowl. And in honor of that, check out this week’s YouTube video of Jake and I taste-testing an item a bit out of our comfort zone- protein cereal.

Also celebrating sweet and tasty flakes in a bowl, here are my top five favorite cereals and accompanying inspirational photos from other bloggers who actually made things with these cereals:

My FAVE 5 Cereals To-Date:

  1. Count Chocula: Forget only at Halloween, WHY CANT WE EAT THIS YEAR-ROUND?!

    Salty Canary's Count Chocula donuts!!
    Salty Canary’s Count Chocula donuts!!
  2. Lucky Charms: Because, you know, everything is better with marshmallows in it.
Aww.Sam's Lucky Charms bark!
Aww.Sam’s Lucky Charms bark!
  1. Aldi Simply Nature Coconut And Chia granola: Y’all, not only is this cereal a bargain, it’s also delicious with yogurt. Oh my gosh, so good with yogurt.
  2. Nature’s Path Organic Heritage Flakes: Ok, I know, when I first tasted this cereal years ago I was like, “How could someone choose this over Frosted Flakes?” But now, y’all, I’m hooked!! It’s slightly sweet flavor and crunchy texture- soooo tasty.
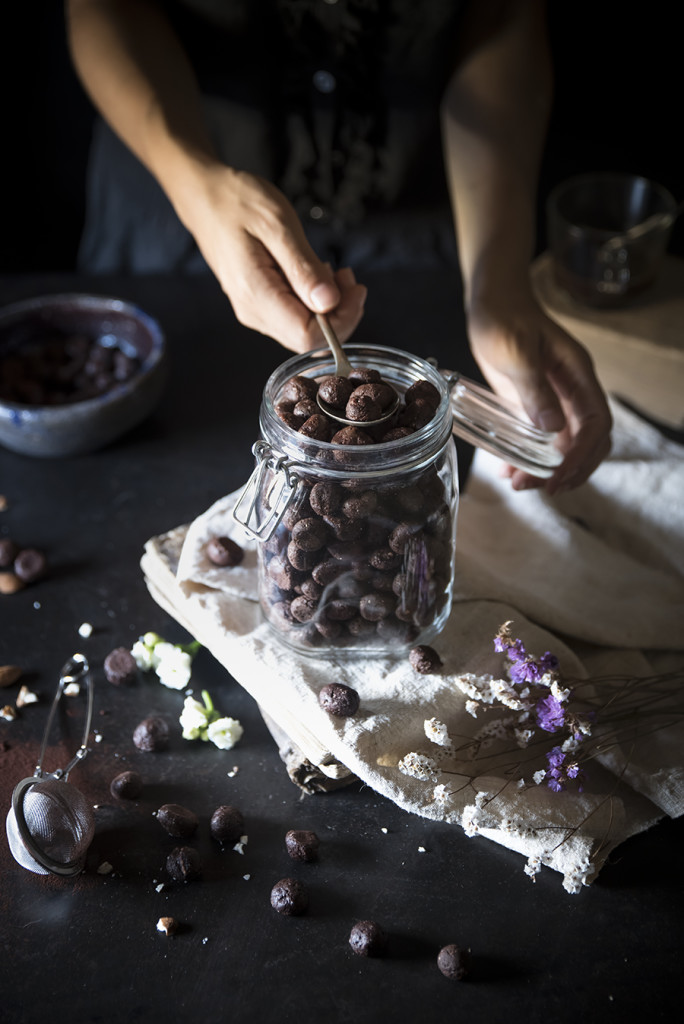
  3. Cocoa Puffs: I grew up eating this cereal every day. Seriously, my mom was AWESOME.
Cocoa Puffs with Almond milk!
These homemade Cocoa Puffs!

My Fave 5 Nut Mylks to Date:

  1. Califa Farms Toasted Coconut Almond Milk: OH. My. GEEZ. This carton is gone in a flash in our household. It’s so good on it’s on, with cereal, with everything..
  2. Trader Joe’s Almond Milk Unsweetened Vanilla
  3. Eden Foods Soy Milk: I totally dig Eden Food’s soy milk because it has SO much protein!! It has like 12 grams a serving, which totally helps make cereal a meal.
  4. Silk Original Almond and Coconut Milk: This is perfect for cereal AND smoothies.
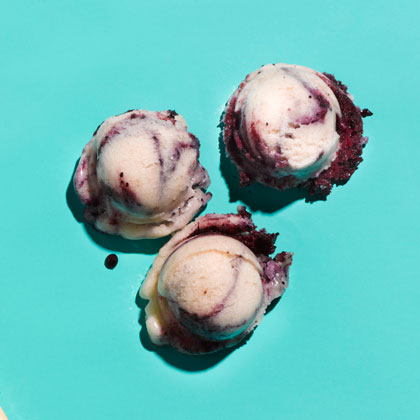
Blueberry and Banana Ice cream from Health- made with almond milk!
Blueberry and Banana Ice cream from Health– made with almond milk!

5.Califa Farms Black and White Cold Brew Coffee: I know this one involves coffee but helloooo this is so slammin’ delicious and perfect for warmer weather. And I totally wouldn’t judge you if you ate this with Cocoa Puffs for breakfast.

This weekend, I encourage you to sit back, relax, and pour yourself a cold bowl of cereal. With marshmallows.

XOXOXOXO!!!

Cheesy Whole Wheat Turmeric Crackers


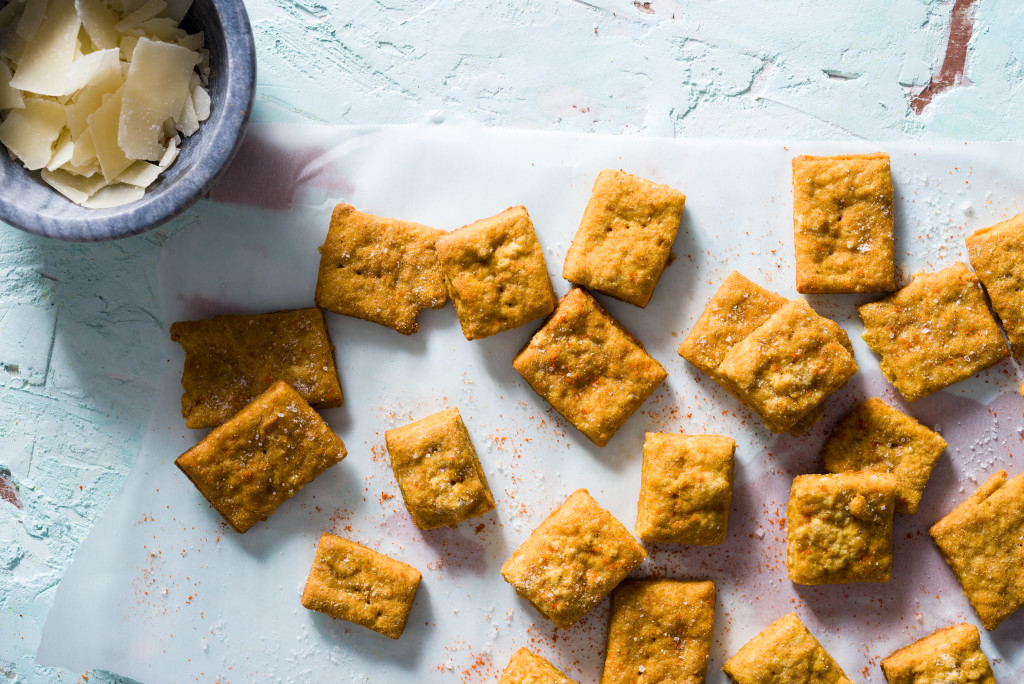
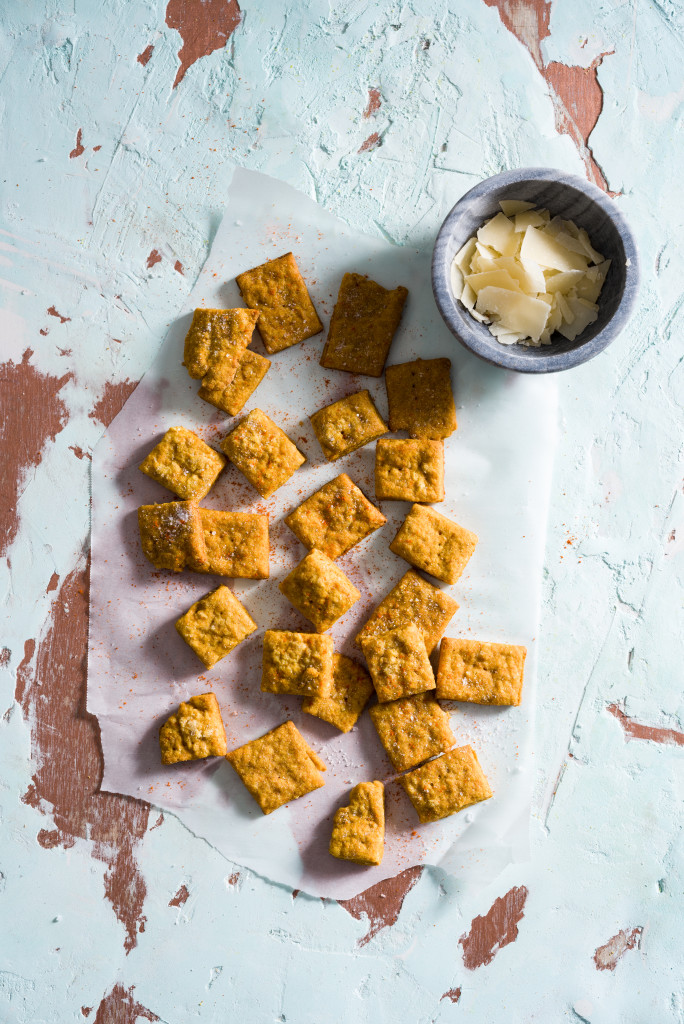
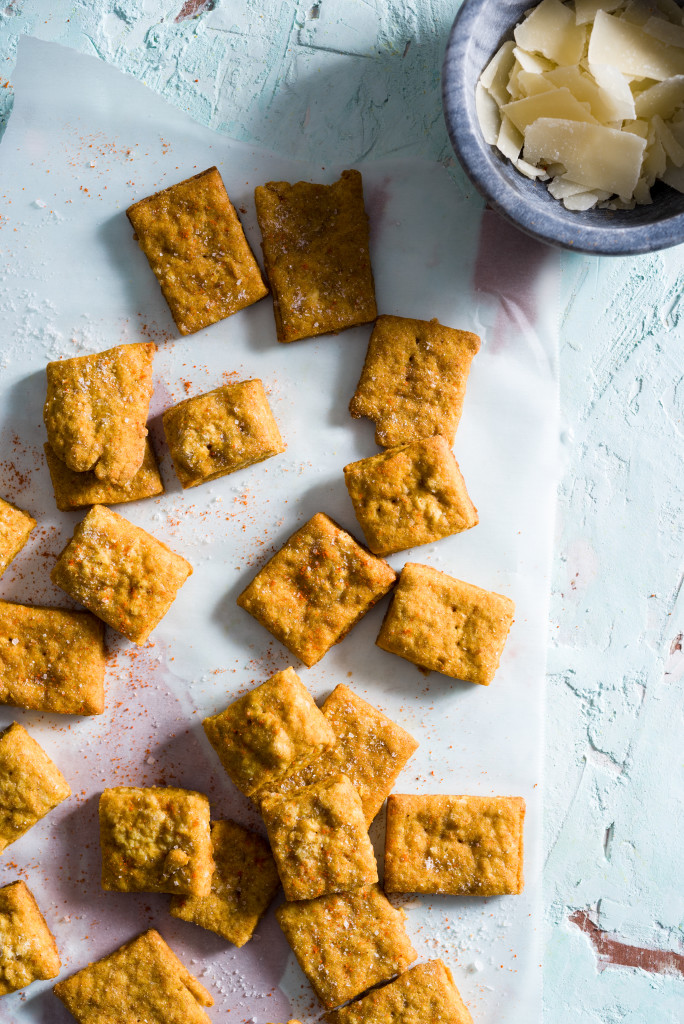
Close-up of homemade cheesy turmeric crackers on a textured blue paster surface with copper accents and small bowl of shaved parmesan cheese.

Imagine this: you are in an exotic market in India. Color fills your vision as you scan the crowd; eager vendors call to you, and the smell of pungent spice quickly hits your breath. It’s exciting, and you eagerly anticipate tasting, seeing, and experiencing the flavor and energy that is all around you.

You walk towards an enthusiastic vendor, eyeing the mountains of brightly hued powders displayed in woven baskets in front of her. A bright orange one catches your eye, and you bend over to smell. It’s pungent and sweet, a bit peppery with a hint of citrus. You scoop a heaping spoonful into your bag, hand the salesman a few coins and head home to uncover it.

**********************************************************

As much as I want that story about India and an exotic spice market to be part of my actual life experience, for now we’ll chalk that up to food fantasy! But the appeal of turmeric is real. Ever since I first discovered the spice a few years ago while trying out a vegan queso dip recipe, I wanted to learn more- and figure out what was up with ALL the articles filling my news feed about it’s benefits.

As you can see in the video, while the pronunciation of turmeric- and circumin-threw me for a bit of a loop, the health benefits of turmeric really are AWESOME. It’s great for your brain, anti-free radical, and can be a preventative measure in your diet against diseases. But I needed help figuring out what to put it in. So….Let’s discuss what to cook with turmeric:

*Egg scrambles and frittatas: Superfood Fritatta

*Roasted veggies (especially root vegetables, cauliflower, and potatoes): Roasted Cauliflower with Turmeric and Cumin

*Rice! Colorful Vegan Turmeric Rice

*Sauteed greens- like kale, collards and cabbage: Scrambled Tofu with Collards and Turmeric

*Soups: Golden Turmeric Chickpea Chicken Soup

*Smoothies Golden Milk Turmeric Smoothie

*Golden Milk! Just click here for Wellness Mama’s recipe:)

Also, one last fun fact: PEPPER activates turmeric! I learned to add about 1/2 teaspoon ground black pepper to 1/4 cup ground turmeric. The pepper adds a bit of spice to the turmeric as well- YUM! Huge shout out to this article from the Kitchn about turmeric that helped make that list!

Tumeric-Cheezy-its-015

This week’s recipe features turmeric in a super fun way– cheesy whole wheat turmeric crackers!! I don’t know about y’all, but there are days when this thought- “Oh my gosh, CHEEZ-ITS!!” consumes my brain. Especially with a Coca-cola- yessssss, please.

But this recipe is EVEN tastier than a processed cheese cracker and has healthy turmeric, paprika and parmesan cheese, which we all know is a winning flavor combo in a baked cracker. Healthy snacking=WIN WIN WIN.

Alright! Let’s stir up that turmeric, and eat those health benefits my friends! Loving people with food and nutrition, yessss pleeeaseee!

Tumeric-Cheezy-its-018

Cheesy Turmeric Whole Wheat Crackers (Recipe from food52 with the substitution of whole wheat flour by me)

This easy, baked cracker is addictive (my husband and I downed a few bags of them all on our own!) Healthier than a traditional processed cheese cracker, these guys are not hard to make and bake up a bunch of squares! Plus you can add more cayenne if you are feeding a spice-friendly crowd.

Time: Probably about an hour!

Yield: LOTS of crackers! Enough to feed a small party of 8-10.

What You Will Need

  • 1 1/3 cups whole wheat flour
  • teaspoons baking powder
  • teaspoons white sugar
  • teaspoon salt
  • 3/4 teaspoon ground turmeric
  • 1/4 teaspoon cayenne (you can add more here for more kick!)
  • tablespoons nutritional yeast (you can buy this in bulk online or at your local healthy foods store)
  • 3/4 teaspoon ground paprika
  • 1/2 teaspoon garlic powder
  • 1/2 cup grated Parmesan cheese
  • cup heavy cream
  • egg
  • tablespoons water
  • Coarse salt, for sprinkling

What You Will Do

  1. Preheat your oven to 375°F (190°C).
  2. In the bowl of a food processor, pulse together the flour, baking powder, sugar, salt, turmeric, cayenne, paprika, nutritional yeast, and garlic powder. Add the parmesan and pulse to combine.
  3. With the machine running, add the cream in a steady stream, then pulse until the dough comes together in a ball.
  4. Transfer to a lightly floured surface, then divide in half. Keep one half in the refrigerator while you work.
  5. Roll the first half into a rectangle, about 1/4-inch thick. You can make the crackers thicker or thinner, depending on how crispy you want them. You’ll just need to keep an eye on the baking time and take them out as soon as they start to brown.
  6. Using a pastry wheel or pizza cutter or sharp knife, slice the dough into small 1-inch squares. Transfer them to a parchment-lined baking sheet (you can transfer the dough first then cut them if that’s easier).
  7. Whisk together the egg and water and lightly brush the egg wash over the tops of the crackers.
  8. Poke holes in each cracker with a fork if you are feeling motivated; sprinkle with coarse salt, and bake for about 15 minutes, or until they start to brown around the edges. Remove from the oven and let cool—they’ll crisp as they sit. Repeat with the second half of dough.
  9. ENJOY the cheesy turmeric-y goodness!


Beluga lentils with Yogurt, Olive Oil and Oregano

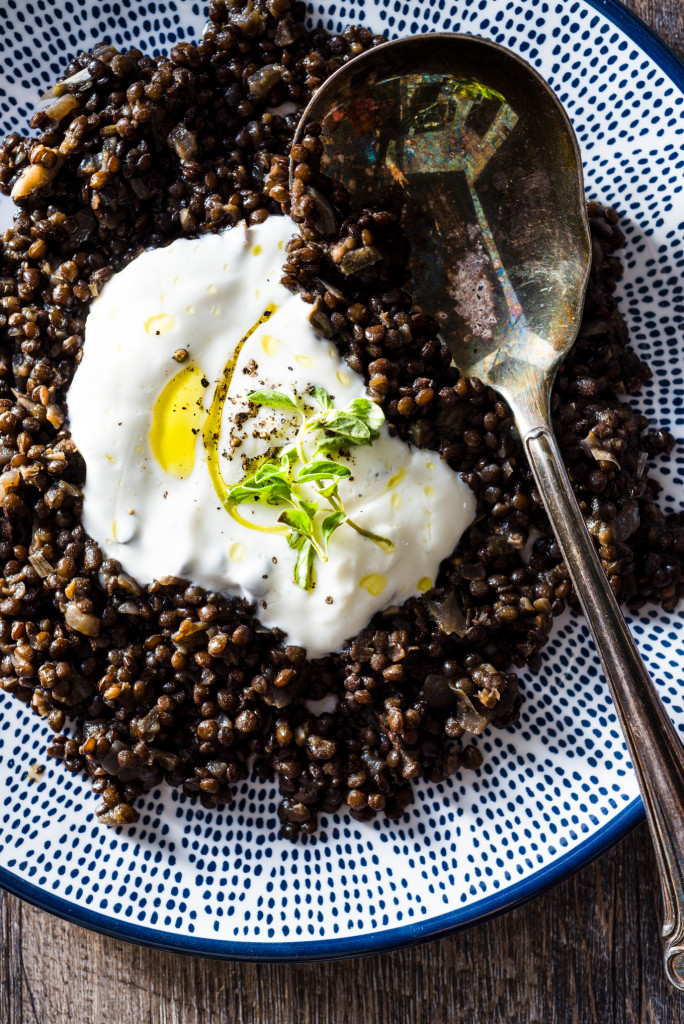
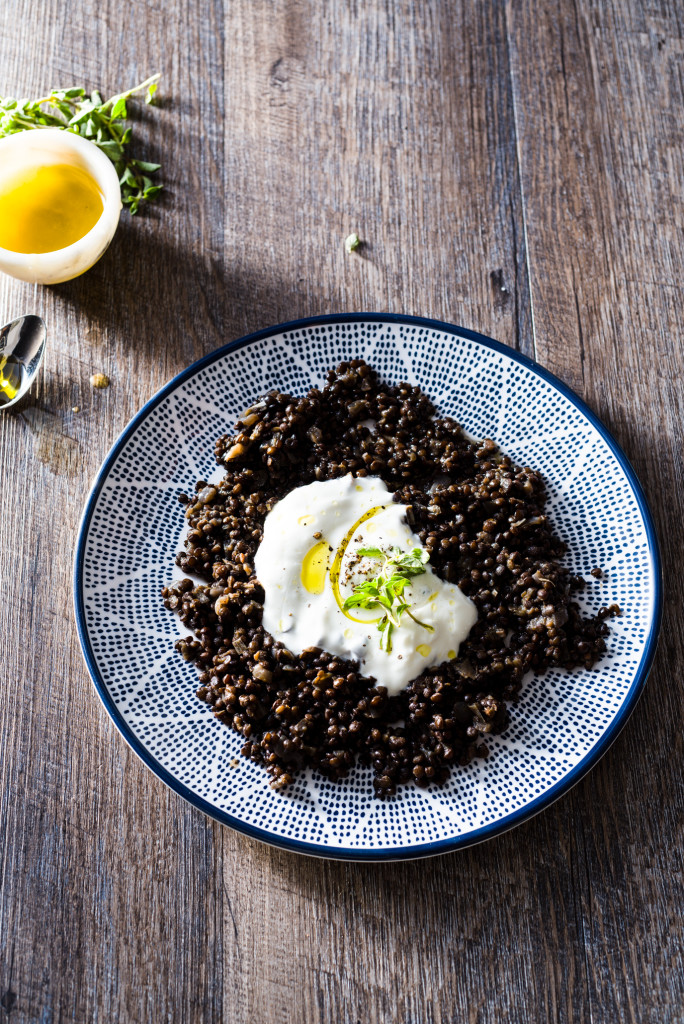
Beluga Lentils

Imagine you are on a really expensive yacht. Waves crash into the side of the perfectly white exterior as the sun shines down on your face. A breeze blows through your hair, and, a bit parched from the warmth, you reach for a glass of icy cold Champagne. A waiter passes by with a tray of shiny black caviar on a crispy crostini, topped with bright green herbs.**

**It should be noted, as part of this fantasy, you are all perfectly tan, just worked out with your personal trainer and your mascara is TOTALLY still on your face.

“I’ve never been a huge fan of caviar,” you think to yourself, “But I’ll give it a try.” The moment the crunch hits your lips you realize- this gleaming substance isn’t caviar at all! It has a much subtler flavor with a hit of spice and an olive oil richness. No pungent fish flavor-no gumminess- it’s just, well, nice.

Welcome to the world of beluga (as in caviar-esque) lentils! Known for their texture (as opposed to the creamier mouth feel of other lentils), these black lentils are perfect for appetizers and salads because of their heft. They also, when cooked correctly, have a shiny gleam to their exteriors, much the same as caviar (but for a whole lot less money).

That’s why this week we are all about some lentils!!

Fun Beluga Facts! 

  • The best cooking ratio is 1/2 cup lentils (rinsed) to 2 cups filtered water.
  • Prep yo’ lentils! Rinse the lentils thoroughly (remove any weird looking bits that may have congregated bag), combine them with water, add salt, and bring to a boil. Simmer for 30-40 minutes covered, with the top slightly askew to release steam.
  • Flavor these legumes in all kinds of ways! Try adding Asian spices, kombu (seaweed), salt + pepper at the beginning of the cooking process.

Beluga-Lentils-4

  • Keep tasting!! Once you reach the 30 minute mark, check to see if the lentils are done. They should have a bite but not leave a starchy aftertaste in your mouth. If they need more time, keep them simmering!
  • Finish the lentils by topping with yogurt (like our recipe), olive oil, herbs, etc.
  • Belugas also go great with fish! (Speaking of caviar…)

So, this week let’s break out our most luxurious of circumstances (for me, it’s my plastic pool in the back yard with our dog Bigsby) and umbrella cocktail, and enjoy the luxury that is belugas!

Beluga-Lentils-4

Beluga Lentils with Yogurt, Olive Oil and Oregano (Recipe modified a bit from Bon Appetit’s Spiced Black Lentils with Yogurt and Mint)

This recipe blew me away with it’s deliciousness! The amazing flavor you get from toasting the powdered spices and mustard seeds brings these flavors to life. I was so addicted to these lentils that I drove around eating them out of a plastic tub in my Prius. 

Serves: 4-6 as a side

Time: 50-ish minutes

What You Will Need:

  • ½ teaspoon ground coriander
  • ½ teaspoon ground cumin
  • ½ teaspoon whole mustard seeds
  • 2 tablespoons olive oil plus more
  • 1 small onion, finely chopped
  • 2 cloves garlic, finely chopped
  • 1 cup black beluga lentils
  • 3 cups (or more) low-sodium vegetable broth*
  • 1 teaspoon red wine vinegar
  • Kosher salt, freshly ground black pepper
  • 1 cup plain Greek yogurt
  • fresh oregano, for topping
  1. Heat rimmed saute pan on medium heat. Add olive oil and spices; stir frequently, toasting for about one minute. This should smell pretty tasty!
  2. Add onion and garlic and cook until just softened, stirring frequently again!
  3. Add lentils and broth; bring to a boil, cover slightly, then reduce to low heat. Cook for 30 minutes, and taste to see how they are doing. Mine took about 50 minutes to reach the texture I liked.
  4. Once done, add in the vinegar, salt and pepper to taste.
  5. Serve warm, topped with Greek yogurt, a drizzle of olive oil, and fresh oregano leaves. YUM!!!

*I realized that I labeled this recipe as vegetarian, but when I cooked these I used Trader Joe’s chicken stock. So you can do whatever you feel here!


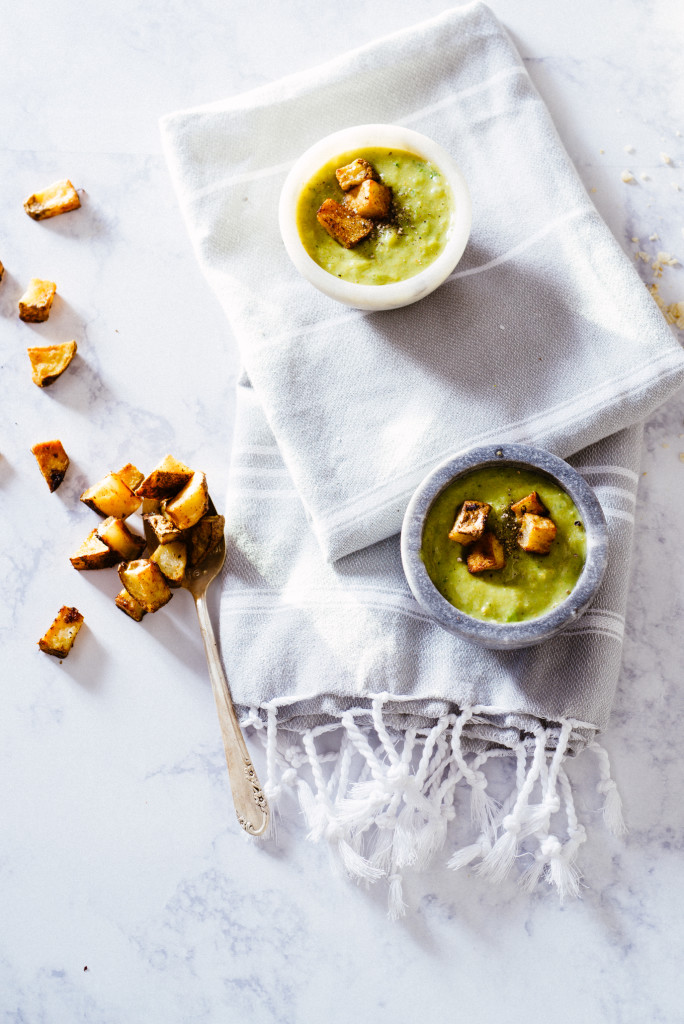
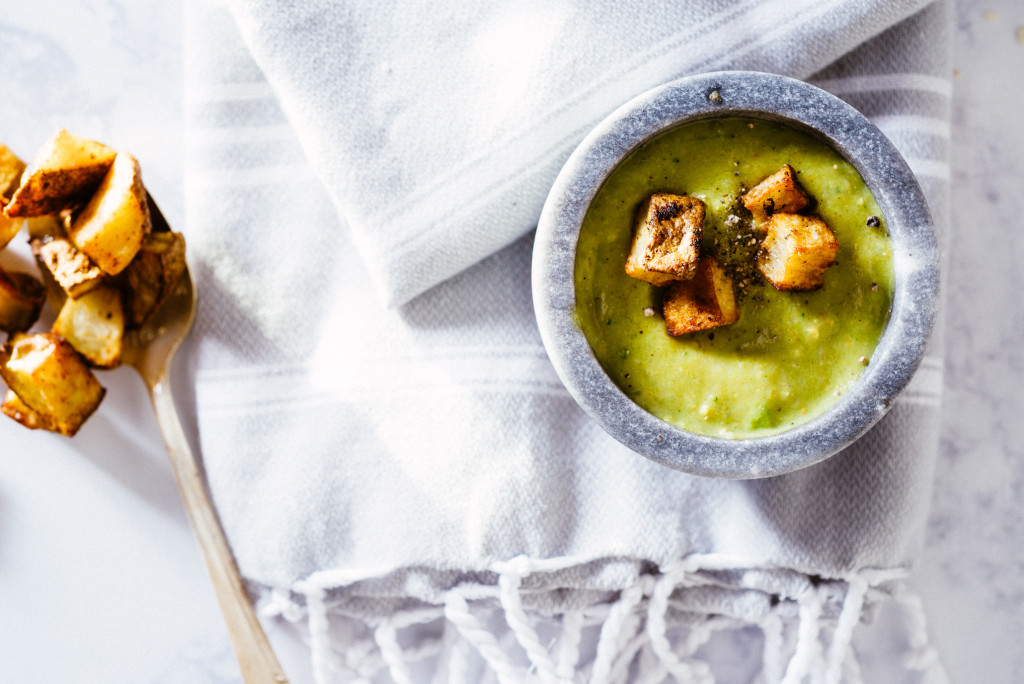
Creamy Non-Dairy Broccoli Soup with Spicy Potato Croutons

Vegan-Broccoli-Soup-1

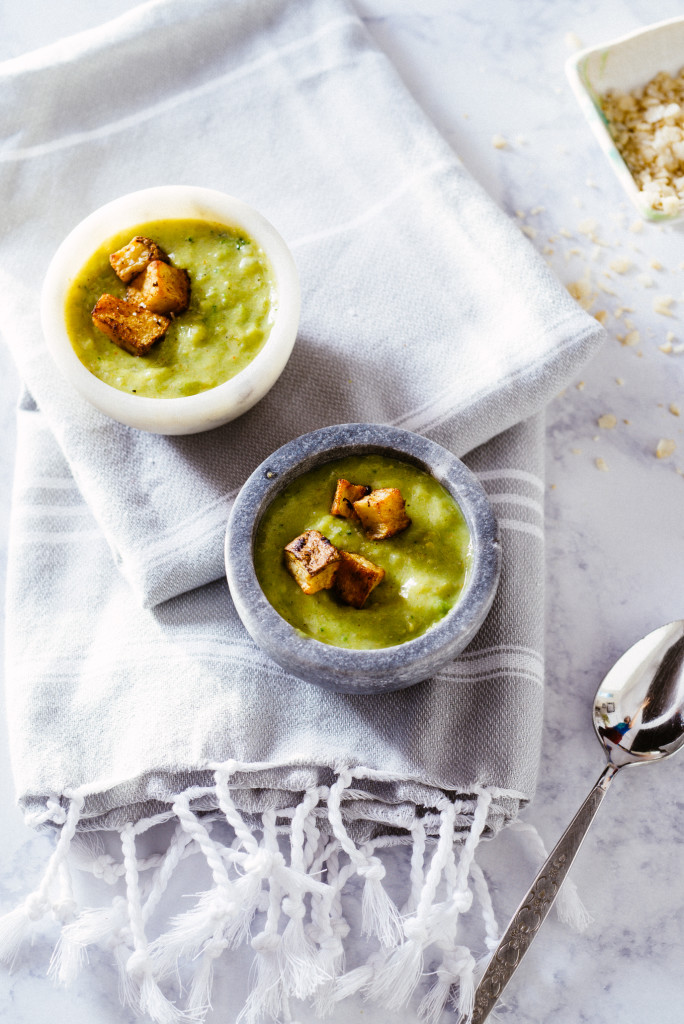
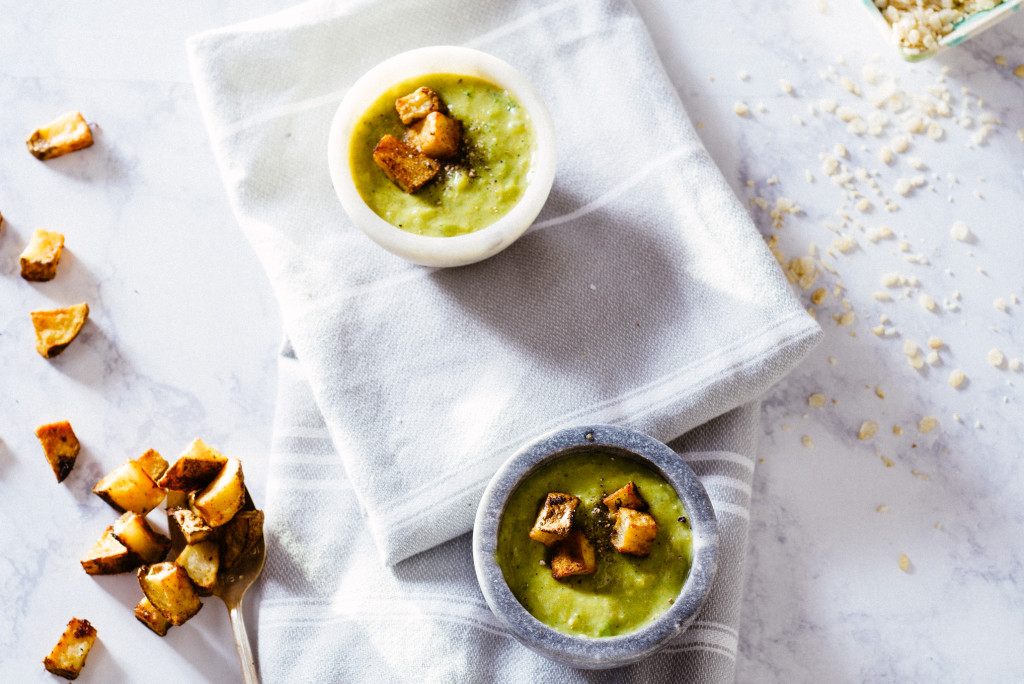
Creamy broccoli soup with potato croutons!!

Brown rice flakes!!

Wait-in a soup?!

Y’all! Let me tell you about a new favorite pantry discovery: brown rice flakes.

Soups, smoothies, stews- these fabulous flakes add a nutty, creamy texture to almost anything! There are a BRILLIANT way to add a new flavor profile to your favorite foods, and have lots of vitamins and minerals (shout out to NIACIN!! This B vitamin helps lower cholesterol). Plus, speaking of lowering unhealthy cholesterol (this thought always awakens memories for me of Quaker oatmeal commercials while watching the Today show) you can ALSO make brown rice overnight “oats.”

Vegan-Broccoli-Soup-4

That’s right, everyone out there who is stuck in a oatmeal rut now has NO excuse not to try these. I for one am vehemently raising my hand for seconds and sending a huge shout out to The Greedy Vegan for her beautiful overnight brown rice flakes with blueberries recipe!! Also, her discovery (that I share in my YouTube video below) about the ratio for those perfect overnight “oats” came at a great time:

But back to this week’s recipe! How did I discover my newfound love for these flakes? Cleaning out my pantry; and realizing that I had a brown rice flakes bag from Eden Foods with an awesome broccoli soup recipe on the back of the bag.

Vegan-Broccoli-Soup-3

I love recipe development; it is one of my favorite types of work I do with food and food styling. Last year I was honored to do a bit of recipe development for a blog that featured their products, and had an extra bag. YES!

And in the spirit of all things informational and adhering to the Luv Cooks formula (Fun=Food), here are our FUN FLAKE FACTS!!!

Brown rice flakes***:

  • Are made from dehusking ricewhich is flattened into flakes. 
  • Can be fire-roasted (which our flakes are)
  • Can be eaten raw or cooked b/c it’s super digestible!
  • Are popular in India, Bangladesh, and Nepal (we are so exotic!!)
  • Adds creaminess to soups, stews, smoothies
  • Can be used in a 1:1 liquid to flakes ratio for overnight oats
  • Has Niacin (for lowering cholesterol) and magnesium (great for everyone!)

***(shout out to The Greedy Vegan and One Green Planet for their awesome brown rice flakes tips)

Vegan-Broccoli-Soup-5

So get your easy, healthy, curry soup pot on and let’s get roasting!

Creamy Curried Broccoli Soup (inspired by the Eden Foods brown rice flakes bag!) with Spicy Potato Croutons

Serves 6

Cooking Time: About 35 minutes

Break out of your broccoli soup rut with this week’s recipe! It only takes about 30 minutes for the whole meal (plus leftovers) if you throw the potatoes in the oven BEFORE you start the soup! Fast, healthy, and featuring my new favorite ingredient, brown rice flakes. GET YOUR SPICE ON!!

For the soup:

What You Will Need:

  • 1 tablespoon olive oil
  • 1 small sweet onion, diced
  • 1 tablespoon roasted hatch chiles (if you don’t have hatch chilis, roasted jalapeños would work great)
  • 2 cloves garlic, sliced
  • 1 teaspoon curry powder
  • 12 ounces frozen broccoli
  • 3 cups filtered water
  • 1 cup unsweetened soy milk
  • 3/4 cup brown rice flakes
  • 3/4 teaspoon sea salt
  • 1/8 teaspoon ground black pepper

What You Will Do:

  1. Heat oil over medium heat; sauté sweet onion and hatch chilis for about 4 minutes, or until softened. Add sliced garlic and curry powder; cook for about 1 minute more.
  2. Add broccoli, water, soy milk, brown rice flakes, salt and pepper.
  3. Bring to a boil, then reduce to a low simmer for about 15-20 minutes, or until the broccoli is tender and the soup has come together a bit.
  4. You can either puree the soup in two batches in a blender to make it extra smooth; I like my soup a bit chunkier, so I followed Eden’s method and blended half of it, then stirred the blended half into the chunkier soup.
  5. Taste and season with additional salt and pepper if needed. ENJOY!!

For the Roasted Potato Croutons:

What You Will Need:

  • 1 russet potato, washed and diced
  • 1 teaspoon chili powder
  • 1 tablespoon olive oil
  • Salt and pepper, to taste

What You Will Do:

  1. Preheat oven to 425.
  2. Line baking sheet with aluminum foil and spray with cooking spray.
  3. Toss potatoes in olive oil, chili powder, and at least 1/4 teaspoon salt and a few pinches pepper. Spread evenly onto baking sheet.
  4. Bake for 10 minutes; stir; bake for 15 minutes more, or until nice and crispy.
  5. Top on warm soup and enjoy!!


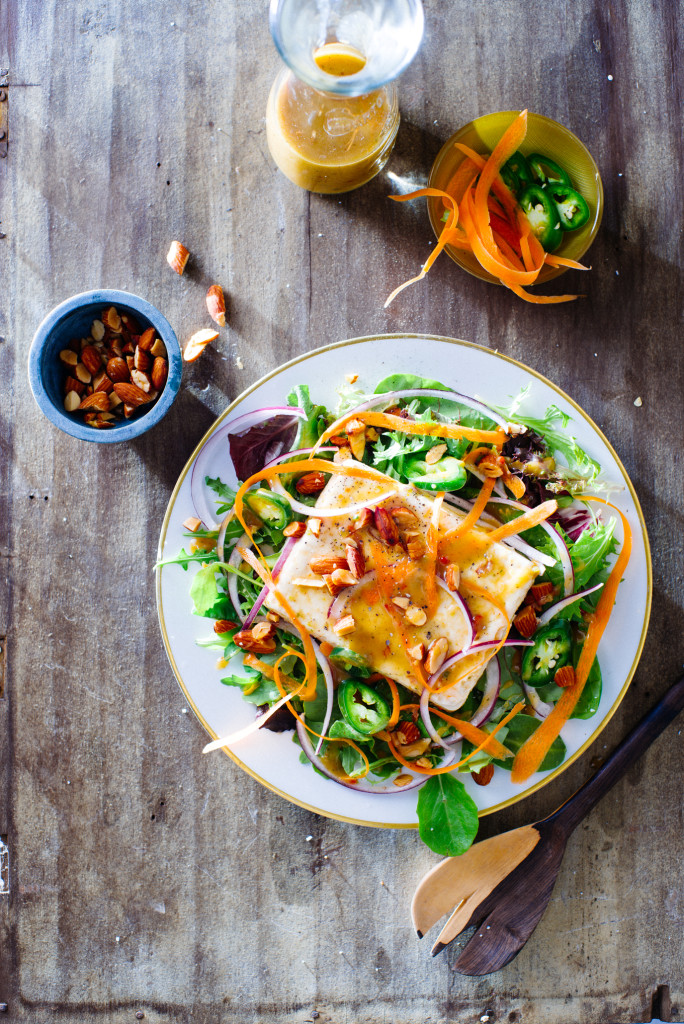
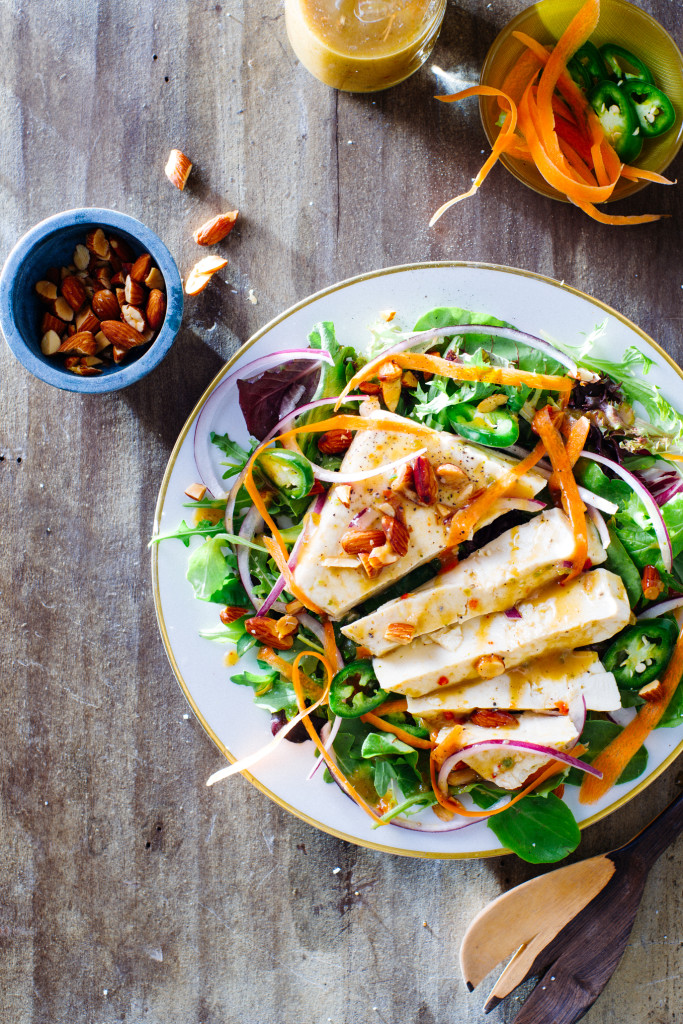
Tofu FUN: Marinated Tofu Salad with Spicy Peanut Vinaigrette

Marinated-Tofu-Salad-9

Tofu is FUN, and so are leftovers!

Ok, here me out.

Part of being a food stylist means I am oftentimes left with some of the craziest leftovers. Normal, wonderful people have ketchup and chicken breast and maybe a stray Chinese take-out container in their fridge. I have quail eggs, bonito flake puree and beluga lentils.

And you know what I realized? That’s kind of awesome. I mean- I am the first to admit that I hate leftovers past two days old. Spaghetti on day 3? It reminds me of my days at the Samford (university) cafeteria and let’s just say- I can’t go there (spaghetti, day one; manicotti, day two; shepherds pie, day 3; sloppy joes, day 4….you see where this is going).

But weird, random ingredients piling up in my pantry and/or fridge that haven’t been cooked yet? We can work with that.

Marinated-Tofu-Salad-3

Which brings me to this month’s focus- vegetarian recipes that attempt to use what I already have on hand. I’m thinking that if this goes well, I may just capitalize on it for months to come- highlighting some of the cool shoots I’ve been working on and sharing with you the ingredient leftover recipes. Let me know if this interests you!

On to tofu.

My inspiration for this salad came from my current favorite cookbook- Tokyo Cult Recipes– and their tofu salad. I noticed that the tofu they used was raw- as in not fried, roasted, or stir-fried- just all by it’s lonesome, right there on top of raw salad greens and veggies. My tofu-hesitant self was thrown. But also intrigued…so here’s what I learned.

Tofu 101: Huge shoutout to this article by the Kitchn for the helpful info! I highly recommend checking out the post if you are interested in learning more!

  • Tofu is a staple of Asian cuisine. Lots of people in Asia are super healthy. So I interpolate some connection there.
  • Tofu is made of soybeans and called bean curd! The difference in the two types of tofu comes from how much water is pressed out of the curd.
  • The more water you press out of tofu, the firmer it becomes and the longer it takes to cook. No water pressed = silken tofu; water pressed out=regular tofu.
  • Silken tofu is a beautiful thing; light and creamy, it ranges in texture from extra soft to medium to extra firm. It’s perfect for smoothies, puddings, salad dressing and sauces!
  • ***BAKING TIP ALERT*** Silken tofu can be used as an egg substitute in baking!
  • Regular tofu is also a beautiful thing. I used it in this spicy sweet tofu stir fry and it’s easier to take on the flavors of what you are cooking when you work with regular tofu. To keep it crispy and light, it helps to press even more water out of the tofu before cooking using a cast iron skillet and lots of paper towels (which you can read more about in that recipe).

Marinated-Tofu-Salad-4

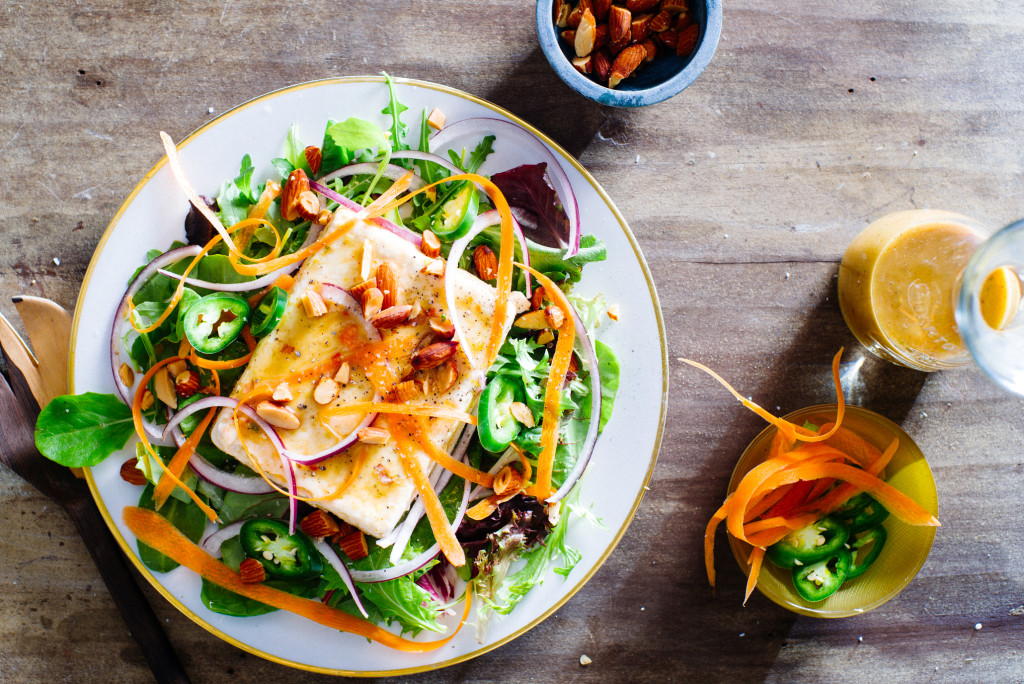
This week’s recipe uses silken organic tofu from Trader Joe’s as well as the Trader Joe’s Spicy Peanut Vinaigrette (which I dig). It’s SUPER simple to put together, will sincerely impress your vegan and vegetarian dinner guests and leaves you with leftover tofu to eat the next day that tastes EVEN YUMMIER.

Here’s to tofu love- and never being intimidated by leftovers!

Marinated-Tofu-Salad-1

Spicy Tofu Salad with Peanut Vinaigrette (Recipe inspired by Tokyo: Cult Recipes Tofu Salad)

The only prep required in this recipe is marinating the tofu overnight in a pre-made, spicy peanut dressing. Once the tofu is marinated, just assemble your veggies, soak the red onions if you want less of a bite, and voila! Lunch!

Serves: 6

Time: Overnight marinating plus 15 minutes assembly time

What You Will Need:

  • 19 ounces organic silken tofu, drained and cut in half lengthwise (so it forms two thinner planks)
  • 1/2 cup Trader Joes Spicy Peanut Vinaigrette plus additional for drizzling
  • 5 ounces organic mixed salad greens
  • 1 carrot, peeled then thinly shaved into ribbons with a vegetable peeler
  • 1/4 cup roasted salted almonds, roughly chopped
  • 1/4 red onion, thinly sliced and soaked in cold water for 30 minutes
  • 2 jalepenos, sliced
  • salt and freshly cracked pepper, to taste

What You Will Do:

  1. Pour 1/2 cup dressing over tofu halves in 8 by 8 inch baking pan, making sure to coat the top and sides of the tofu well with dressing. Cover with plastic wrap and put in fridge overnight.
  2. When you are ready, assemble the salad! Create a bed of salad greens, then top with one or two tofu planks. Add carrot ribbons, almonds, red onion, and jalepenos.
  3. Right before serving, drizzle with additional dressing to taste. You can either serve the tofu plank(s) whole and allow guests to slice, or go ahead and slice it into pieces for easy serving.


Popcorn Recipe Round-up + Taste-Testing a Teriyaki Beef Steak

Lucky Charms Popcorn

Friday is here!!!

This week I decided to throw caution to the wind (literally, the wind noise in the video I am sharing adds something, ummm special, to this week’s post) and share Jake and I’s attempt at taste-testing road trip snacks. Round 1- Jack Link’s beef steak, teriyaki flavor.


HAH! As you can see, we edited out much of our arguing about the ranking system for snacks; I said we should start with the flavor of a wet noodle thrown against a gas station wall as 1; he said that actually would be quite flavorful, so we landed on packing peanut as 1 (?) and a cold Snicker’s ice cream bar after a long summer day as a 10.

Also, I seriously doubt meat glue actually exists (I have the blog! I get the last word! HAH again!)

Ok, moving on! It has been such a fun month of popcorn recipes. I sadly only have one bag of SkinnyPop left at our house, and all of the recipes I’ve made have been eaten. So, just to keep this party rolling, I compiled a list of the Internet highlights so you can have more popcorn fun. Thin mint popcorn, popcorn snack mix, pizza popcorn, YES TO EVERYTHING!

  1. Lucky Charms Popcorn from a Night Owl Blog! Lucky Charms marshmallows + kettle corn + candy melts

Samoas Popcorn

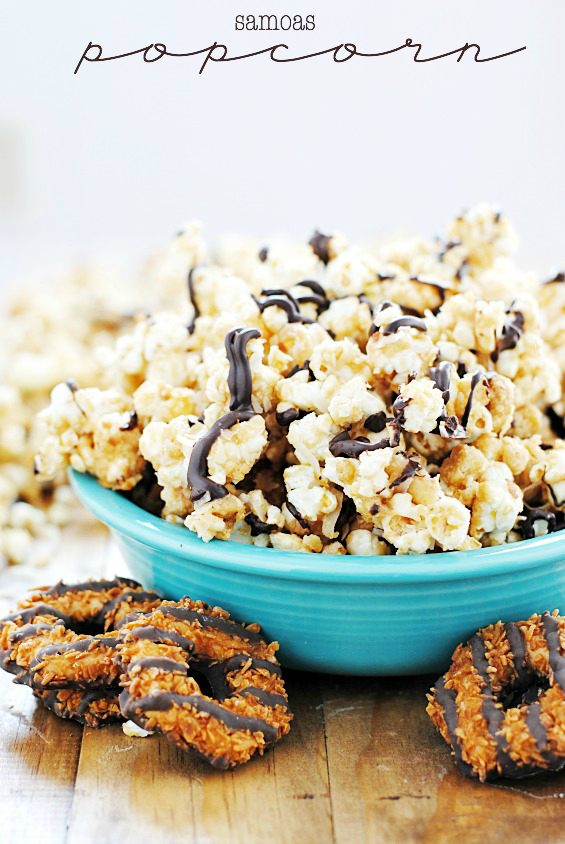
2. Samoas Popcorn from Something Swanky: Popcorn + Caramel + Toasted Coconut + Shortbread Cookies + Chocolate

3. Pizza Popcorn from Naive Cook Cooks: Popcorn + GREAT spices + Tomato Paste + Parmesan + Fresh Basil

Crab Boil Popcorn4. Crab Boil, Ramen and Everything Bagel popcorn from Food Network  Popcorn + 50 FLAVOR OPTIONS!!!

Smitten Kitchen popcorn mix5. Popcorn Party Mix from Smitten Kitchen Popcorn (instead of chex) + Butter + Seasonings + Nuts + Pretzels + Bagel Crackers

Last, but certainly not least….

Thin Mint Popcorn

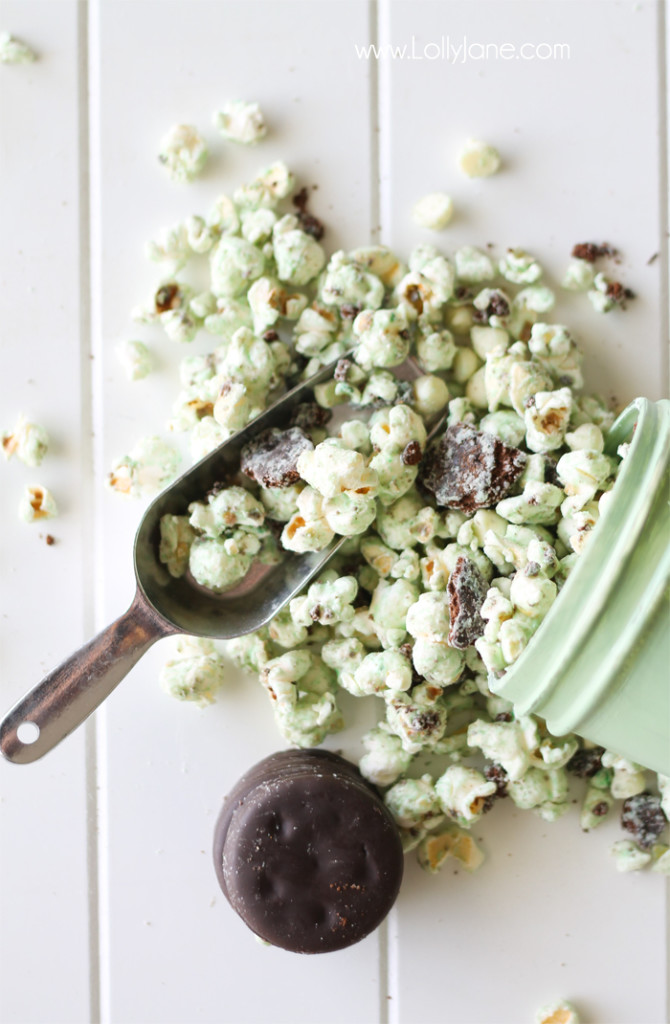
6. Thin Mint Popcorn from Lolly Jane Popcorn + Crushed Thin Mints + White Chocolate + Green Food Coloring

And, ok, one more- you know I can’t resist a food video!!

Alright, there you are, my fave internet popcorn recipes and an awkward beef steak tasting video full of wind noise.

LOVE YOU GUYS!! Happy weekend XOXO


Spicy Buffalo Wing Popcorn + 5 Best International Food Spots in Nashville


Skinny-Pop-3-Ways-093

안녕하세요!

Those symbols translate to “hello!” in Korean. Why, you may ask, am I greeting you in Korean when clearly this week’s recipe is about as American as they come?

So glad you asked!

Because this week, I want to encourage us all to get outside of our collective foodie comfort zones (and languages). After finding this week’s spicy popcorn recipe from The Whole Bite (and her FANTASTIC tip about cooking spray in the bowl before you toss the popcorn and caramel sauce), I knew that it was going to be a different type of week for the blog. One where I challenged myself to do something a bit wild. To stray from the more straightforward recipes of the past two weeks and go on a bit of a culinary adventure into SPICY CARAMEL. You heard me- spicy, buttery, caramel, sauce.

Skinny-Pop-3-Ways-117

The revelation of adding hot sauce to caramel caught me so off guard- and inspired me so much- that I knew I had to make it. It also kicked me into a adventurous food mood that I have yet to shake. Jake and I made kimchi chicken thighs twice this week. I’ve visited two Asian restaurants that embraced such fantastic flavor (Chiang Mai sausage and Sambal chili paste at one; life-changing kimchi, fried rice cake and jjampong at another) I couldn’t help but be inspired.  I’m going out for pho tonight.

Must. Have. Flavor.

Skinny-Pop-3-Ways-121

In the spirit of adventure, I want to challenge each of YOU to experience food in a new light this week. Just like SkinnyPop embraces all kinds of flavors with their popcorn (helloooo dusted dark chocolate and jalapeño), I would love to see us all embrace new flavors on our plate.

Also speaking of food adventures, as I promised in my video, here are my Top 5 International Food Spots in Nashville:

1. The Woodlands At the Woodlands, you can experience both a piece of paper masala dosa the size of a small shark and chana datura, a fried bread the size of a sting ray, with, oh my word, all the paneers and curries. Plus, every food photo on Yelp makes my mouth water. Tip: Order everything! Seriously, I’ve never eaten anything at Woodlands I didn’t enjoy.

2. VN Pho  One of the older ladies who owns VN Pho once gave me the LAST egg custard roll she had for FREE even though it was meant for her cousin; she just wanted me to taste it (or, I was so enthusiastic about dessert I may have scared her a little). Either way, the family that owns VN, and the people who work there, are the sweetest and you will love them. TipLife-changing beef & seafood pho!

3. Sichuan Hot Pot and Asian Cuisine If you are in the mood for a steaming bowl of broth with a large pork bone anchoring the center, topped with lamb, mushrooms, taro, lettuce, onions, more mushrooms I can’t identify and the most delicious Asian sauce selection I’ve encountered in Nashville, then this is your spot. Plus, you get to control the heat and length of time you add ingredients to the broth- each table has burners for every two seats-ensuring that you will a.) most likely burn your tongue, but b.) it will be completely worth it.  Tip: Use ALL the sauces!! Seriously, get a round tray and pile those little bowls up.

4. Bajo Sexto: My husband and I had the most relaxing afternoon we’ve had in a long time at Bajo Sexto- and didn’t intend to. In fact, we were there shooting food photos of the restaurant, but in a wild turn of events, had about an hour between places to go. So, we sat down, drank a Mexican Coca-cola, and enjoyed the tastiest roast chicken, fried fish taco and beet salad I’ve had. OH MY WORD that pollo!! Crispy, salted skin with salsa pasilla-I crave it still.  Tip: Order the baja fish taco. Actually, order three.

5. Korea House: Oh, Korea House. When our neighbors invited us to join them for a date there, I had NO IDEA how worth it the line we stood in was. Not only have I been eating on my spicy seafood stew for three days because I don’t want the flavors to end, their hot sake, potato pancake and pickled cucumbers were addictive. Tip: Arrive early; order #40 with a side of bimbibap.

Skinny-Pop-3-Ways-091

So, I issue you all, my awesome readers, a food challenge this week. Make this fantastic, spicy buffalo wing inspired popcorn. Follow it up with a flavor-filled trip of your own. And if you do make the ambitious adventure a reality, I want to hear ALL about it in your comments below.

Skinny-Pop-3-Ways-104

Spicy Buffalo Wing Popcorn (Recipe from The Whole Bite, which was originally adapted from BonAppetit.com)

This simple caramel sauce is delicious; all you have to do is watch it closely to make sure it doesn’t burn. Also, Chelsea’s tip about making sure you spray the bowl with cooking spray before you toss in the caramel is a must- as is her tip about washing the bowl soon after you use it! Lastly, make sure you also have all of your ingredients prepped and ready to go. I don’t want anything to stand in the way of your popcorn joy:)

What You Will Need:

  • 1 4.4 ounce bag SkinnyPop, original flavor
  • 3/4 cup sugar
  • 1/4 cup hot sauce (I used Texas Pete)
  • 3 tbsp. unsalted butter, cubed
  • 1 tsp. salt
  • 1/4 tsp. chili powder
  • 1/2 tsp. baking soda

What You Will Do:

  1. Preheat the oven to 300. Line a rimmed baking sheet with parchment paper.
  2. In a saucepan over medium-high heat, bring the sugar and 1/4 cup water to a boil, stirring with a wooden spoon to dissolve the sugar. Boil 10-12 minutes, swirling the pan occasionally until the caramel takes on a dark amber color. *Make sure you watch this process; I wasn’t paying attention and let mine get a bit too brown. It was still yummy though!
  3. Remove the caramel from the heat and stir in butter and hot sauce with a long wooden spoon. Don’t be alarmed when it starts to bubble and foam! That’s a good thing! Return to the heat and boil 3 more minutes (or less if you are like me and cooked it a bit hot on the front end).
  4. Remove the caramel from heat and stir in salt, chili powder and baking soda.
  5. Working quickly, pour hot caramel over popcorn and toss to coat. Spread popcorn into an even layer on prepared baking sheet and bake 20-25 minutes until dry (the caramel will not be hardened).
  6. Let cool (DONT TOUCH IT!!) at room temperature, then break it up into large clusters.  Seriously, don’t touch it until it’s cooled or your fingers and tongue will burn off.
  7. ENJOY!!

Vegan Cheesy Popcorn + 5 Ways to STAY MOTIVATED!!

Skinny-Pop-3-Ways-056

It’s cheesy, it’s vegan and it’s AHHHMAZZING.

LET’S GET MOTIVATED!! ***

That’s right, this week’s recipe is fantastic. As in, so fantastic, that when I served it at a party recently my girlfriends could NOT get enough. Then my husband started eating it, I jumped in, and before we knew it our fingers were orange, popcorn crumbs were all over the floor and the bag was, sadly, almost empty.

Skinny-Pop-3-Ways-036

You see, I have a lifelong love of cheddar cheese popcorn. It all started with cheddar cheese balls. Do you know the kind I am talking about? They came (maybe still come?) in a blue can that you have to peel back the metal can opener layer to access (it’s very hazardous, but I believe preserves the freshness).

I learned to be very careful at that stage- overzealousness as a seven year old can cause injury-in order to fully immerse myself in the glorious smell of pseudo cheddar cheese and the neon, powdery goo left all over my face.

It eventually escalated to the bagged version, of which I have a complete weakness for. Road trip snack? Cheddar popcorn. Movie night? I was that person who bought the microwavable popcorn, cheddar flavor. Youth group snacks? You guessed it.

Skinny-Pop-3-Ways-058

Oh, but NOW, the beauty of SkinnyPop. Not only do they have a White Cheddar flavor (which is delicious, trust me, I’m an expert;) ) but the Original flavor transforms beautifully if you are looking for another non-dairy cheddar option. Plus, you don’t have to soak the raw cashews overnight to create that spicy cheesy flavor! In fact, I bet this cheese powder would also pair well with the white cheddar flavor- like a double hit of cheesy goodness!

This week’s inspiration comes from Vegan Family Recipes. Vanessa is a popcorn GENIUS and this vegan cheese popcorn is totally crave-worthy. Plus, she has a TON more vegan recipes where this one came from-have you ever made vegan chocolate cake with vanilla coconut oil frosting?! I am intrigued!

For today’s version, I just made a few tweaks to her original recipe, mixed in SkinnyPop, and added my own hit of onion, garlic,and cayenne. It’s SO EASY, all you have to do is shake the homemade cheese powder up in the bag. Voila! Let the snacking begin…

Skinny-Pop-3-Ways-043

Vegan Cheesy Popcorn (Recipe adapted from Vegan Family Recipes)

This easy, weekday popcorn recipe is as simple as making the cheesy powder and tossing it in the SkinnyPop bag! Plus, NO overnight soaking of cashews to create a great, cheesy flavor!

What You Will Need:

  • 1 bag SkinnyPop original flavor
  • ⅓ cup raw cashews
  • 1 teaspoon turmeric
  • 1 tablespoon + 2 teaspoons (10g) nutritional yeast
  • 2 tablespoons corn starch
  • ¼ teaspoon cumin
  • 1 teaspoon salt
  • 1/2 teaspoon onion powder
  • 1/2 teaspoon garlic powder
  • 1/4 teaspoon cayenne powder

What You Will Do:

  1. Make the cheese powder! Put cashews, turmeric, nutritional yeast, corn starch, cumin, salt, onion and garlic powder, and cayenne in the bowl of a food processor. Pulse until a fine powder forms- don’t pulse too long or you will start making nut butter!
  2. Open popcorn bag, then toss about 3/4 of the powder into the SkinnyPop bag.
  3. Dance like you mean it and shake that bag up! Taste, and add more powder if you like! ENJOY!


***PLUS This week’s Video: 5 Tips to STAY MOTIVATED!! Video points are outlined below for you A++ students who like to take notes and things of that nature. :)

  1. 01-sugar-spice-4-mrDaily ritual-I have a ritual I do almost every morning: coffee+prayer. I meditate on my purpose for the day, think about what I want to accomplish, and talk to the Lord about my schedule. Taking time to center myself and focus on my purpose for the day really makes a difference! I’ve learned that my heart motivation actually matters more to me than the physical result of my labor. Granted, this mindset is still a work in progress, but a simple daily ritual helps me stay focused. Simply put: do something every day that centers you and reminds you of your purpose.
  2. Beauty– Ingest beauty! I’m such a lover of beauty- magazines, flowers, art history books- all of them speak to me. Take in, feast, meditate on what it is that you want to project out into the world. I think Proverbs says that “As a man thinks in his heart, so is he.” I ponder on beauty because it makes me feel like I am coming alive. Whatever that is for you- do something every day that makes you feel creatively alive.
  3. Community & Friends– The best way I know to stay encouraged is to connect to my community. “No man is an island” rings true here. I want to be intentional about sharing what’s going on in my life, but also about hearing what matters to the people I love. Maybe there is someone on your heart today. Check in, say hello, ask them how they are! You are NEVER alone. Sometimes when you are in a freelance or solitary work position it can feel UBER insular, but I promise, that’s not the truth! You were made to be part of a bigger picture and bigger world- to impact the people around you.
  4. 01-sugar-spice-2-mrGratitude– I have to daily remind myself to stay grateful! I know when I am pursuing big dreams and passions (for me it’s food styling, the blog, having a family) sometimes I become so forward thinking that I forget to be grateful for the moments I have now. Comparison can enter our hearts when we are thinking about the big picture, too- but comparison is the thief of joy!! Let’s just forget comparing ourselves to other people because THESE are the moments we have;  they are a GIFT and they are beautiful.
  5. Lists– I know this sounds super simple, but list-making really makes a difference. I love checking things off of a list! Granted, I am more of a type A personality, but if you run your own business, or simply don’t have someone patting you on the back for productivity, a list holds you accountable and helps me feel accomplished. It’s your way to say “Way to go SELF! I see the progress I did make today.”